Table of Contents
Overview
This guide will walk you through the process of adding ShipperHQ as a Calculated Rate in a Shopify-defined Zone. Once ShipperHQ is added as a method within your designated Zone in Shopify, it will display rates on the frontend of your eCommerce store. 😊
Requirements
Ensure that you have already connected ShipperHQ to your Shopify store and configured your carriers to connect to rates.
Steps to Add to Shipping Zone
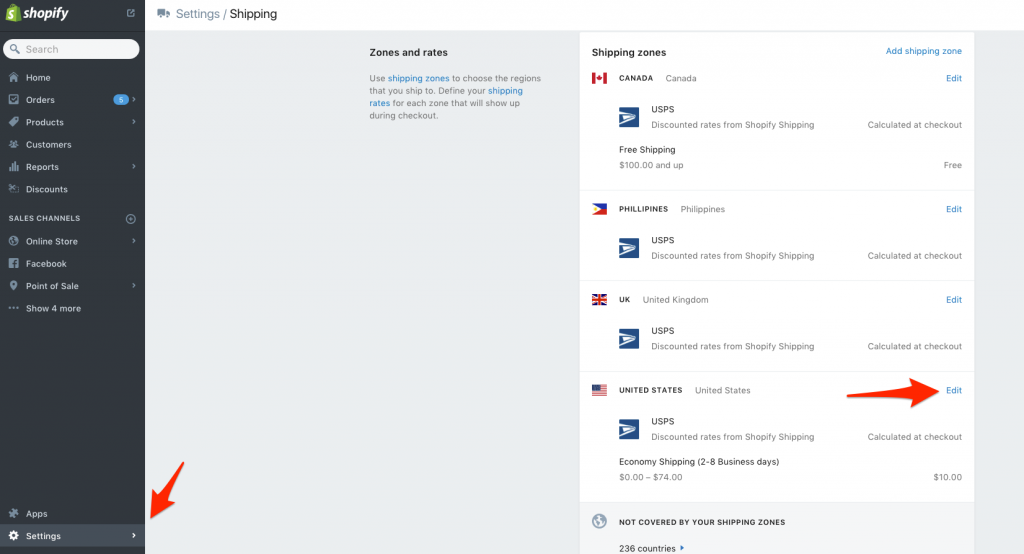
- Go to Shopify ➔ Settings ➔ Shipping Zones ➔ United States and click edit.
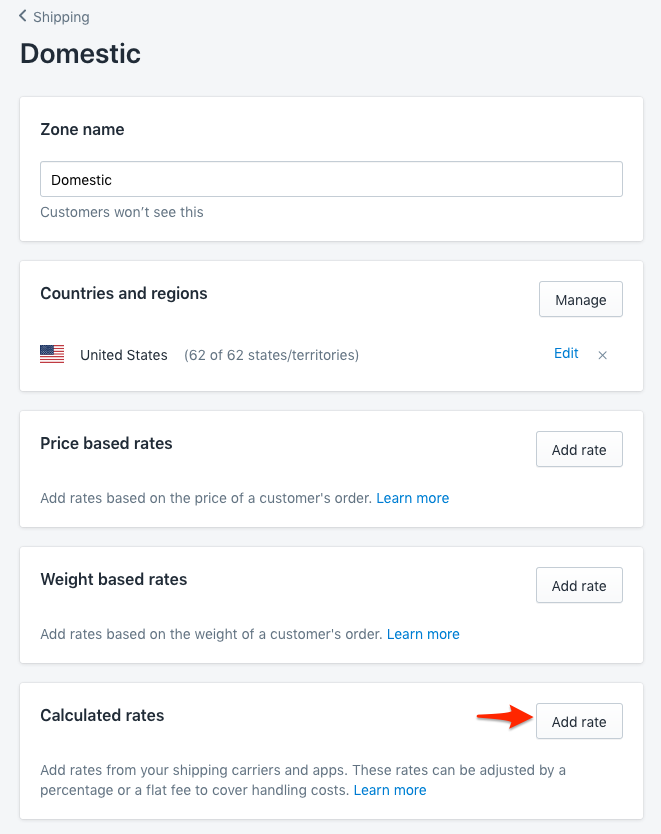
- In the "Calculated rates" section, click "Add rate."
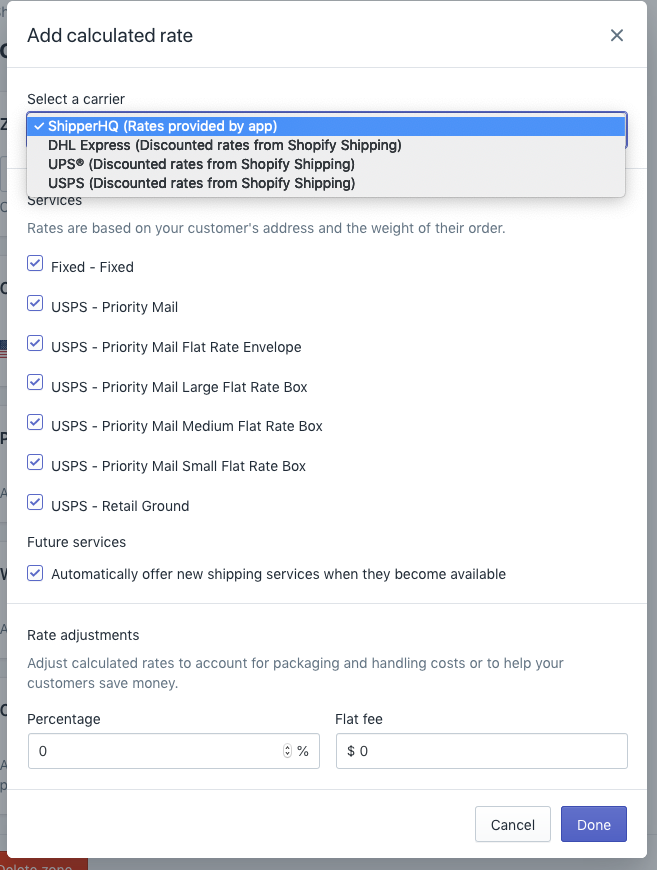
- Select ShipperHQ as your carrier to add a calculated rate.
- Click Done.
💡 Important! Please note that shipping zones in ShipperHQ are independent of zones in Shopify. The screenshot above shows that ShipperHQ calculated rates are restricted to a United States zone with 62 states. This means that if ShipperHQ is configured to return rates outside the US, Shopify won't display that rate as it's restricted to the US zone. Therefore, ensure that the zone in Shopify containing ShipperHQ calculated rates includes all the desired countries/states. The same applies to shipping zones outside of the US.