Table of Contents
- Overview
- Steps
- Add via Trial Wizard
- Add or Edit Websites Manually
- Website Overview
- Connecting ShipperHQ to Your eCommerce Platform
- Origins Information
- Advanced Settings
- Next Steps
Overview
The Websites area in ShipperHQ helps you manage which sites your shipping rate logic connects to. Adding a new website provides the API Key and Authentication Code needed to connect your eCommerce store to your ShipperHQ account. This document explains how to name and add the URL of your stores to the dashboard. If you are looking for instructions to connect your store to test rates, visit our documentation for Connecting ShipperHQ to Your eCommerce Website. 😊
Steps
Add via Trial Wizard
If you're on a New Trial, the Trial Wizard guides you through adding your Website URL and Website Name to the system.
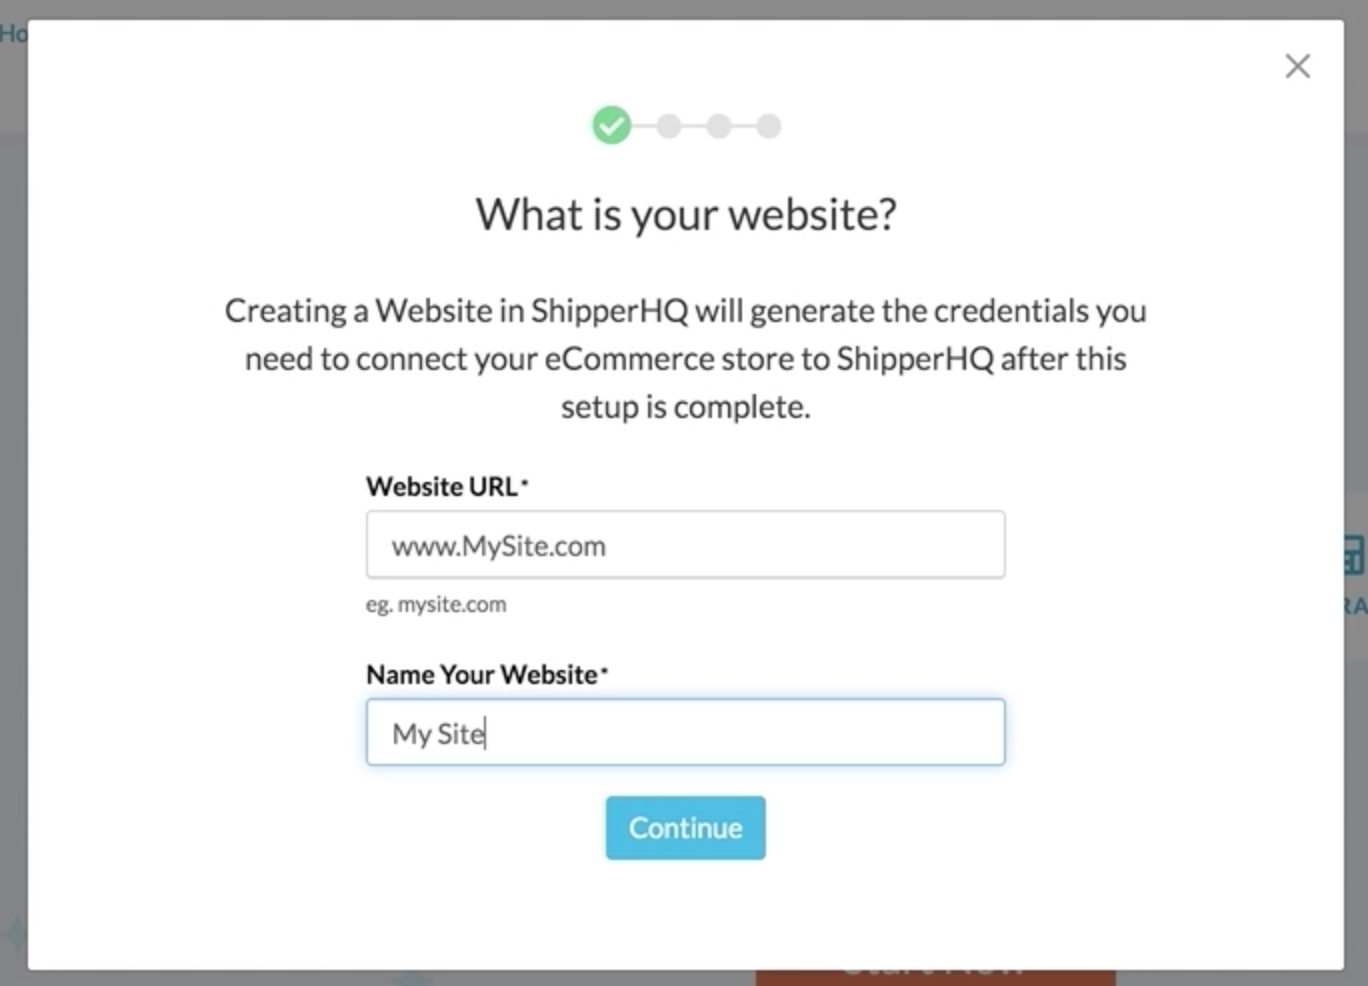
Once entered, proceed through the Trial Wizard. The website information you entered is listed under the "Websites" tab in the lefthand navigation.
Add or Edit Websites Manually
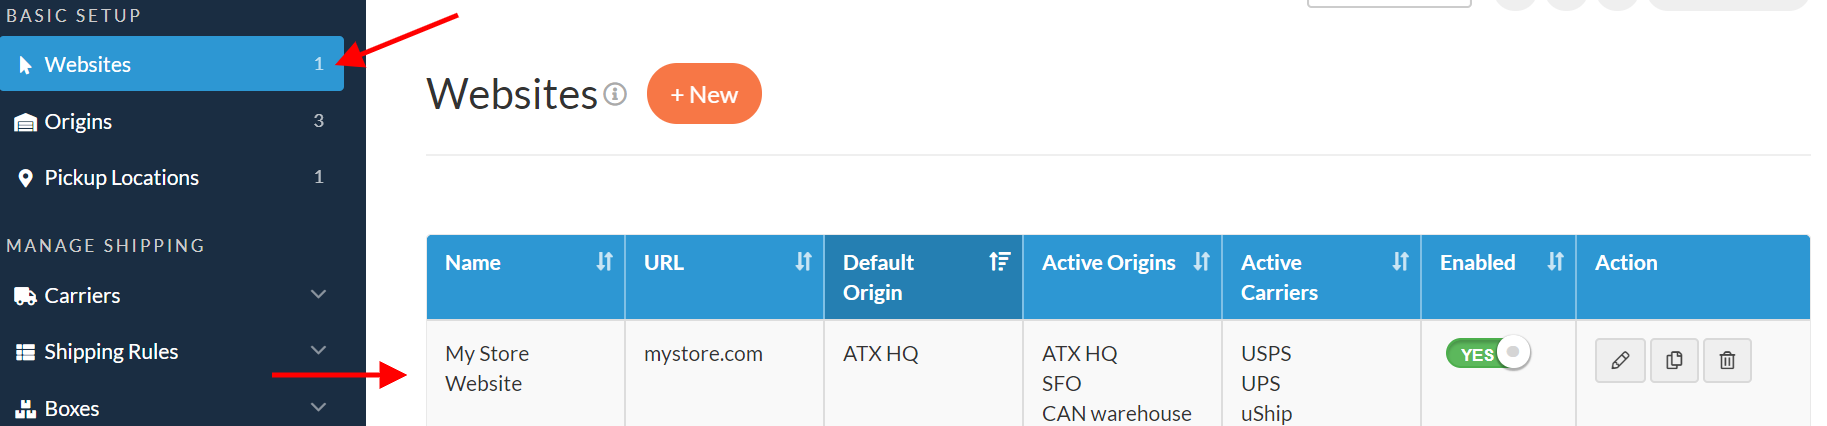
If you're not using the Trial Wizard and need to add a website, you can do so directly from the ShipperHQ "Websites" panel.
- In ShipperHQ Dashboard, go to Websites. Any websites you have created are listed here.
- To update an existing website, click the pencil icon on the right. To add a new website, press the +New button at the top of the page.
- See the details below for insight on configuring each main section of your Website. 💡
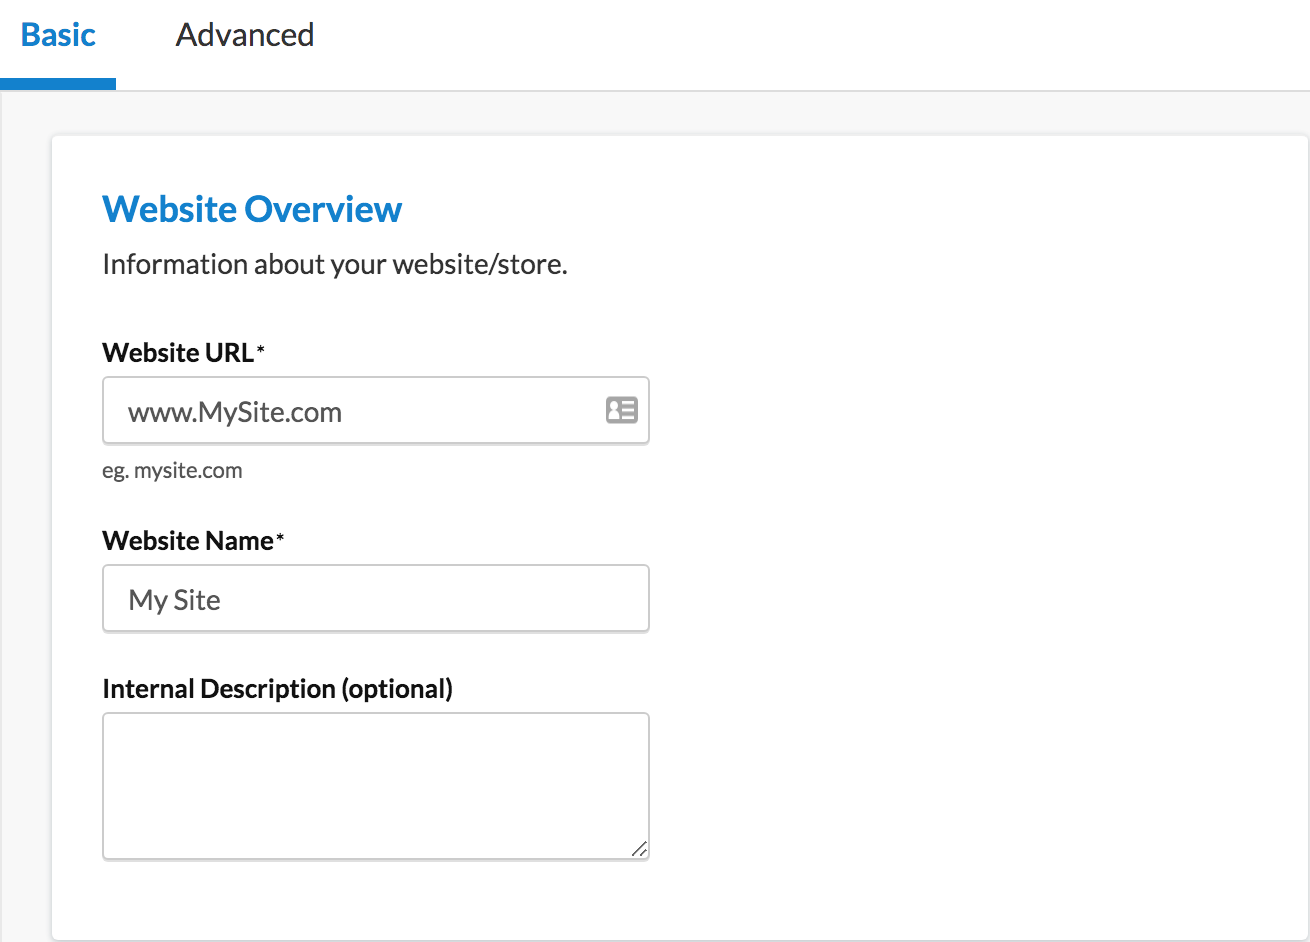
Website Overview
In the Basic panel, the Website Overview section is where you enter your Website Name and Website URL. The Internal Description is optional and for your internal reference only.
Connecting ShipperHQ to Your eCommerce Platform
For platforms like Magento 1, Magento 2, Zoey, and WooCommerce, you'll need both an API Key and an Authentication Code to connect with ShipperHQ. For BigCommerce and Shopify, ShipperHQ is already connected to your store when the app is installed. When you're ready to test rates, you need to enable the app in your platform.
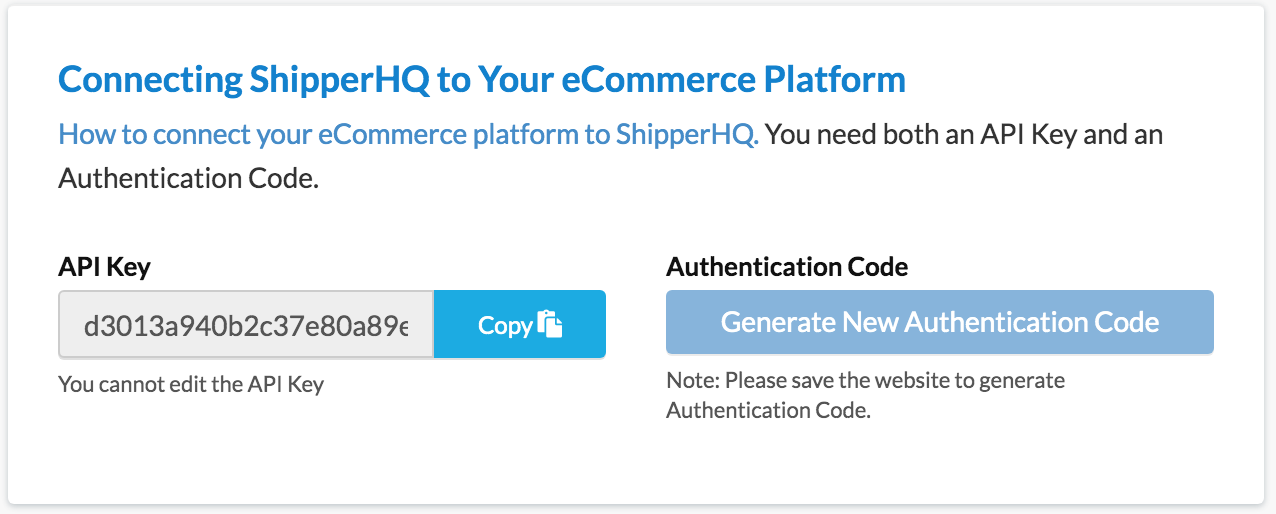
- API Key is used to connect your website with ShipperHQ.
- Generate New Authentication Code button automatically generates a new Authentication Code, which is shown only once for security. Changes to the Authentication Code take effect immediately. Record this code somewhere safe as all connections using an old code will no longer work until updated in your platform.
See the detailed steps here for adding the API Key and Authentication Code, or enabling the software for your eCommerce platform. 😊
Origins Information
In this section, set your default and active origins related to this website. An origin is any location your products ship from, like vendors, warehouses, or fulfillment centers.
⚠️ NOTE: If you have not added any origins yet, you won't be able to designate them here. See the steps for Adding your Origins.
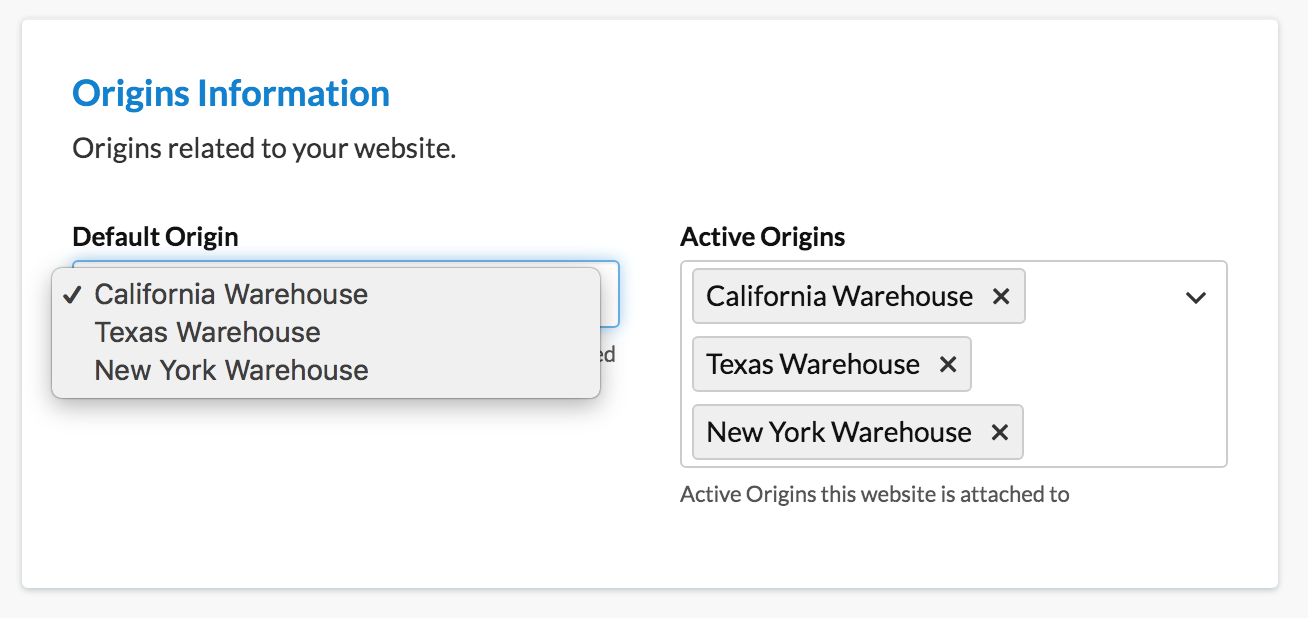
- Default Origin is your primary warehouse or ship-from location. A default origin is required for rating and validating live-rate carriers. You can only set one default origin.
- Active Origins are all the origins from which you will be shipping for this specific website.
If you have only one shipping origin, set that as the "Default Origin".
Advanced Settings
In the Advanced panel, you can access additional settings depending on your shipping requirements.
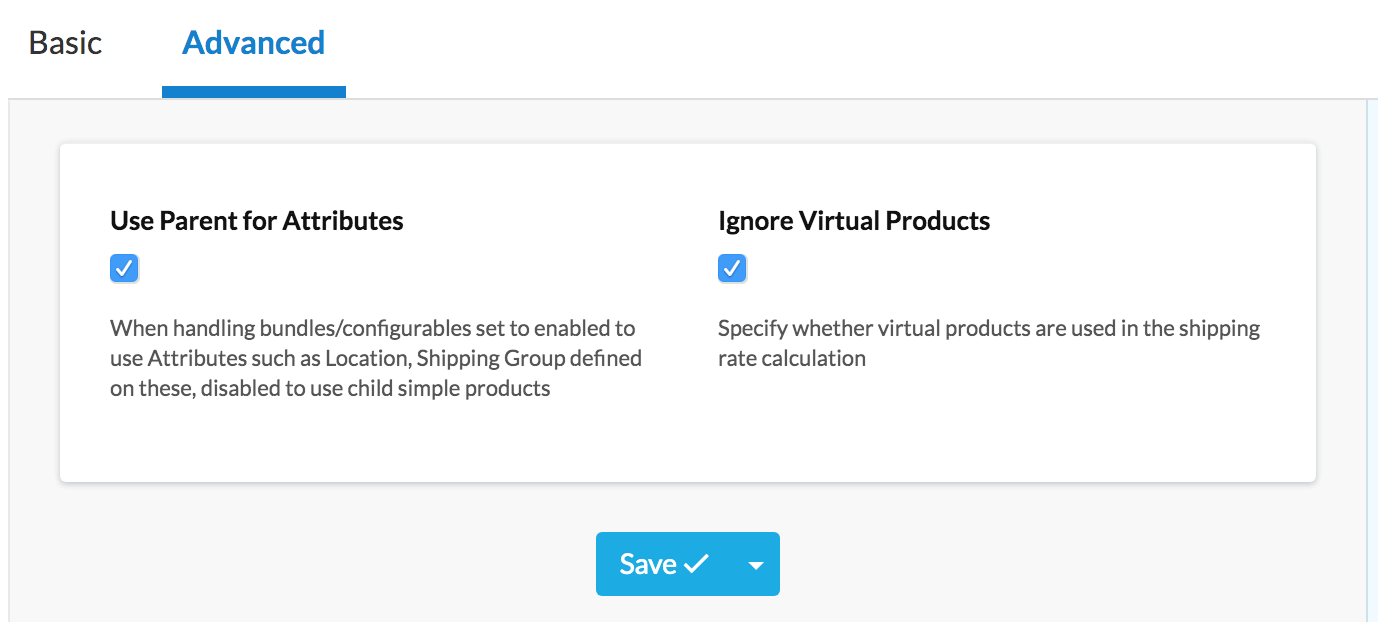
⚠️ NOTE: The settings here depend on your eCommerce platform.
- Use Parent for Attributes: By default, ShipperHQ uses the attributes defined on the parent product, regardless of child product attributes. Unchecking this setting uses child product attributes instead. This does not affect simple products.
- Ignore Virtual Products: ShipperHQ ignores virtual products by default, meaning they're not included in rule calculations. If you'd like virtual products considered for rating/rules, uncheck this setting.
Next Steps
Once you've configured your Website in ShipperHQ, proceed to set up Carriers, Rules, and connect ShipperHQ to your website.