
Table of Contents
Overview
This guide will help you install and connect your Averitt Express account in ShipperHQ. Follow the steps below to ensure a successful setup and integration.
Requirements
- A registered account with Averitt Freight Web Services
Ensure you have your Averitt Freight Account Number, Username, and Password ready. You can contact Averitt Freight to create an account and obtain these details.
- The LTL Freight Advanced Feature must be enabled in ShipperHQ
See how to enable LTL Freight for guidance on this feature.
Carrier Installation
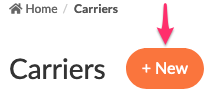
- From your ShipperHQ dashboard, locate the Carriers link on the left navigation and click to enter.

- Select +New to create a new carrier.
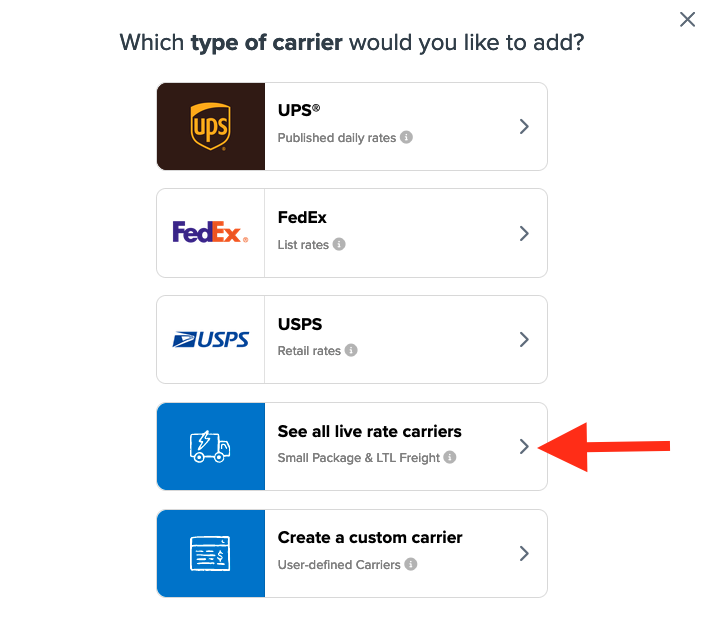
- Choose the option to See All Live Rate Carriers.
- Use the search field to enter "Averitt" to quickly locate and install this carrier.
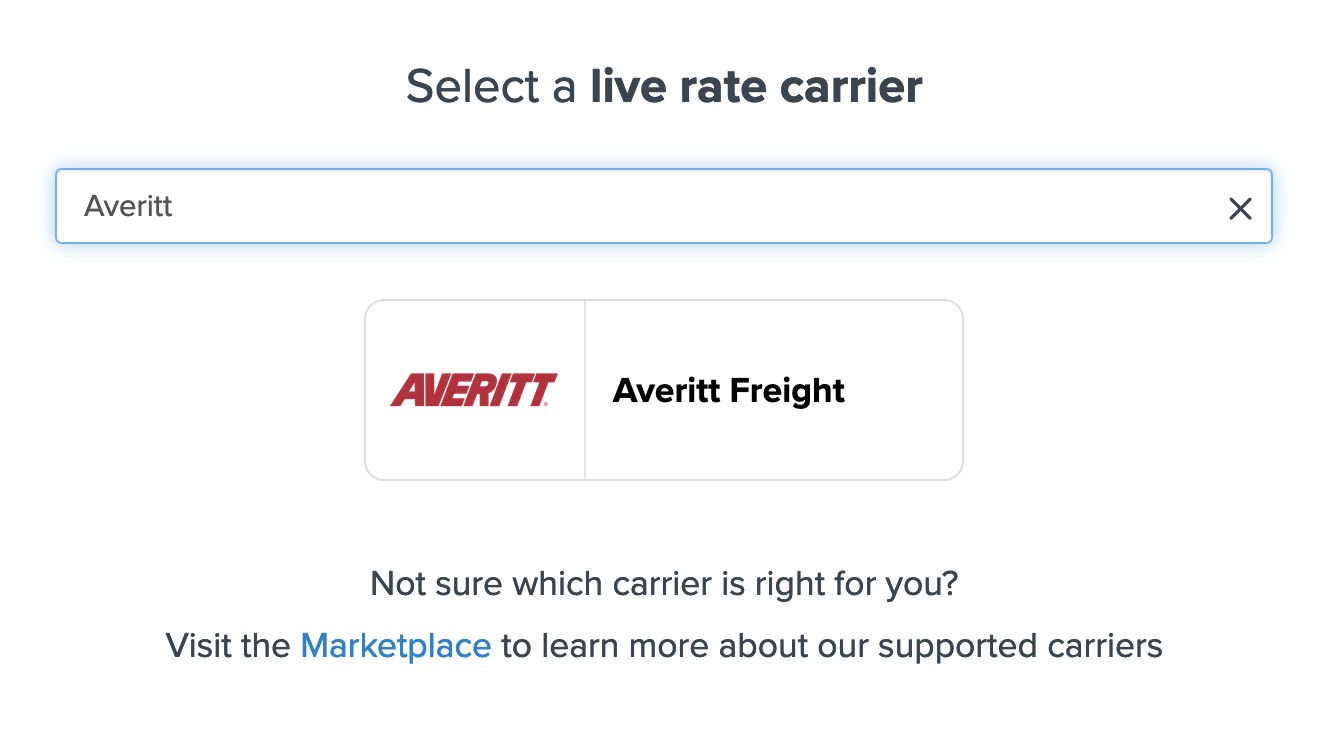
- Click on the Averitt Freight icon and proceed to the next screen.
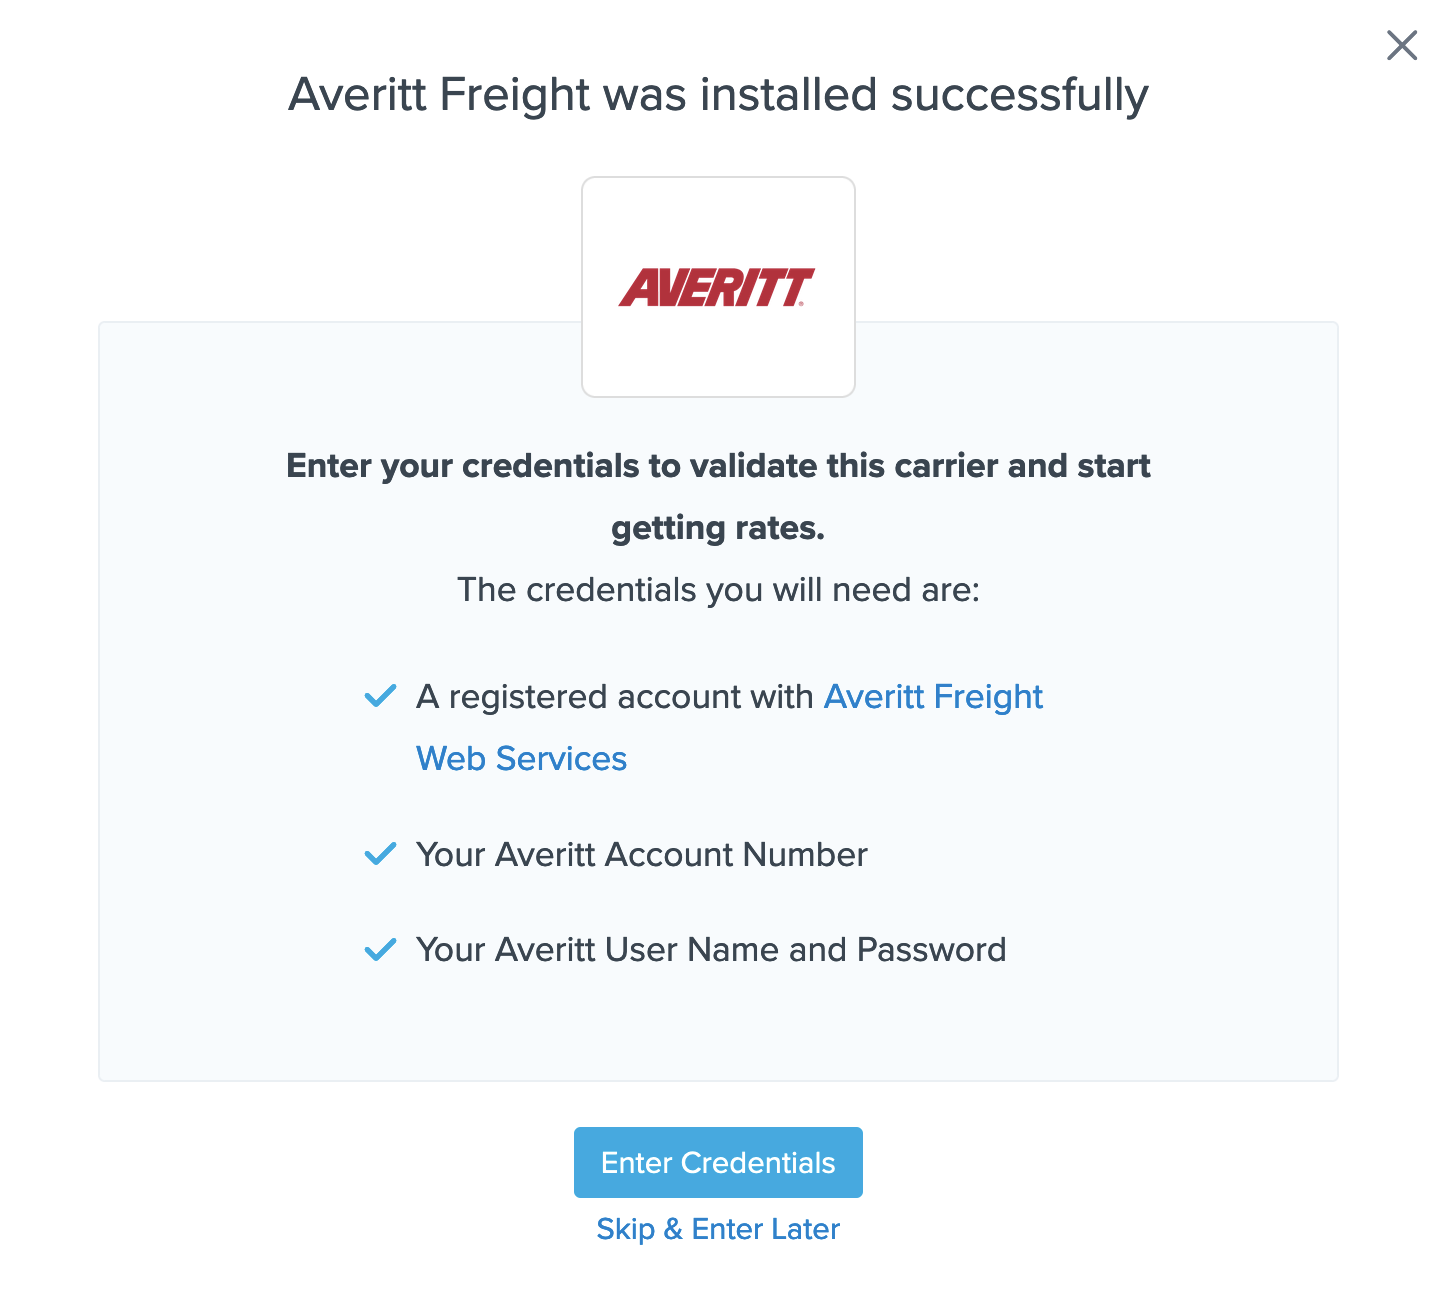
- Select the option to Enter Credentials if you have them. You can also choose to Skip and Enter Later if necessary.
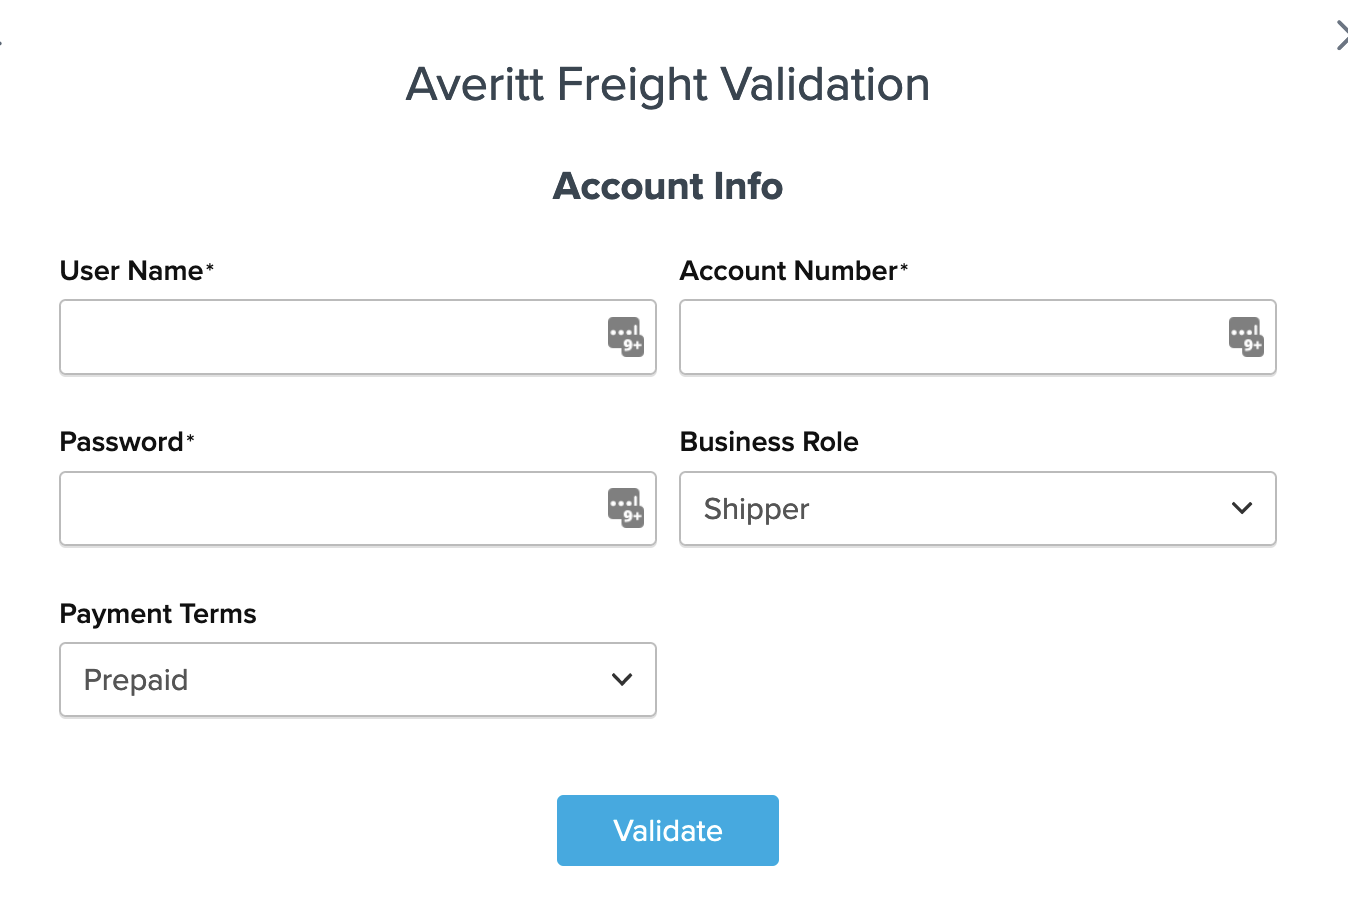
- Enter your Averitt account number, username, and password when prompted on the next screen to complete the setup.
Conclusion
Once you have entered the account number, username, and password, ShipperHQ will validate the information with Averitt Freight. If everything is correct, you will receive a notification that the carrier has been installed successfully. 😊
If you encounter an error, double-check that the details are correct, ensuring all characters and case match what Averitt Freight provided. If issues persist, please feel free to Contact ShipperHQ Support or Averitt Freight for further assistance. 💡