How to install ShipperHQ on Shopify
Integrate and optimize ShipperHQ advanced shipping rates on Shopify
Table of Contents
- Overview
- Requirements
- Install
- Troubleshooting ShipperHQ Installation
- Disable ShipperHQ Rates in Shopify
- Enable ShipperHQ Rates in Shopify
- Next Steps
- Date & Time on Shopify
- Shopify Multi Origin and Inventory Support
Overview
Offer a better shipping experience at checkout with ShipperHQ 😊. Tailor the shipping methods and rates shown at checkout based on product type, geography, cart quantity, your packing logic, price, and much more. Our sophisticated shipping tool allows for detailed customization to meet your business's needs.
Requirements
Shopify requires your account to have the carrier-calculated shipping feature (also known as CCS, Real-Time Calculated Shipping, or RTCS) to use apps like ShipperHQ.
- Included at no extra cost on all Shopify Advanced and Shopify Plus plans or on the Shopify plan if paying yearly.
- If on the Shopify plan and paying monthly, contact Shopify to add Carrier Calculated Shipping for an additional fee. There may be a delay of 30 minutes to a day before this reflects on your account.
- CCS is not available for Basic or Starter Shopify plans, so ShipperHQ cannot be used on these plans.
Install
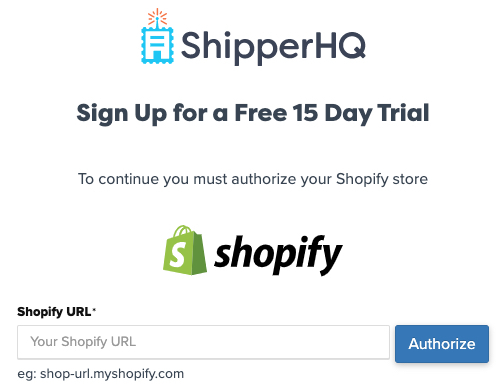
- Sign up for a ShipperHQ account, select Shopify, and enter your Shopify store URL. Note: use your Shopify URL ending with ".myshopify.com".
- Click the Authorize button.
- Log into your Shopify store if not already logged in.
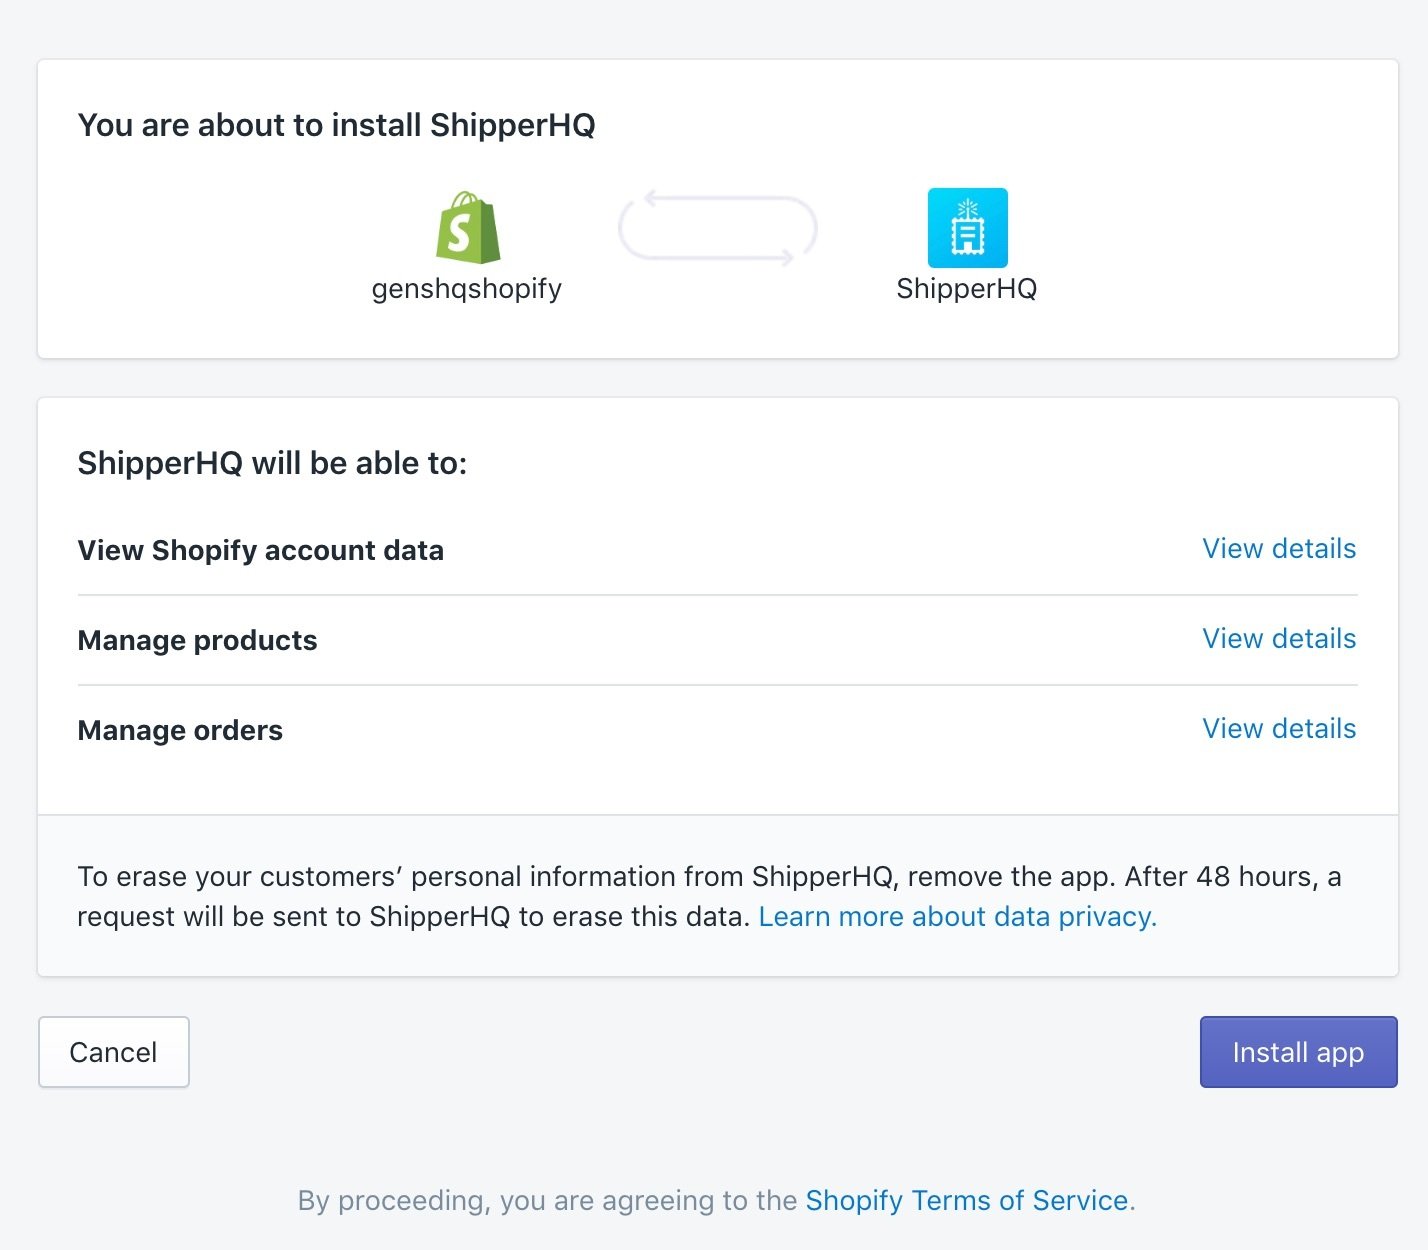
- After authorizing, you'll be redirected to your Shopify apps dashboard to install ShipperHQ.
- Click Install app.
- Accept billing to start your 15-day free trial. Billing begins immediately after 15 days unless you uninstall ShipperHQ.
- ShipperHQ can be installed on Shopify Development stores without accepting billing. However, once converted to a production store, ShipperHQ will not function until billing is accepted.
Once you've accepted billing, you'll return to ShipperHQ to add information to your account profile.
- Voila! The Trial Wizard helps you begin setting up your carriers and shipping rules.
Once installed, rates from ShipperHQ are live immediately. Disable them in the Shipping Settings in Shopify if required until they're configured as desired.
Troubleshooting ShipperHQ Installation
ShipperHQ rates might not immediately appear in checkout. Test the Shopify or Shopify Plus storefront checkout to verify. If issues persist, refer to our Shopify Installation FAQs. Contact Shopify Support if needed.
Disable ShipperHQ Rates in Shopify
To remove ShipperHQ rates until you're ready to enable them:
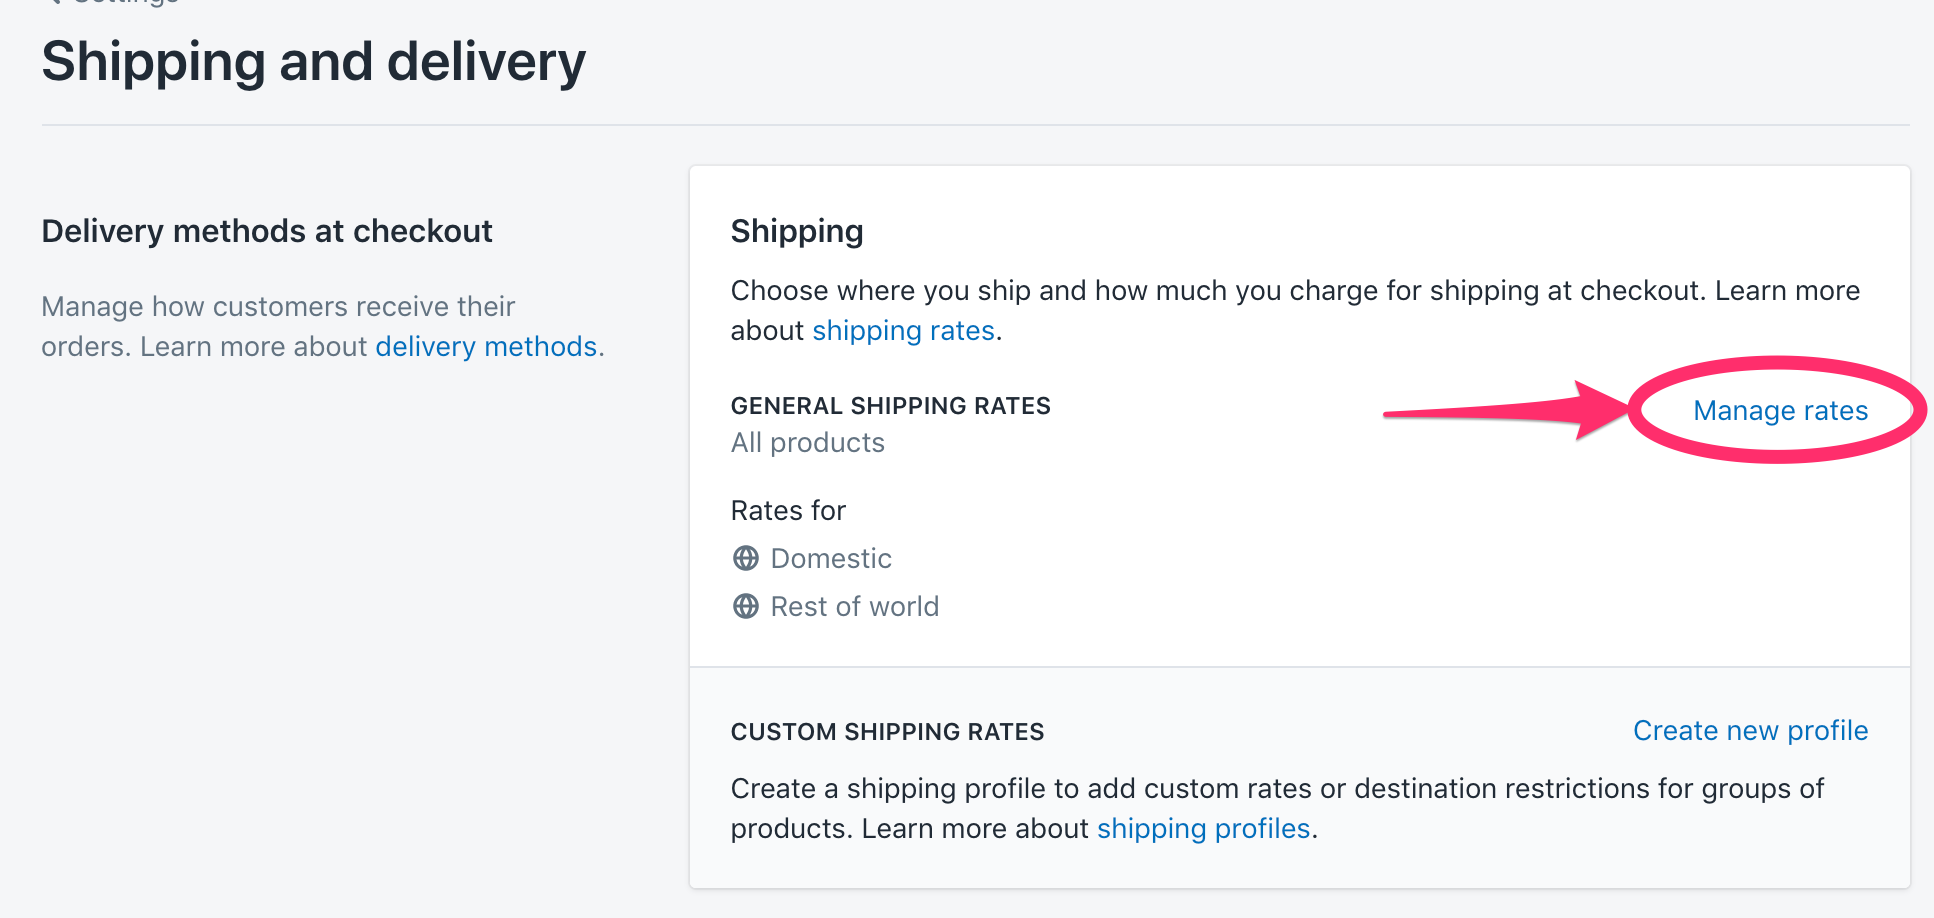
- Navigate to Settings > Shipping and delivery; in the Rates at Checkout section, select Manage Rates.
- Scroll to the Shipping from section and see one or more shipping zones listed. Under each zone, click the three dots next to ShipperHQ and select Delete.
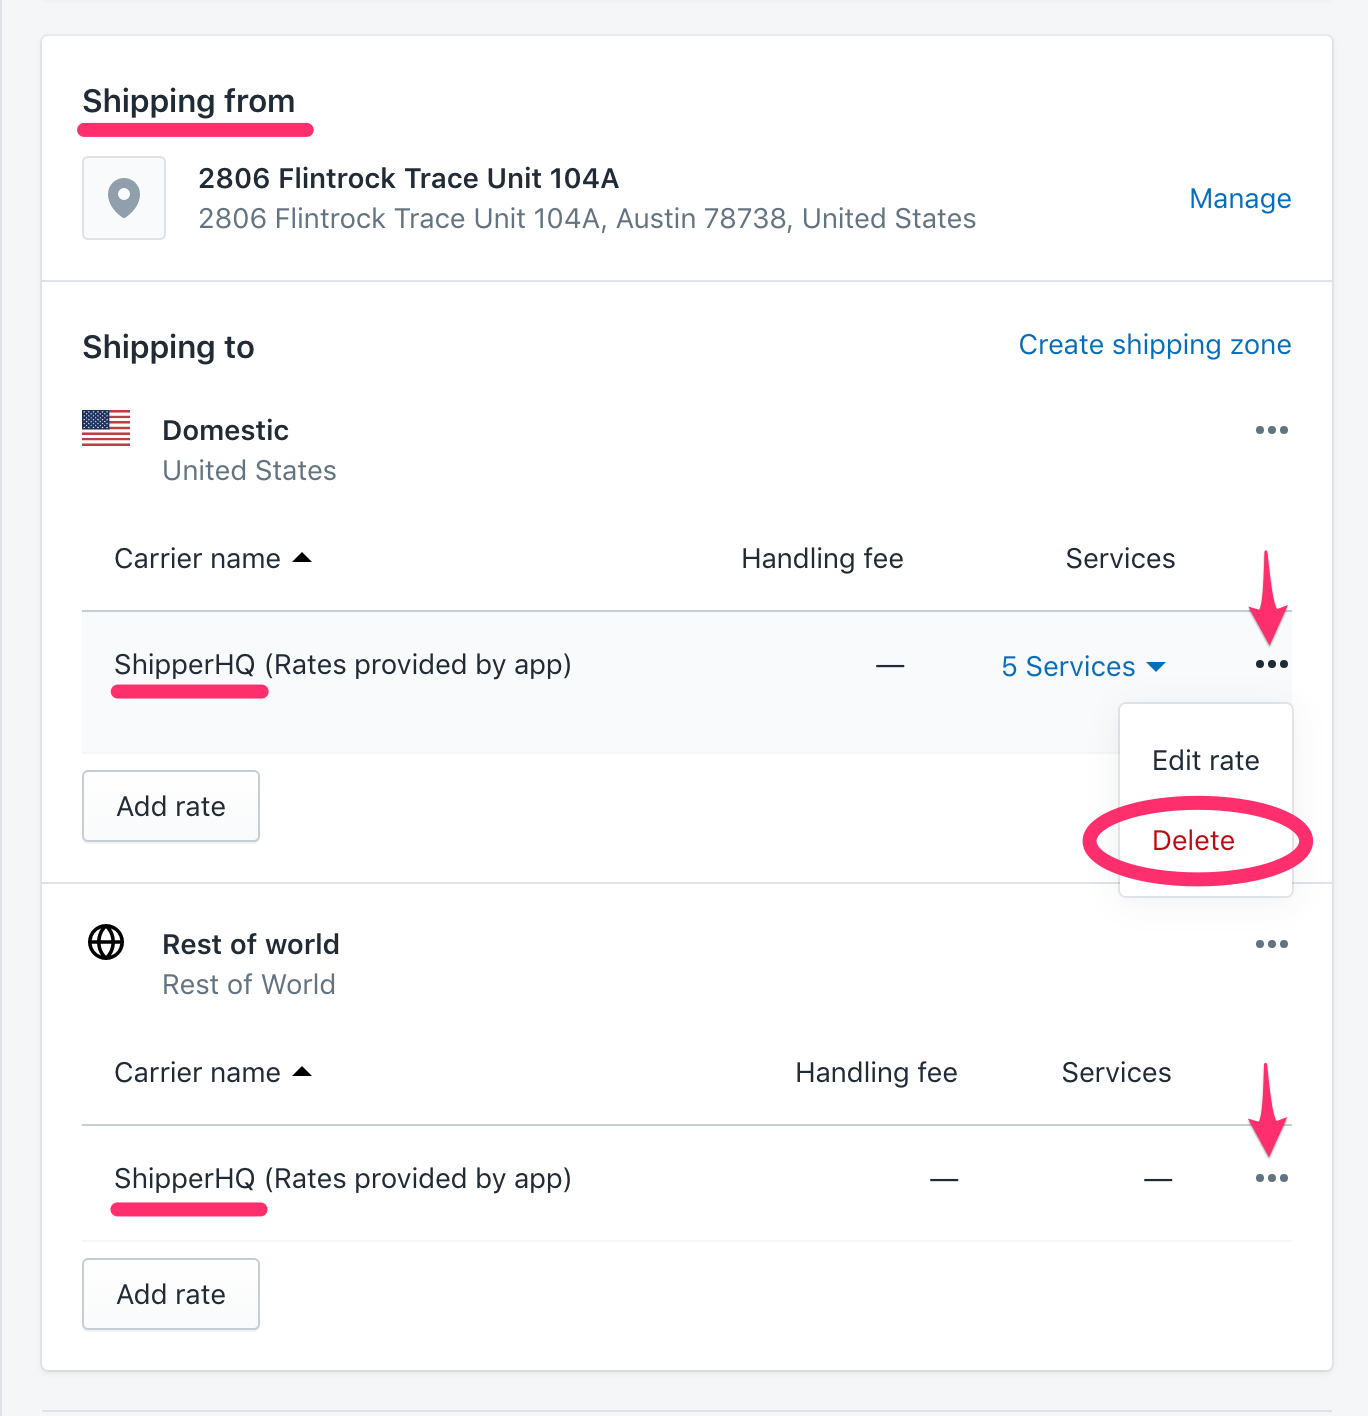
- Remove ShipperHQ rates from each zone.
- Save the changes in the Shipping and delivery page.
- Rates will not show until added back when you're ready.
💡 Note: If ShipperHQ doesn't appear in shipping methods, your Shopify account may lack access to Real-Time Calculated Shipping. Review the Requirements above.
Enable ShipperHQ Rates in Shopify
To add ShipperHQ to your store when ready:
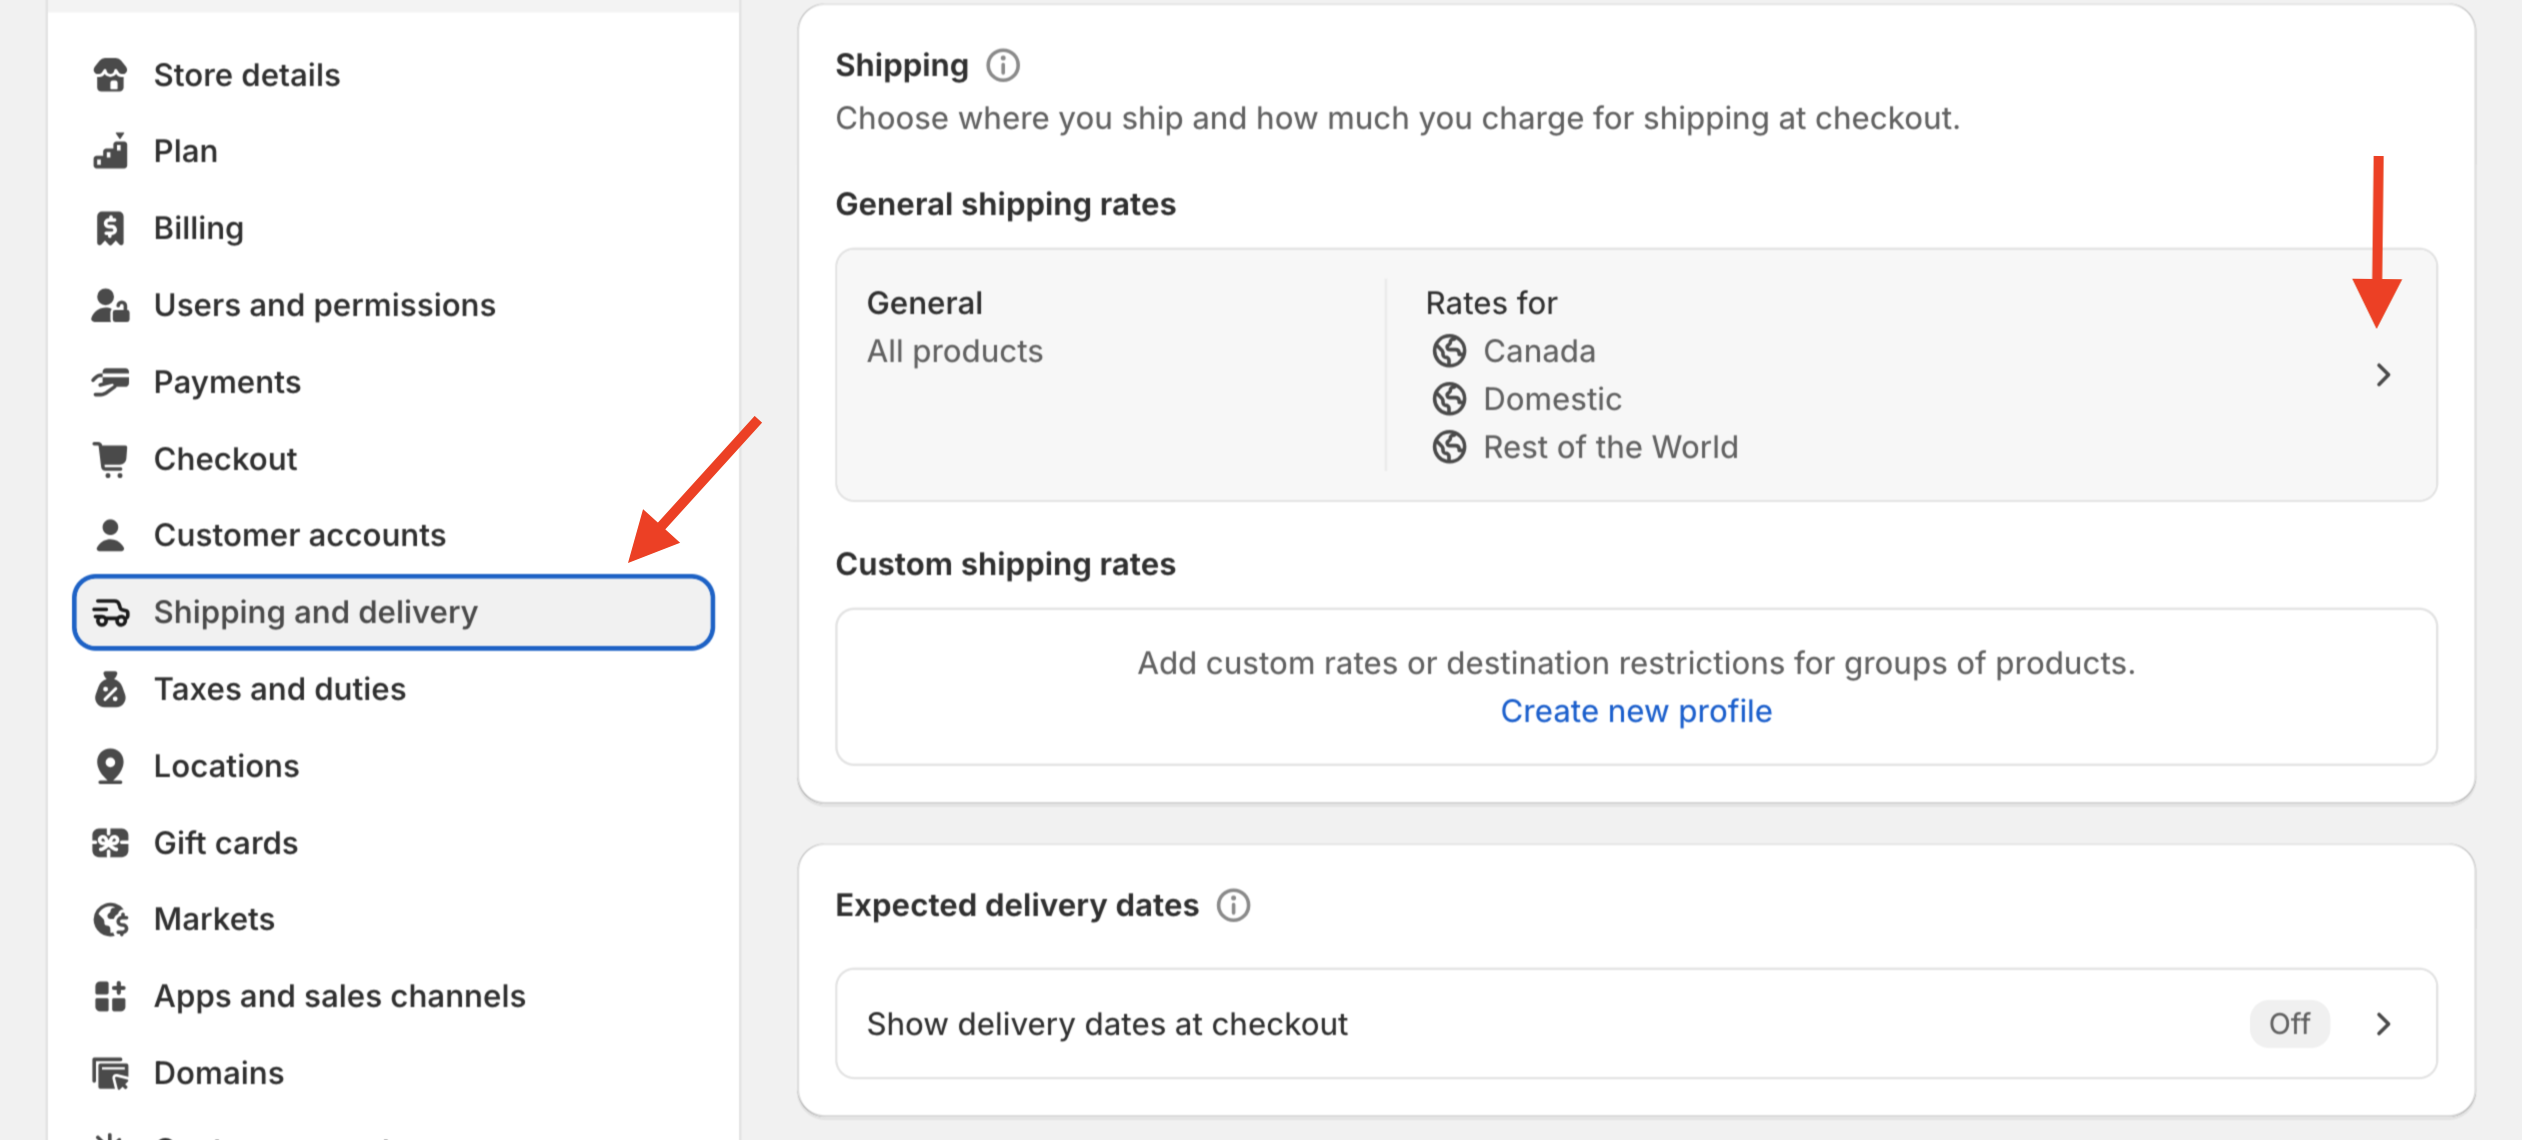
- Navigate to Settings > Shipping and delivery and click on the General Shipping section.
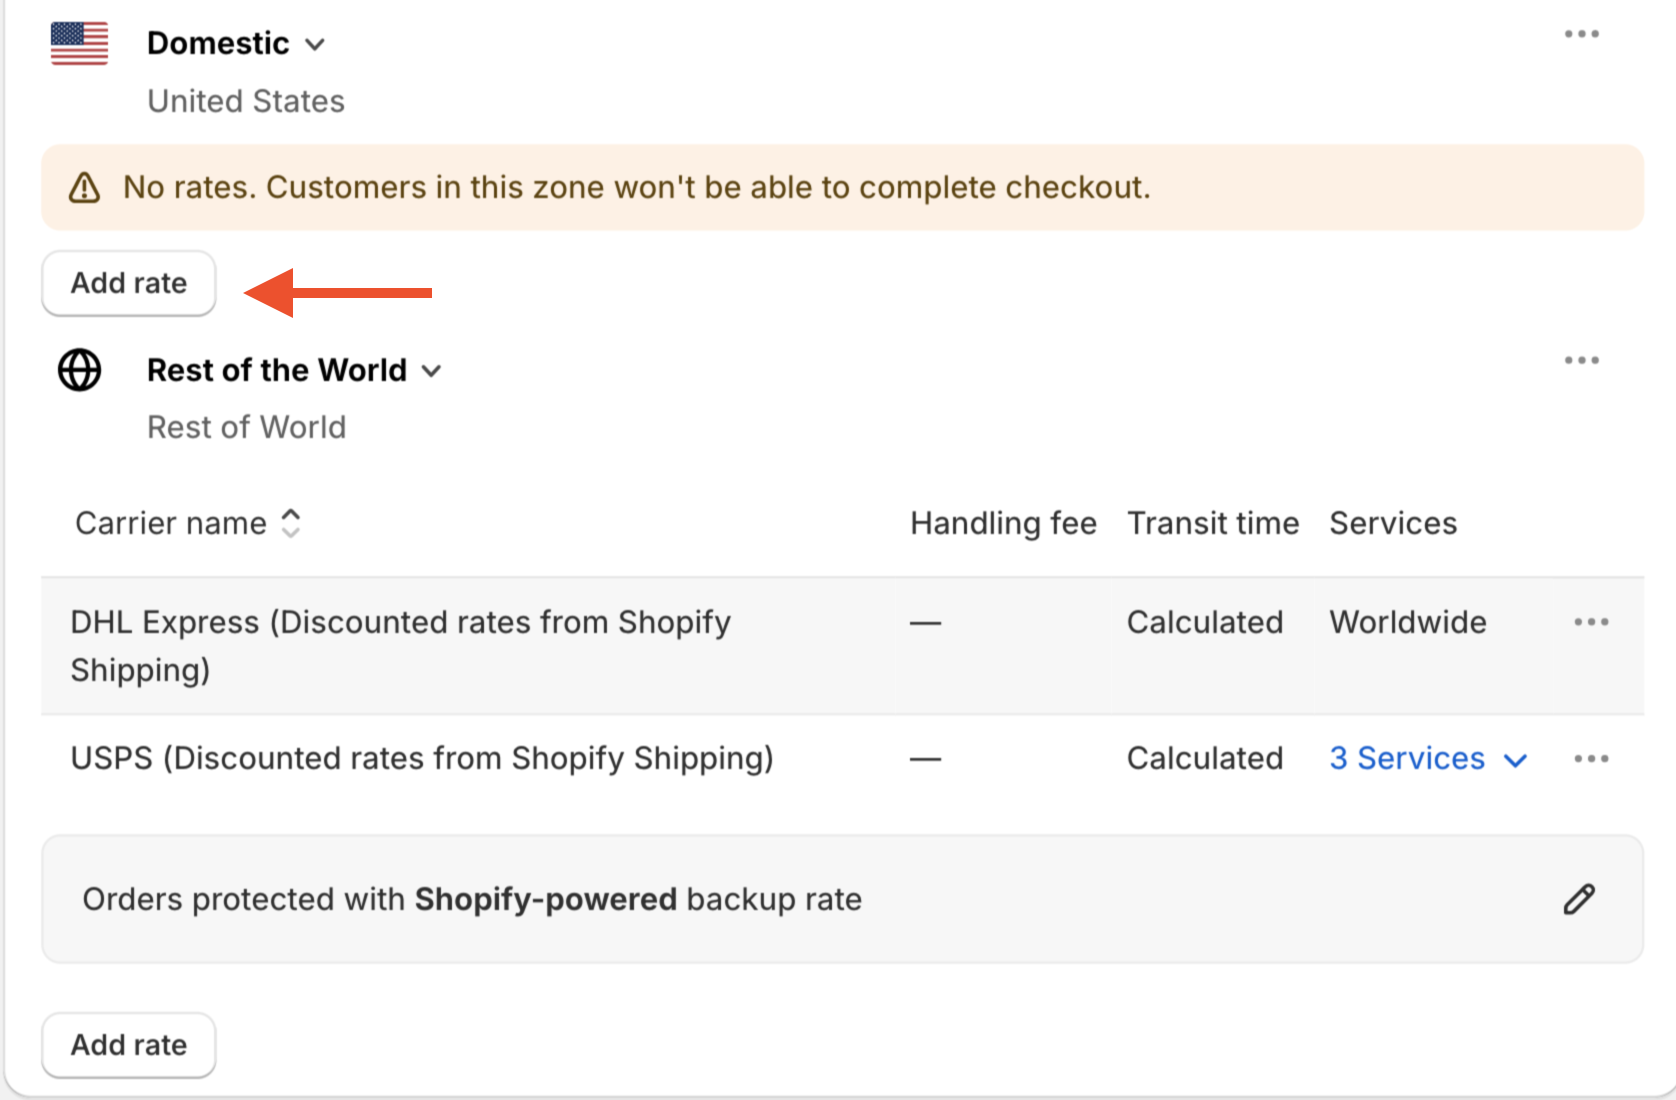
- Scroll to the Shipping from section and select Add rate.
- In the Add Rate window, select Use carrier or app to calculate rates and choose ShipperHQ.
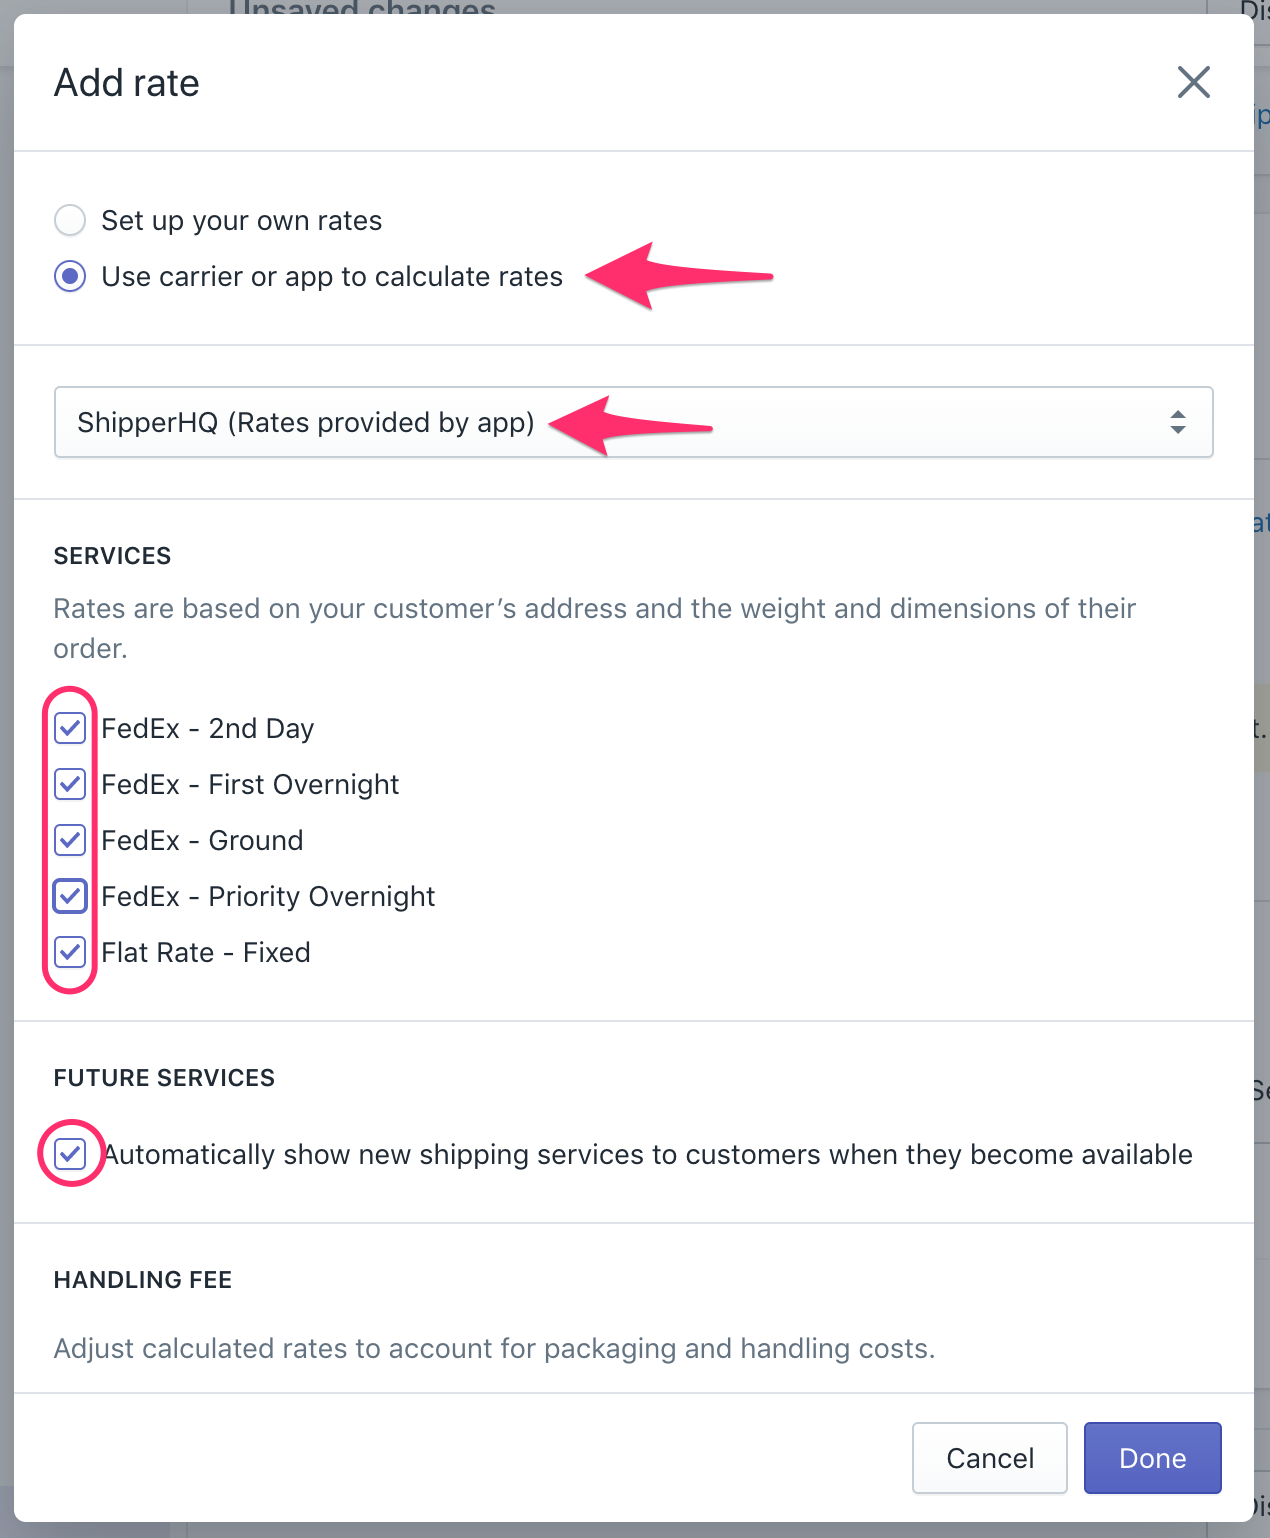
- Check all Shipping Methods imported from ShipperHQ.
- Ensure Automatically show new shipping services to customers when they become available is checked.
- Save your shipping settings.
- Test your rates in the checkout to see ShipperHQ in action.
💡 Note: The zones mentioned here are separate from ShipperHQ Zones. Refer here for more details.
Note: Not all carrier services in ShipperHQ appear in Shipping Profiles. Rates will still return at checkout if "Automatically show new shipping services..." is enabled.
Next Steps
With ShipperHQ connected to your Shopify store, you're set to start testing rates. The Trial Wizard assists in setting up your Origin Location and connecting a Flat Rate Carrier. Also consider adding:
- Carrier Rules to modify or control rates.
- Advanced Features to enhance your checkout, offering delivery dates and more.
For billing related to the ShipperHQ Enterprise Plan or annual subscription, please contact us.
Date & Time on Shopify
Enable date & time to allow methods from ShipperHQ to appear in Shopify checkout when available. Disable any unwanted methods in ShipperHQ. 💡 Note: Ensure "Automatically show new shipping services..." is ticked as methods under "Services" de-select next day if date/time is enabled.
Shopify Multi Origin and Inventory Support
ShipperHQ does not support multiple origins in Shopify but does offer Multi-Origin shipping within the ShipperHQ App. These capabilities are mutually exclusive. We recommend using Multi-Origin Shipping within ShipperHQ. For further details, visit our Frequently Answered Questions page.