
Table of Contents
- Overview
- Requirements
- Steps for Freight Class on Shipping Group
- Assign Products to their Shipping Groups
- Freight Class in Magento
Overview
Set freight classes for your items using shipping groups 🚚. If all products have the same freight class, set it as the default on your LTL Freight carrier. For products belonging to different classes, use shipping groups to define these differences.
Requirements
To proceed, ensure the LTL Freight advanced feature is enabled.
Steps for Freight Class on Shipping Group
- Create your Shipping Group and name it meaningful, like CLASS 150.
- In the Advanced panel of Shipping Group settings, locate the Freight Class dropdown and select the appropriate class.
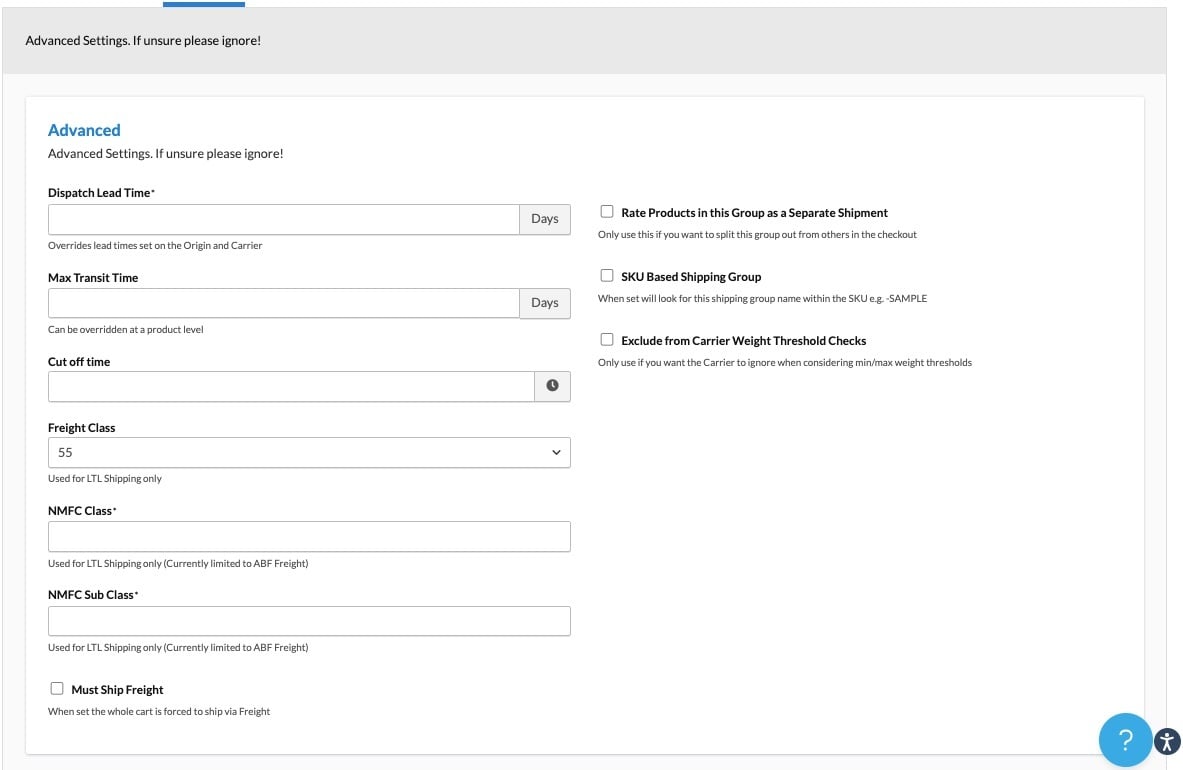
- Save the Shipping Group after setting the freight class.
- Optionally, set NMFC Class and NMFC Sub Class for ABF Freight carriers. The freight class will apply to all relevant carriers.
Products in this group will be rated based on their Freight Class when in the cart. Please note, NMFC Class, Sub Class, and Freight Class for the Shipping Group are overridden if the packing box has a Freight Class set. Ensure boxes do not have a Freight Class set to use Shipping Group values 😊.
Assign Products to their Shipping Groups
Assign products to their groups via your eCommerce platform by setting the group name in the product's Shipping Group attribute. When using an LTL Freight carrier, ShipperHQ will apply the specified freight class for each product in the Shipping Group.
Freight Class in Magento
Magento supports two freight class attributes at the product level:
freight_classshipperhq_nmfc_class
Both attributes can be set in Magento. However, the shipperhq_nmfc_class attribute is used only for the ABF carrier, whereas the freight_class attribute is applicable to all relevant carriers.