Overview
Origins are the locations from which orders ship. These could be your warehouses, retail stores, or even vendor locations if you use dropshipping. You'll need at least one Origin to set up rates in ShipperHQ, and ensuring your Origin address is accurate is crucial, especially if you're using live-rate carriers. If you offer in-store pickup, remember that pickup locations are referred to as "Locations" in ShipperHQ. If a location serves both shipping and pickup purposes, you'll need to create both an Origin and a Location with the same address.
Table of Contents
- Overview
- How Many Origins Do I Need?
- Managing Origins
- Adding New Origins
- Additional Settings
- Adding Origins in Bulk
- Deleting an Origin
- Additional Features
- Date & Time
- Multi-Origin Shipping
- Origin Configuration Settings
- Basic
- Address
- Restrictions
- Dispatch
- Advanced
- Next Steps
- Troubleshooting
How Many Origins Do I Need?
- If you have a single shipping facility, you need 1 Origin.
- Use 1 Origin per warehouse if shipping from multiple warehouses.
- Use an Origin for each vendor location if you're dropshipping products.
- If fulfilling from multiple retail locations, use an Origin for each one.
Configuring rules for multiple origins requires the Multi-Origin Shipping Advanced Feature.
Managing Origins
Adding New Origins
For new ShipperHQ accounts, the Trial Wizard aids in setting up Origins. For existing accounts, navigate to "Origins" in the left-hand menu and follow these steps:
- Press the "New+" button at the top to add an Origin.
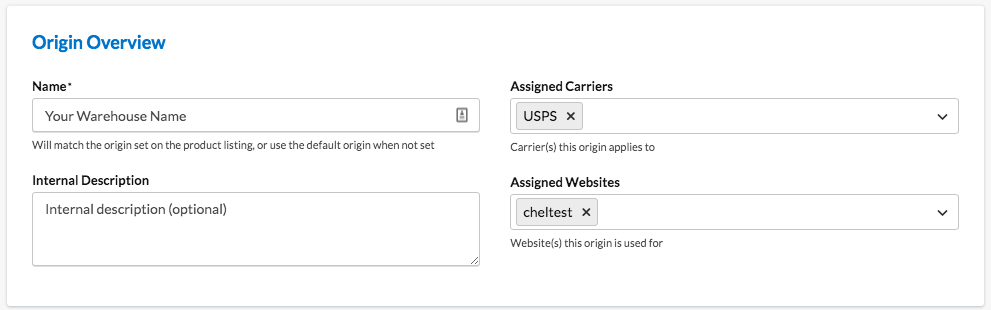
- In Origin Overview, set a Name, assign Carriers, and select applicable Websites. You can assign Carriers later if needed.
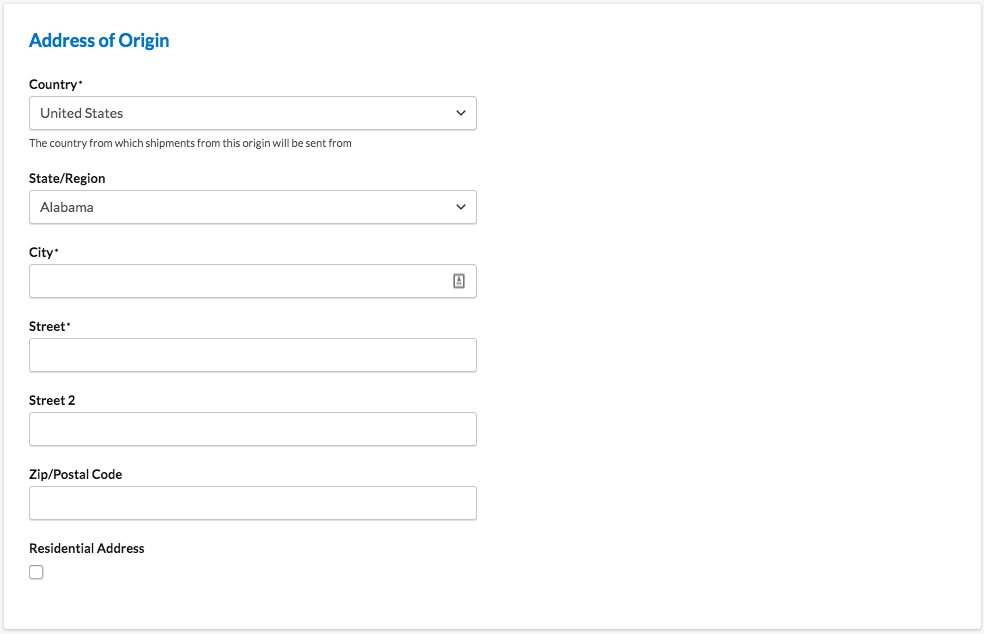
- Enter the ship-from address in Address of Origin. Ensure accuracy, especially for Live Rate Carriers or the Nearest Warehouse functionality.
- Save your Origin.
Additional Settings
Depending on your ecommerce platform and enabled features, additional setup options may be available. These are detailed in the Origin Configuration Settings table at the end.
Adding Origins in Bulk
For multiple origins, importing a CSV file is easier. Go to Origins > CSV > Import. To format your CSV, create one Origin, save it, then export it via CSV > Export. Note: Origins can't be deleted via CSV, and there's a maximum of 450 Origins per import.

Deleting an Origin
Before deleting an Origin, unselect any connected Website and Carrier, then save, ensuring active Origins aren't accidentally removed.
Additional Features
Date & Time
The Date & Time Feature shows delivery dates or calendars on your Shipping Methods. It includes settings like cutoff time, lead-time settings, and blackout dates for precise delivery information.
Multi-Origin Shipping
The Multi Origin Shipping Feature handles multiple Origins and includes options for:
- Assigning Products to Specific Origins
- Choosing How ShipperHQ Selects Origins
- Merging Different Shipping Methods
- Setting Zones served per Origin
- Changing "Origin" terminology (e.g., to "Warehouse")
- Managing Inventory by Origin (Magento and Zoey)
Origin Configuration Settings
Basic
- Name: Internal name for the Origin.
- Internal Description: Your description of the Origin.
- Assigned Carriers: Carriers for shipping from this Origin.
- Assigned Websites: Websites connected to this Origin.
Address
- Country, State/Region, City, Street, ZIP: Accurate address details are critical for correct rate calculations.
- Residential Address: Checkbox to indicate residential origins for accurate live rates.
- Contact Details: Names, phone numbers, and email addresses for order notifications.
Restrictions
- Restrict to Zones: Limit shipments to selected Zones.
- Custom Shipping Methods Assigned: Specify allowed methods from Custom Rate Carriers.
- Live Shipping Methods Assigned: Specify allowed methods from Live Rate Carriers.
Dispatch
- Production Cutoff Time: Cutoff for same-day shipping.
- Lead Time Settings: Define production days for different shipping methods.
- Blackout Dates & Days: Set dates and days without dispatch or production.
Advanced
- Latitude & Longitude: Coordinates determine the nearest Origin.
Next Steps
Once your Origins are configured:
- Connect your Carriers if you haven't yet done so.
Troubleshooting
If issues arise with your new Origins during testing, explore our documentation: