How to Define Box Sizes
Set optimal box sizes for accurate shipping rates using ShipperHQ
Table of Contents
- Overview
- Setup: Define Box
- Basic Panel
- Optional Panel
- Advanced Panel
- Master Packing Boxes
- Entering Boxes via CSV
- More Information
Overview
This guide explains how to set up and define boxes, box sizes, and pallets in ShipperHQ. Ensure that you have Dimensional Packing enabled. With this feature, ShipperHQ calculates the most accurate shipping rates by packing items volumetrically into defined box sizes. Follow the steps below to define a box and adjust its settings effectively 😊.
Setup: Define Box
Once Dimensional Shipping is enabled, 'Box Definitions' will appear in the bottom left corner. Here, you can define boxes either individually or by CSV import. To create a box individually, navigate to Box Definitions in the left column and click "Add New +".
Basic Panel
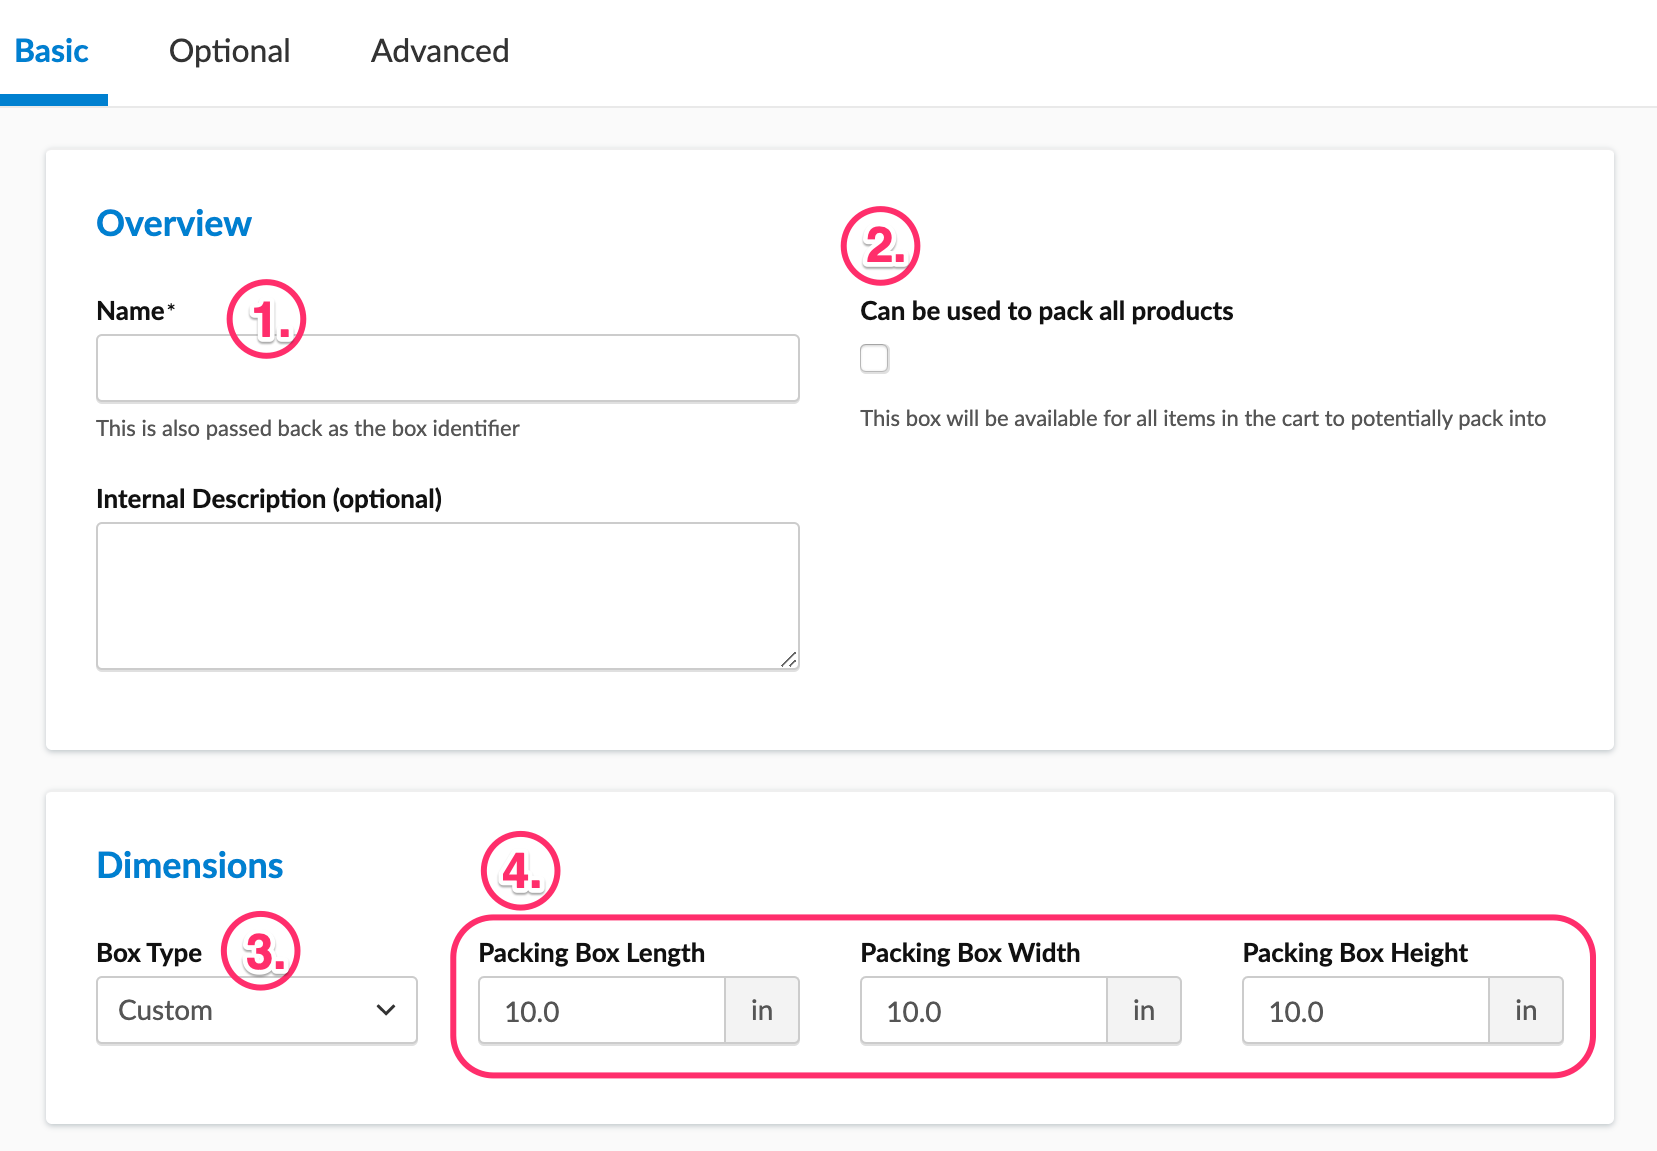
- Name your Box. The name becomes the Box Identifier and helps in recognizing it in logs.
- Decide if the box can be used to pack all products. If not, this box can be used within a Packing Rule.
- Note: If "Can be used to pack all products" is selected, the box won't display in Magento's possible shipping boxes attribute, as it's treated as assigned to all products.
- If the box is assigned to a packing rule, you won't see this option.
- Choose either a custom box size (define your own dimensions) or select from USPS Flat Rate Boxes.
- Define the length, width, and height for a custom box.
Optional Panel
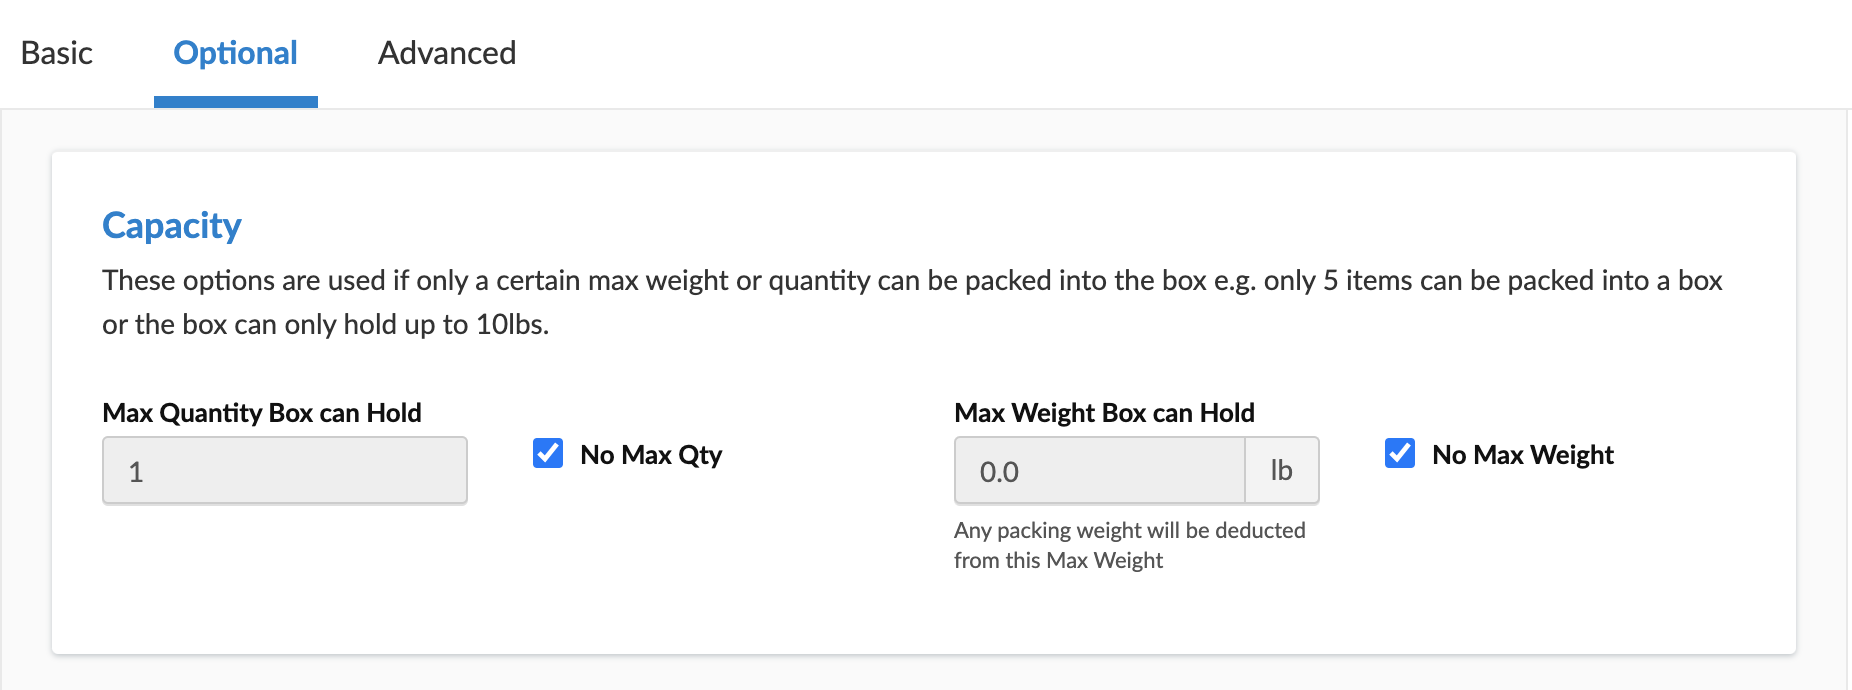
- Set a max quantity and max weight limit if necessary (e.g., max of 5 items or up to 10lbs).
Advanced Panel
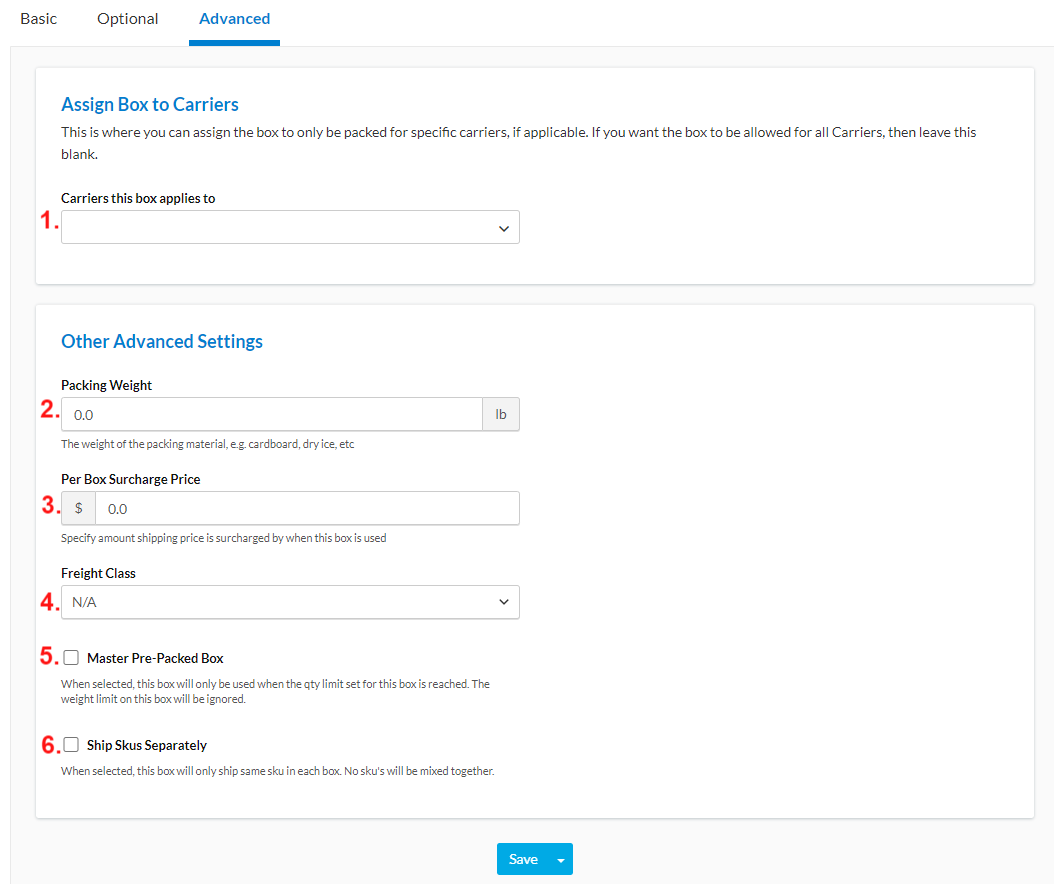
- Assign the box to specific carriers, if needed. Leave blank for all carriers.
- Set a Packing Weight for heavy packaging materials like extra cardboard or dry ice.
- Add a Per Box Surcharge for additional costs.
- Surcharges apply after shipping rules and might show after a free shipping rule. For specific surcharge situations, refer to box-based shipping rules.
- Set a Freight Class for the box if applicable.
- Indicate if you are setting up a Master Box (also called 'Case Pack').
- Choose to Ship Skus Separately so only items with the same SKU are packed in this box.
Master Packing Boxes
You can assign a box as a master pre-packed box, or "case pack". A master packing box ships alone, like when shampoo is sold in boxes of 6, 15, or 30. If a customer orders 8, 6 go in a master box and the remaining 2 can be packed with other items. Learn more about Using Master Packing Boxes.
Entering Boxes via CSV
To upload multiple boxes in bulk, use a CSV. The maximum is 500 Boxes per import. If you have more than 500, split them into separate CSV files.
- Create at least one box in ShipperHQ using the above steps. This sets up the CSV structure.
- After adding a box, use the Export CSV option in the box list's upper right corner. This downloads the list to your computer.

- Open the CSV file to enter remaining box details. Copy data in each column as shown from the first box created manually.

- Once your list is ready, go back to ShipperHQ and select Import CSV from the box list's upper right corner.

- Choose Browse to locate your CSV file on the computer.
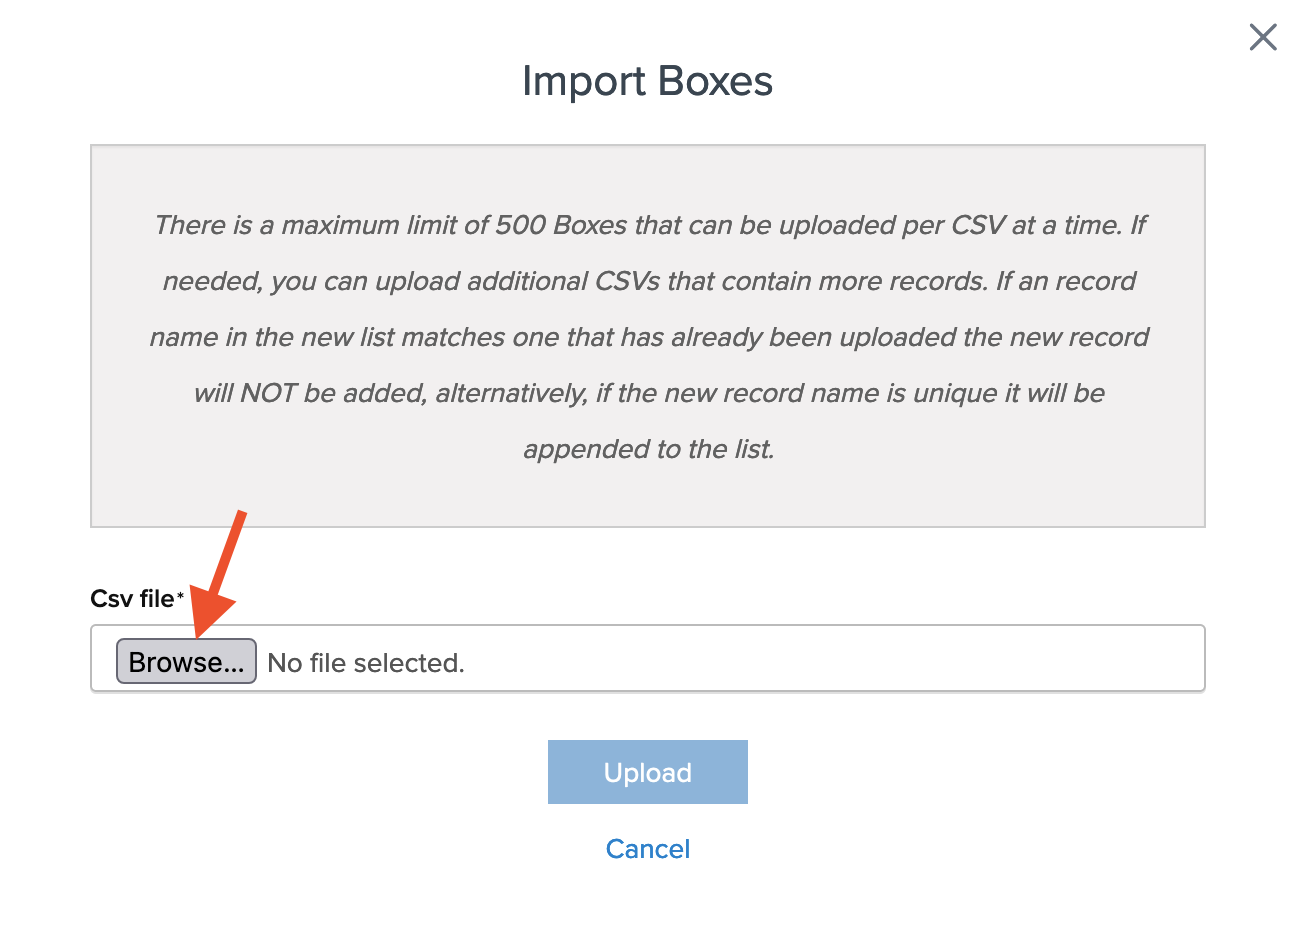
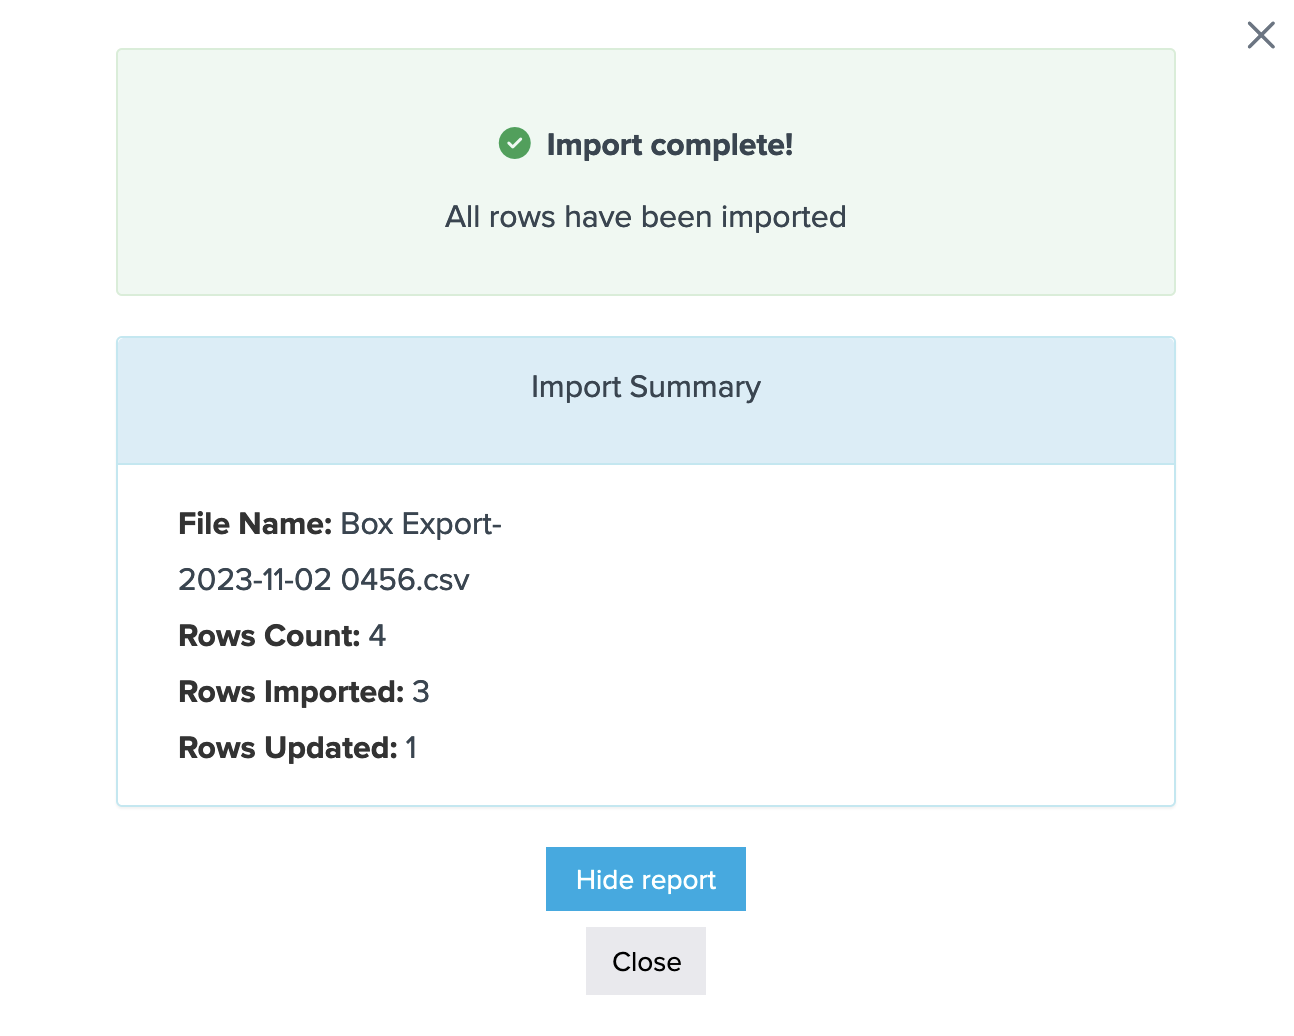
- Select Upload to import. You'll receive a success notification or a list of errors to correct before re-importing.
More Information
For additional details on setting up packing rules and using boxes, visit the Packing Rules category 💡.