
Overview
💡 Important Update
UPS has updated their APIs to use a new security protocol, OAuth 2.0. If you notice "Update Required" or "Reauthentication Required" next to your UPS carrier in ShipperHQ, you must reauthorize the connection to continue using negotiated UPS rates and services. This is a quick process.
UPS will soon retire the old authentication services. After that, you won't be able to return negotiated UPS rates until you reauthenticate your UPS account in ShipperHQ. Contact us if you have any questions or need help with this update. Steps to update your credentials
This article explains how to set up the UPS Access Point® in ShipperHQ. Other UPS services are also supported on ShipperHQ but are set up separately.
Table of Contents
- Overview
- What is UPS Ship to Access Point?
- Platform Support
- Requirements
- Register for UPS Access Point
- Adding UPS Access Point
- Connecting to Your UPS Account to Use Your Negotiated Rates
- Required Information
- Validating Your UPS Account
- Filtering Pick Up Locations
- Displaying Map
- Troubleshooting
Free and Discounted ShipperHQ Subscriptions for UPS Customers
You can offer "Ship to a UPS Access Point Location" for free with a ShipperHQ Plan supporting UPS Access Point. This plan supports basic display options only. More information is available on our Promotions & Savings page. For full ShipperHQ features supporting UPS services, check our UPS Ready page.
Other UPS Services
ShipperHQ supports a wide range of UPS services, including domestic and international small packages. More on ShipperHQ support for UPS
What is UPS Ship to Access Point?
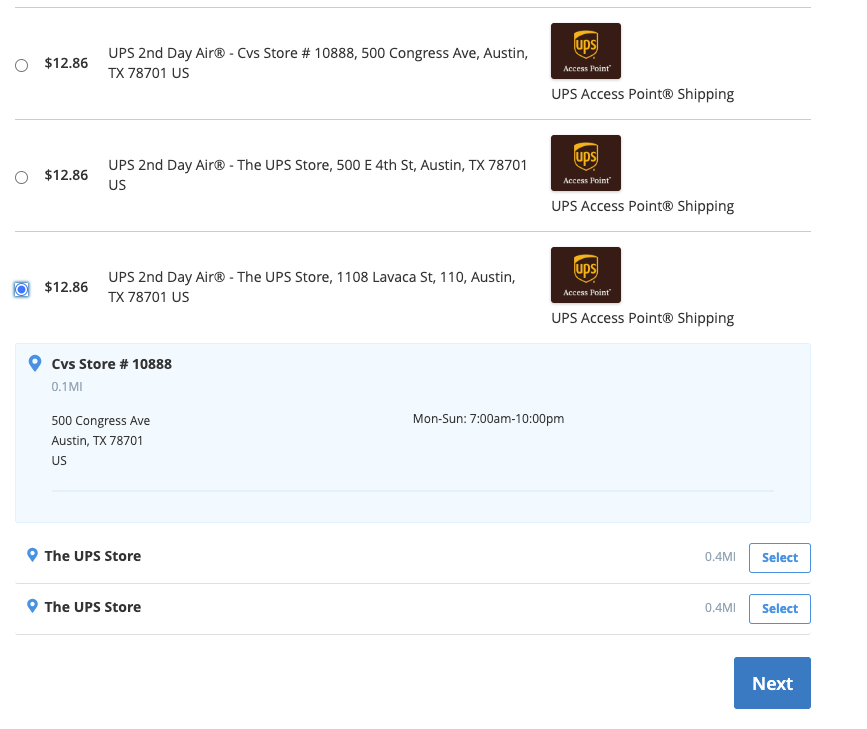
UPS Access Point® allows sending customer packages to a UPS Access Point® location for convenient pickup. These locations are chosen for reliability and convenience, and customers can select the one closest to them. Merchants can control which types of locations are available, such as those that accept restricted goods or exclude certain business types.
ShipperHQ enriches the checkout experience for Magento 1 and 2 with functionality for selecting pickup locations and displaying maps of nearby locations.
Note: "Delivery Date & Time" Advanced Feature is not required for using UPS Access Point®.
For Magento 2
To display a map at checkout, install the module-pickup additional module. More details are available on Installing Magento 2 Separate Modules.
Platform Support
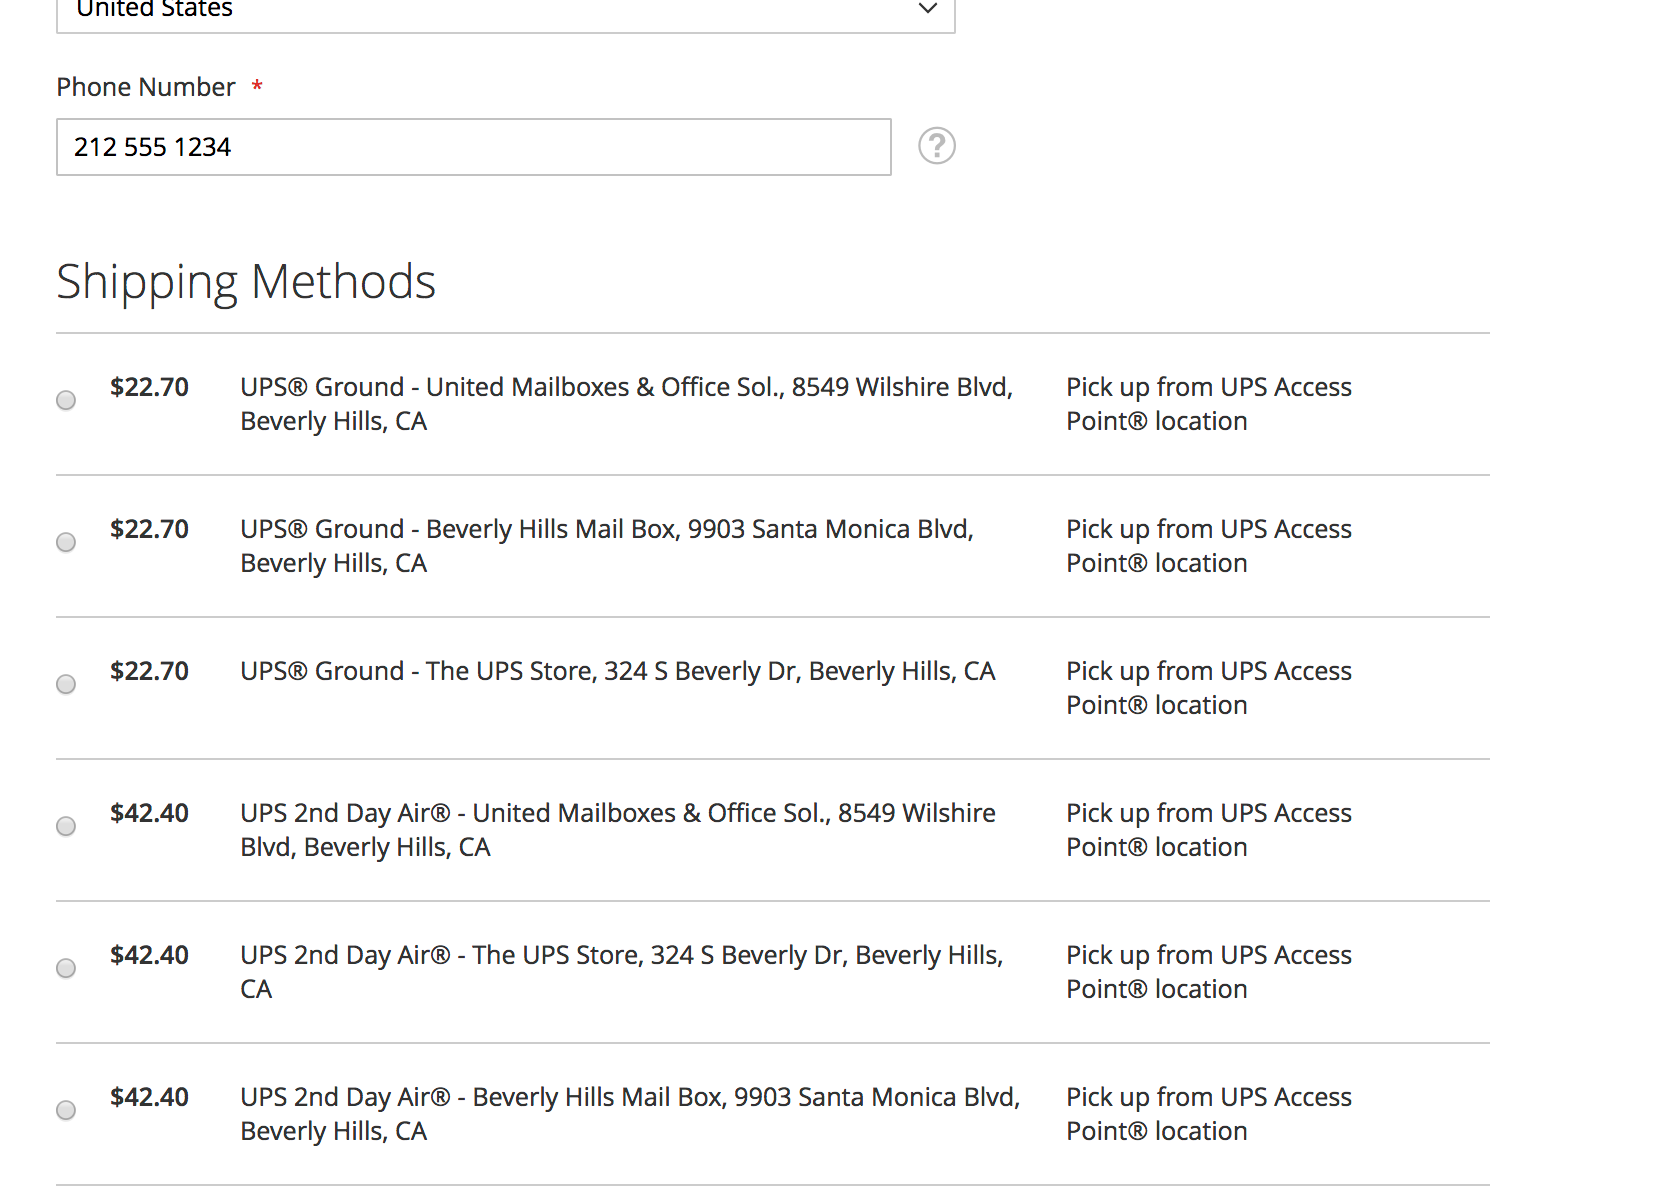
For Shopify and BigCommerce users, we offer specific features for UPS Access Point®. This solution is available for Magento 2, BigCommerce, Shopify, and WooCommerce versions of ShipperHQ. Customers can choose a pickup location at checkout. All available pickup locations are displayed as separate shipping methods.
Requirements
Follow these directions to set up the necessary credentials and add the UPS Access Point® carrier in ShipperHQ.
Register for UPS Access Point
- You need a UPS shipping account.
- Similar to the UPS Parcel carrier, Fetch your Latest UPS Invoice.
Adding UPS Access Point
With your credentials ready, follow these steps to set up UPS Access Point in ShipperHQ.
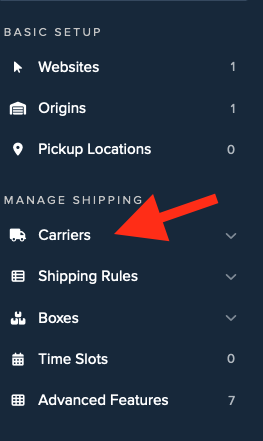
- Log into your ShipperHQ account and go to Carriers in the left menu.
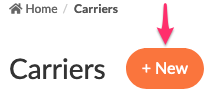
- Click + New to add a new carrier.
- Select Live Rate Carrier.
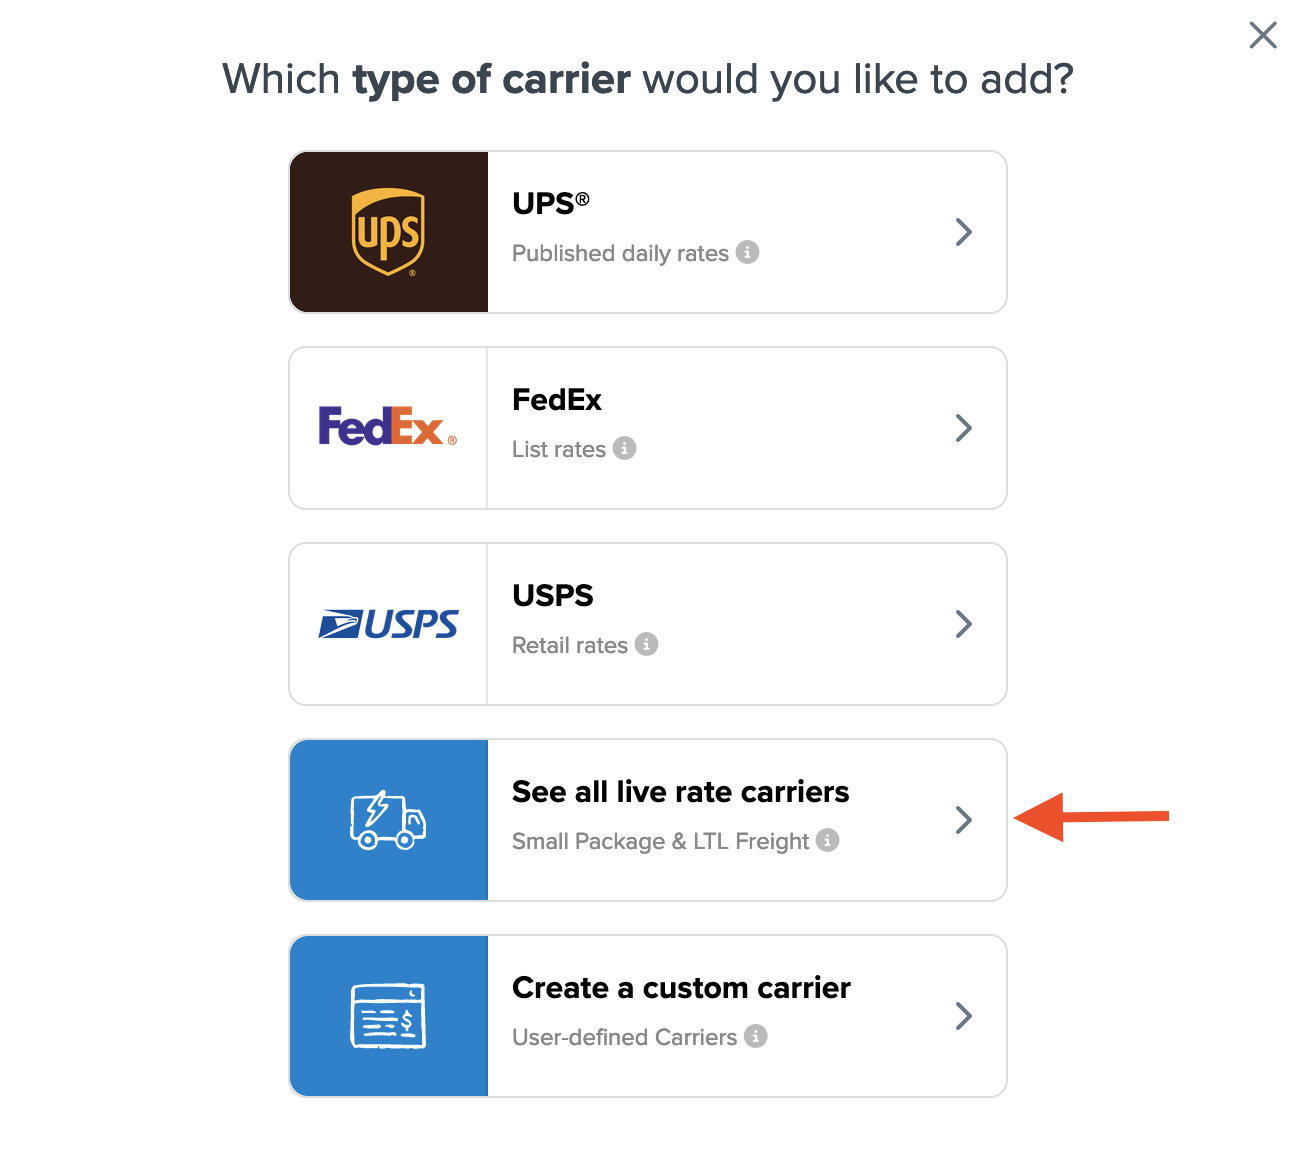
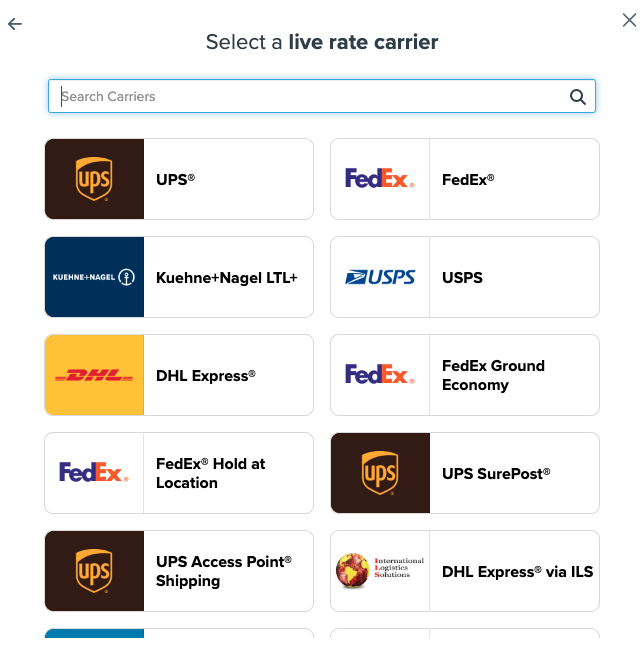
- Search for UPS Access Point or find it in the list of available carriers.
- Continue to connect your carrier account to ShipperHQ.
Connecting to Your UPS Account to Use Your Negotiated Rates
⚠️ CampusShip UPS.com Accounts do not currently support OAuth for ShipperHQ. More information is available here.
To use your UPS Account rates or contract-only services, follow these steps.
Required Information
- An active UPS shipping account connected to UPS.com. Follow this guide to connect if not done already.
- Your UPS.com User ID
- Your UPS.com Password
✅ Need a UPS Account? Set one up in minutes to access discounted UPS rates. Open a new UPS account.
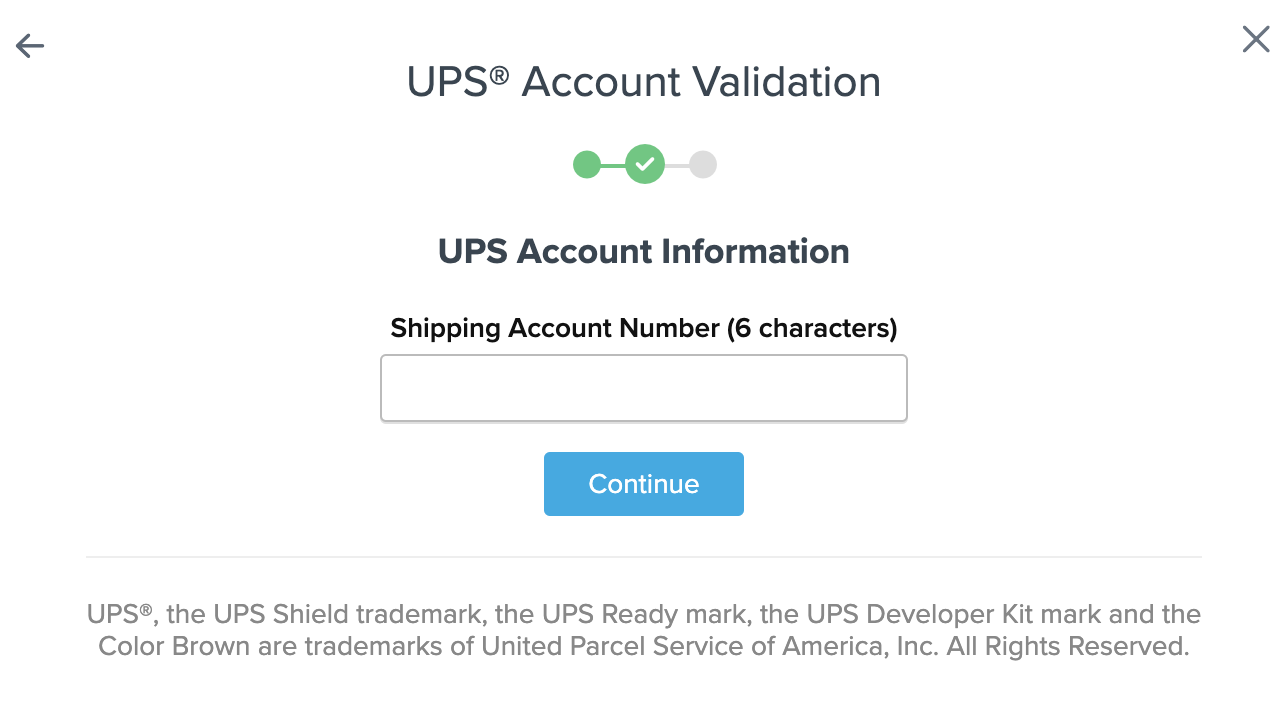
Validating Your UPS Account
Once you have the required account information, connect your ShipperHQ account to your UPS account using these steps.
- Enter your UPS Shipping Account Number.
- Select Enter Credentials.

- Enter your username or email address associated with your UPS account and accept the terms of use.
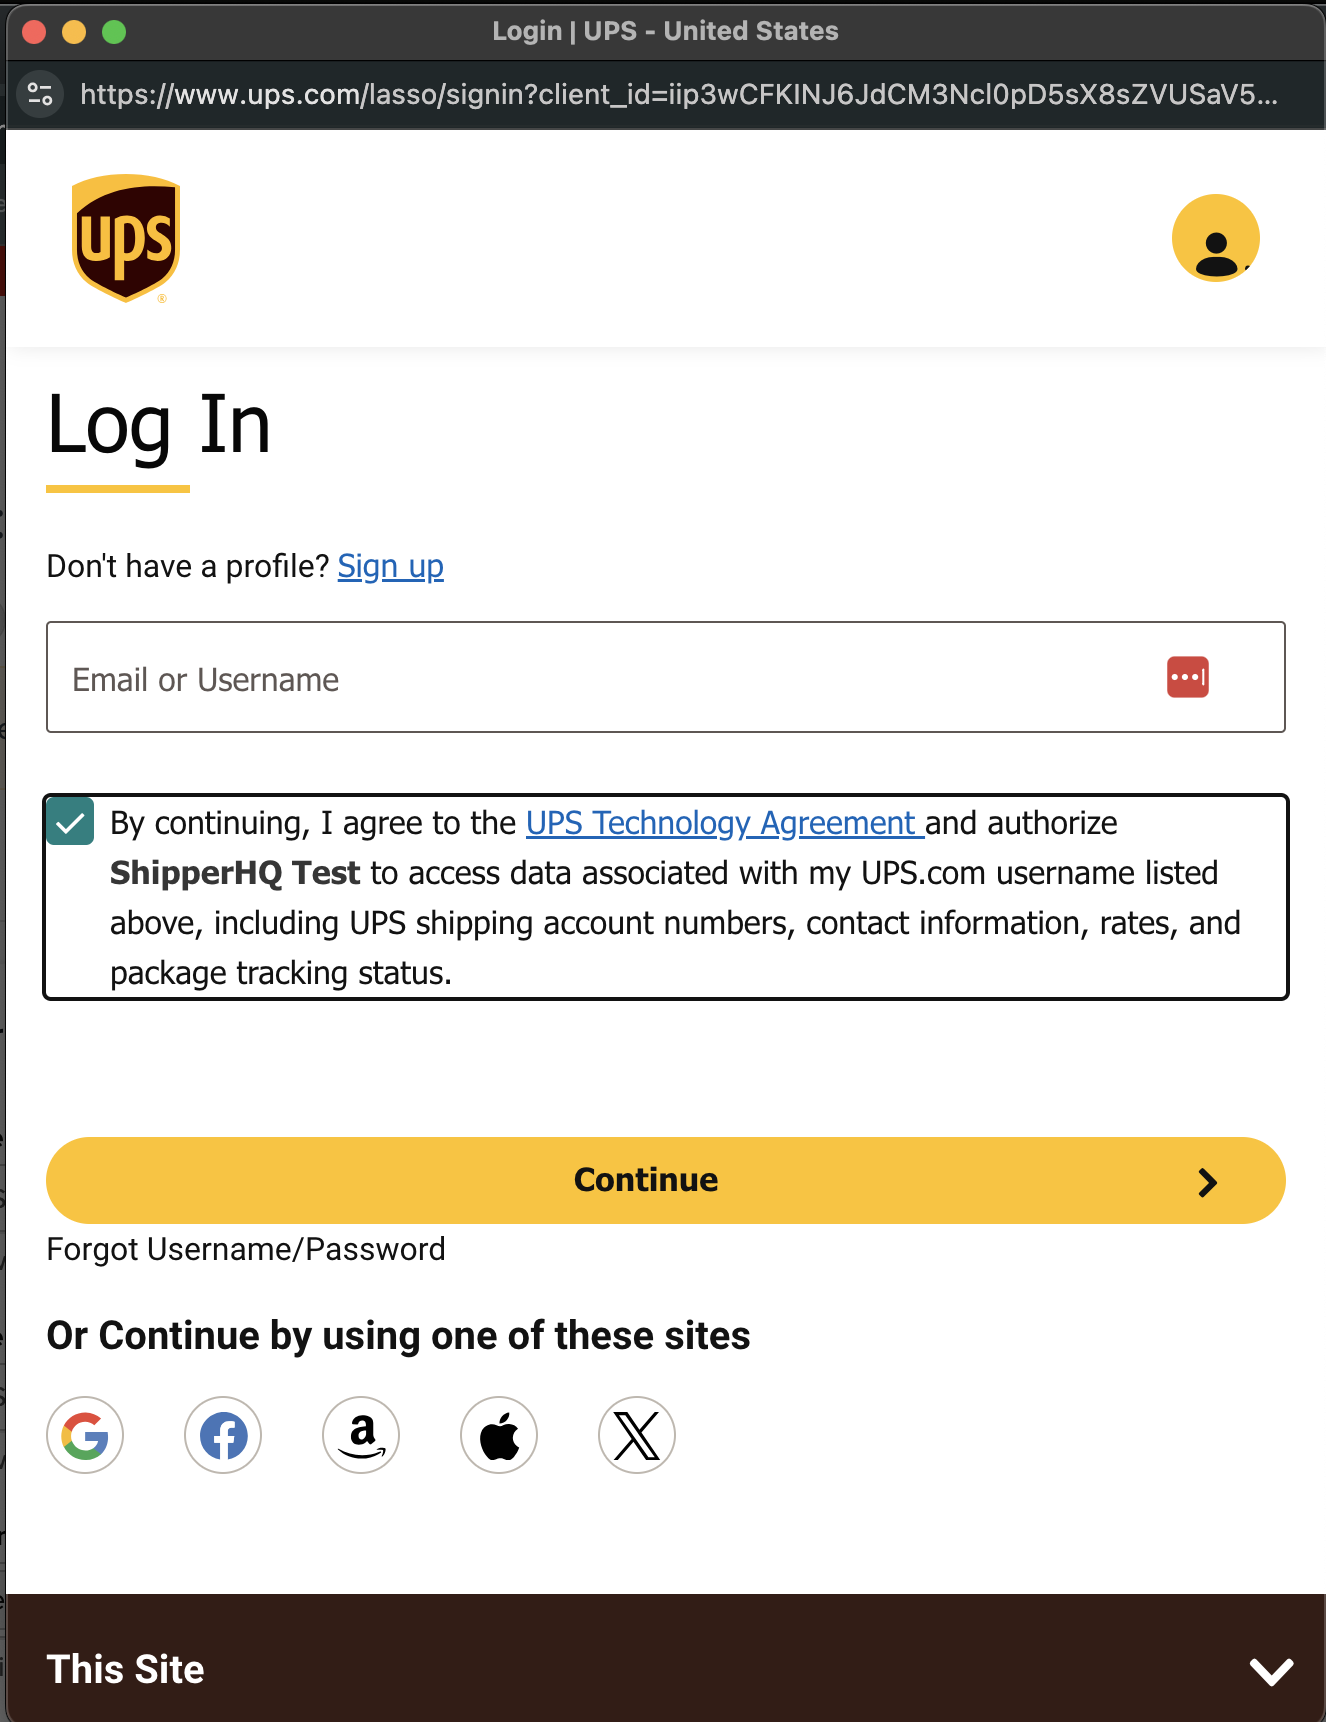
- Enter the password for your UPS account.
Once validation is complete, you can enable the carrier immediately or configure it further.
⚠️ If validation fails, please Contact ShipperHQ Support or review and retry entering your credentials.
- Click Configure This Carrier if validation succeeds.
- Adjust settings as needed, then Save to complete setup.
- Your UPS Access Point® carrier is now ready for configuration.
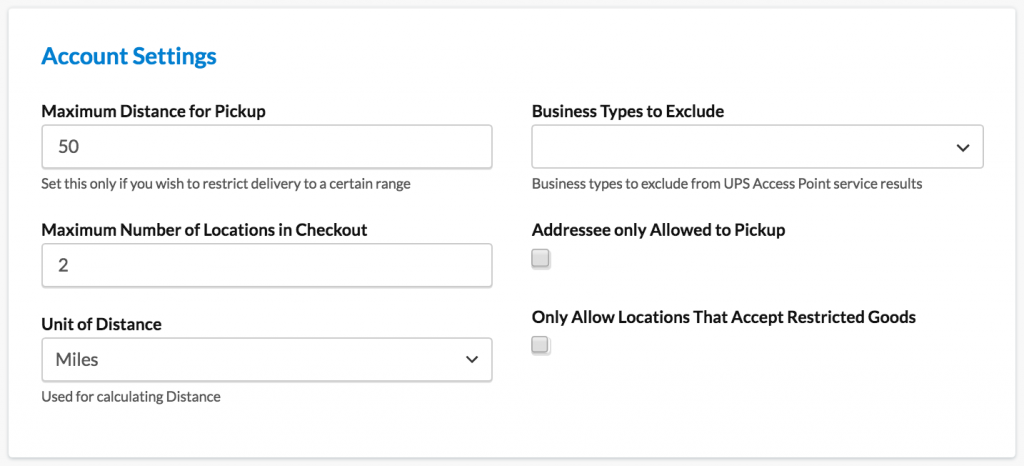
Filtering Pick Up Locations
UPS Access Point® allows merchants to filter delivery locations based on acceptance of restricted goods or business type. Options are available in the Account Settings under the Basic panel of your UPS Access Point® carrier.
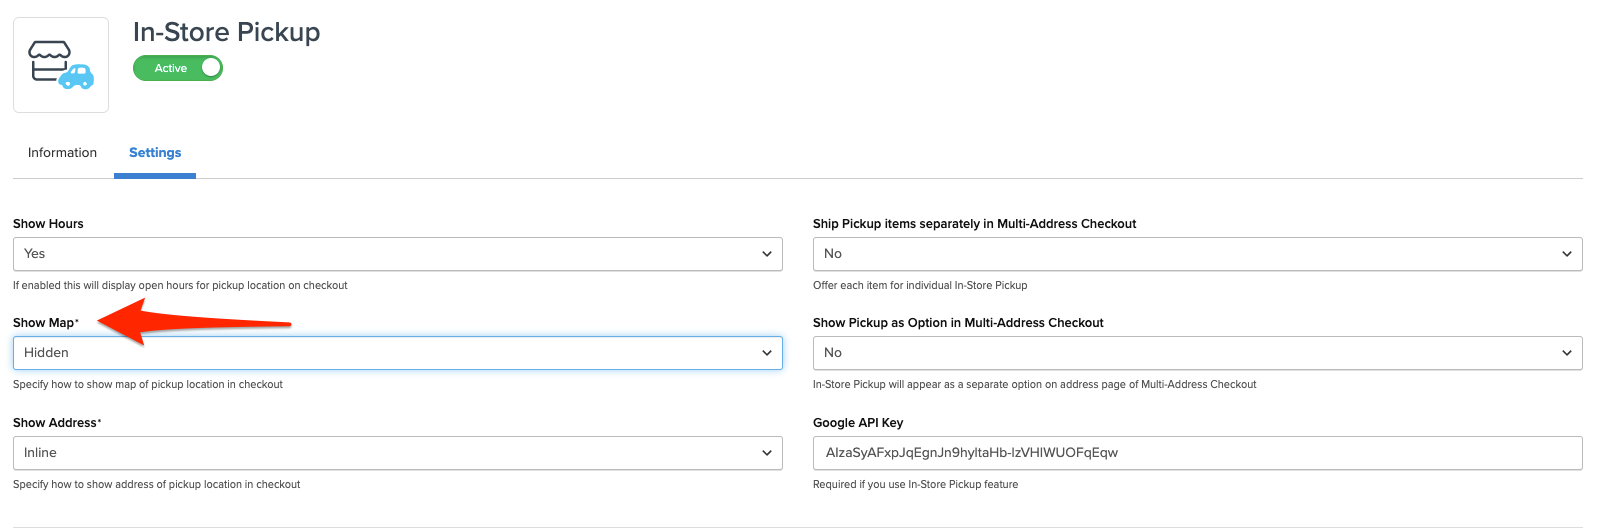
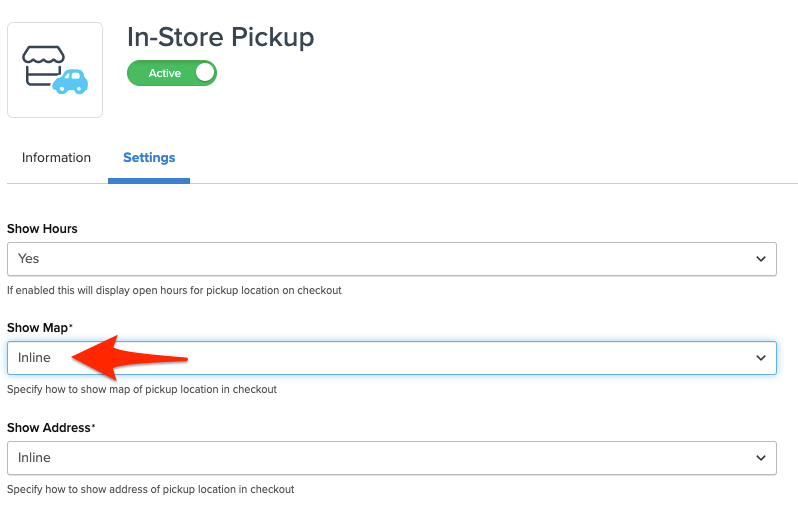
Displaying Map
Note: This function is supported on the Magento/Adobe platform when the In-Store Pickup Advanced Feature is enabled.
To show a map for UPS Access Point options, set the Show Map feature to "Inline" or "Popup."
Troubleshooting
If you receive a message regarding "UPS Account is not authorized for Hold for Pickup," you need to enable this feature on your UPS account. Your UPS account representative can assist with this.