
Table of Contents
- 😊 Important Update
- Overview
- Available UPS Services
- Domestic and International Small Package
- Ship to a UPS Access Point Location
- UPS Ground with Freight Pricing
- UPS Ground Saver (formerly UPS SurePost)
- UPS Mail Innovations
- UPS My Choice
- UPS Hundredweight
- Adding UPS
- Connecting to Your UPS Account to Use Your Negotiated Rates
- Required Information
- Validating Your UPS Account
- Configuring UPS
- Basic Settings
- Account Settings
- Shipping Methods
- Carrier Service Area
- Date & Time Settings
- Package Settings
- Fees Settings
- Optional Settings
- Specific Configuration Scenarios
- Setting up UPS Canada
- Setting up UPS Hundredweight Service
- Troubleshooting
- CampusShip UPS.com Accounts
😊 Important Update
UPS has updated their APIs to use a new security protocol, OAuth 2.0. If you see "Update Required" or "Reauthentication Required" next to your UPS carrier in ShipperHQ, you'll need to reauthorize the connection to continue using UPS negotiated rates and services. This is a quick process 😊. UPS plans to retire the old authentication services soon. After that, you must reauthenticate your UPS account in ShipperHQ to access negotiated rates. If you have any questions or need assistance, feel free to contact us.
Steps to update your credentials
Overview
ShipperHQ supports a wide range of UPS® services, including domestic, international, small package, and alternative delivery options. This guide provides information on different UPS carriers, configuration settings, and the setup process.
💡 Free and Discounted Subscriptions for UPS Customers: As a UPS Ready® provider, ShipperHQ offers payment eligibility under UPS Digital Connections. For a free plan supporting UPS Access Point locations, visit our UPS Ready page and Promotions & Savings page.
Available UPS Services
Domestic and International Small Package
The UPS small package carrier covers most domestic and international services, including ground and air.
Learn about setting up UPS small package services
Ship to a UPS Access Point Location
Customers can ship orders to a UPS Access Point location using the UPS Access Point carrier.
Learn about setting up UPS Access Point
UPS Ground with Freight Pricing
UPS Ground with Freight Pricing offers competitive rates for non-palletized shipments. This requires a contract with UPS.
Learn about setting up UPS Ground with Freight Pricing
💡 ShipperHQ also supports TForce Freight, formerly UPS LTL Freight. Learn about setting up TForce Freight
UPS Ground Saver (formerly UPS SurePost)
UPS Ground Saver is available by contract only. Please contact us to access it.
Learn about setting up UPS Ground Saver
UPS Mail Innovations
Live rate integration isn't available, but you can set rates manually using a Custom Table Rate.
UPS My Choice
UPS My Choice offers real-time delivery updates and can be integrated with ShipperHQ for Adobe Commerce and Magento 2.
Learn about setting up UPS My Choice
UPS Hundredweight
This discounted rate applies to certain US shipments. ShipperHQ supports this service.
Learn about UPS Hundredweight Service
Adding UPS
Get your credentials ready and follow these steps to set up UPS in ShipperHQ.
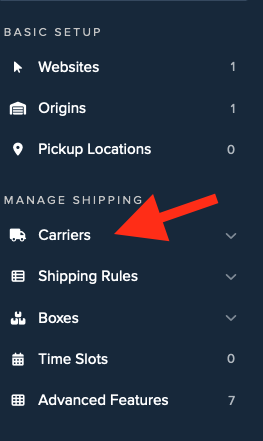
- Log into ShipperHQ and navigate to the Carriers link.
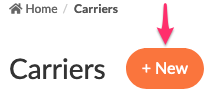
- Click + New to add a new carrier.
- Choose Live Rate Carrier.
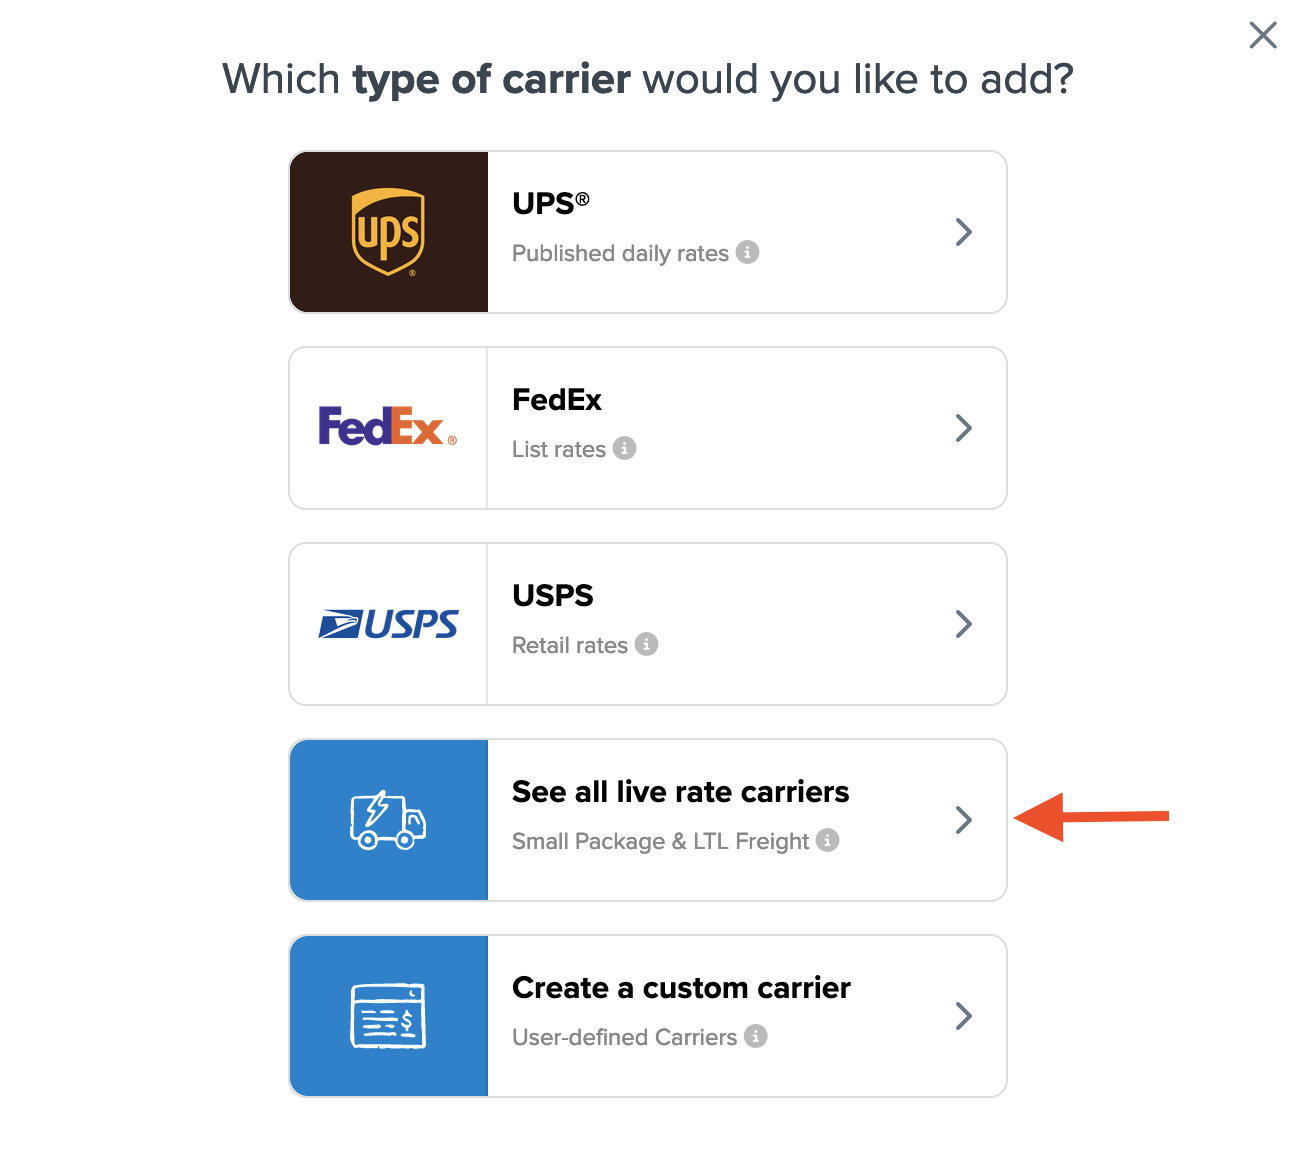
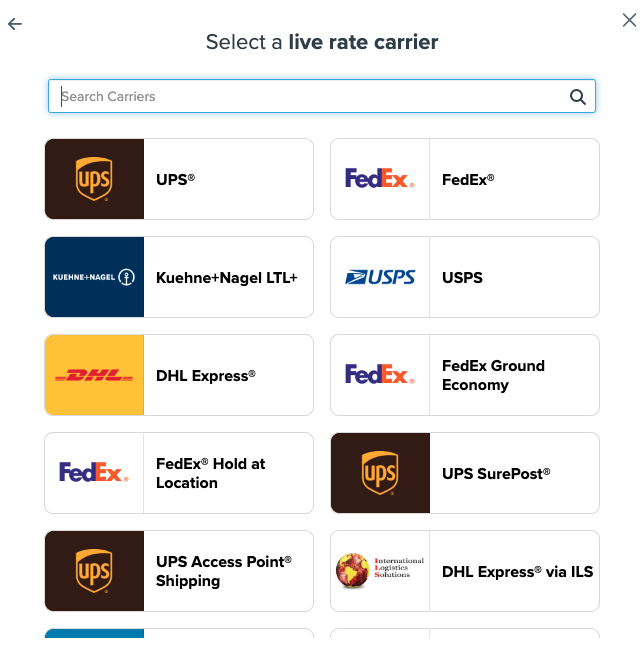
- Search or scroll for UPS from the list.
- Connect your UPS account to use your negotiated rates.
This option uses UPS published list rates by default. Add your credentials anytime to switch to negotiated rates.
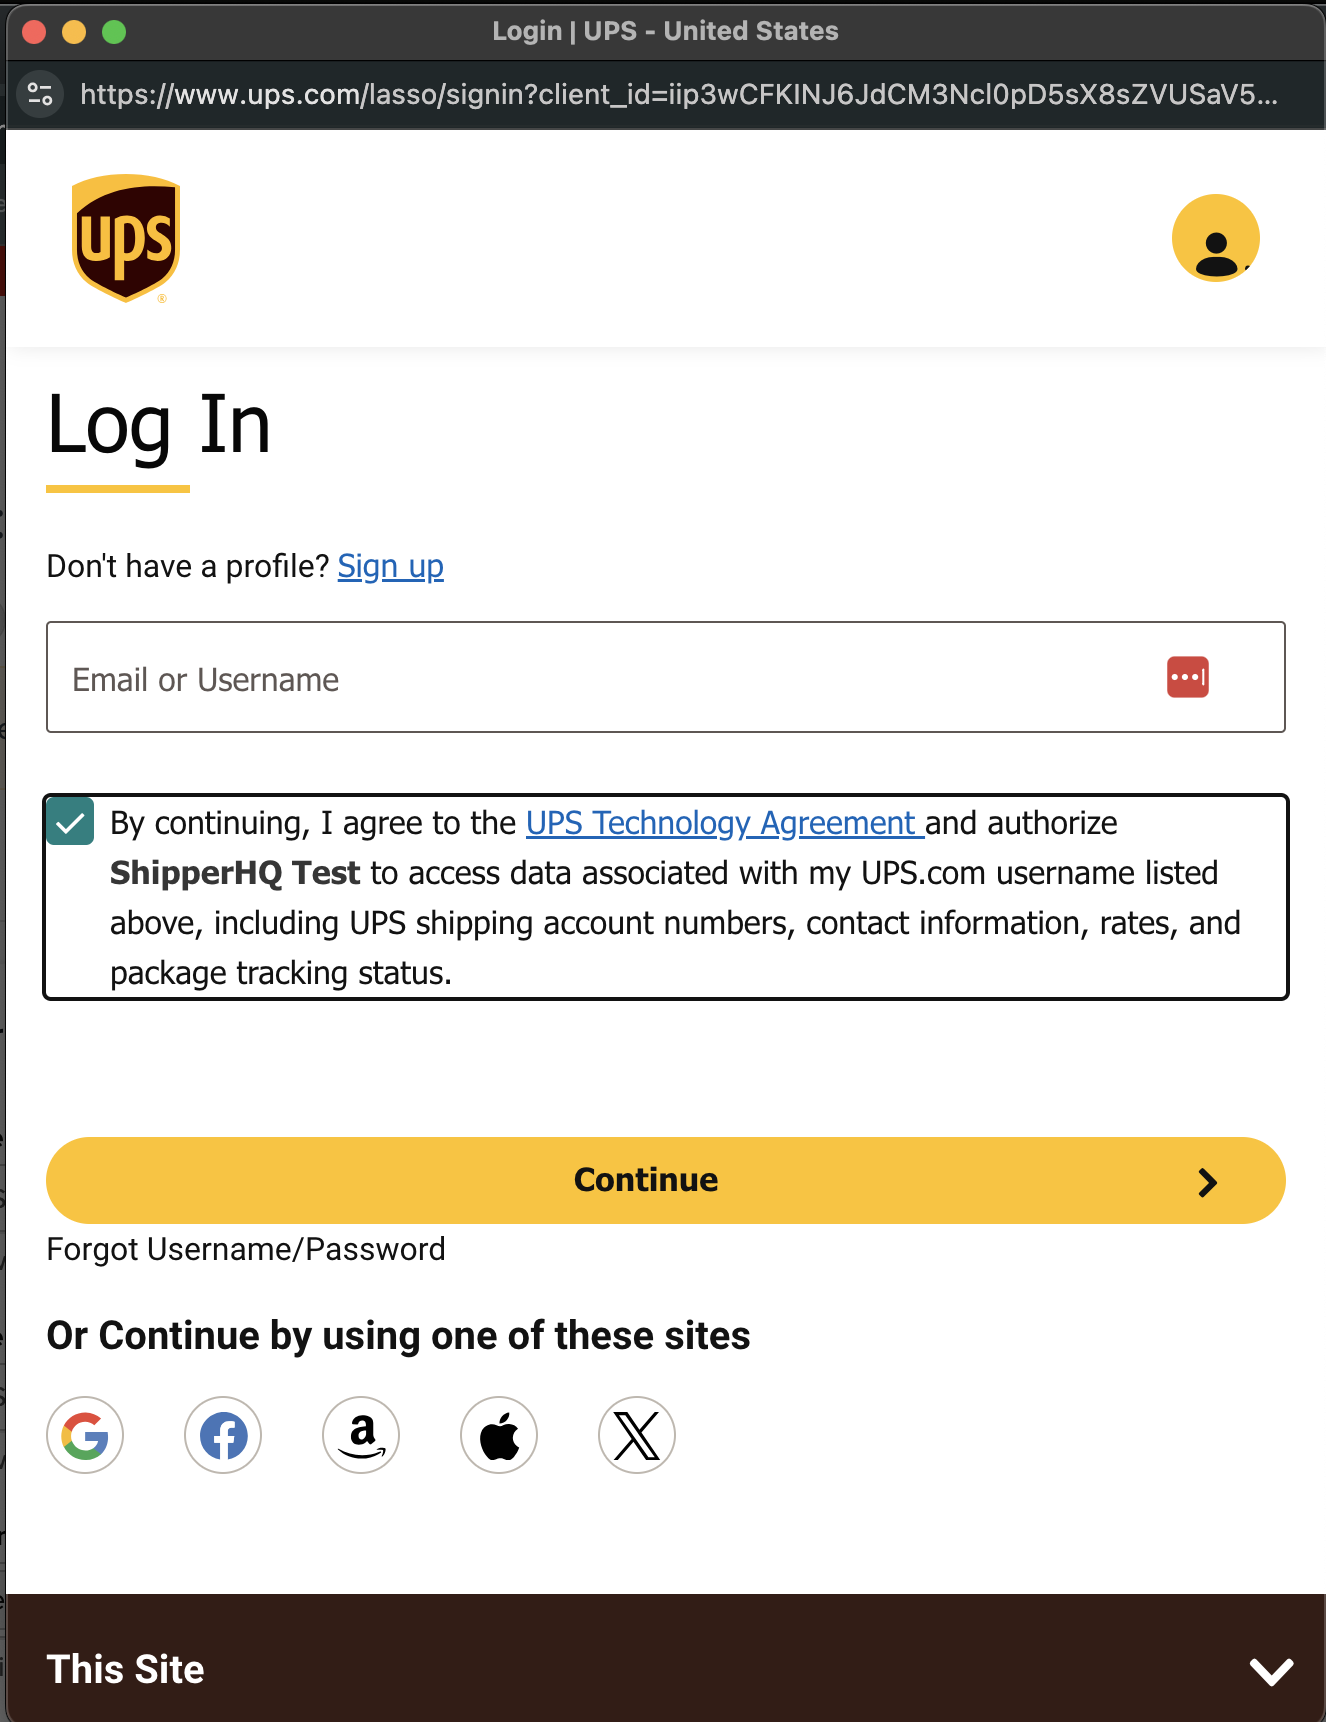
Connecting to Your UPS Account to Use Your Negotiated Rates
⚠️ Note: CampusShip UPS.com accounts don't support OAuth with ShipperHQ. For details, see here.
To use your UPS account rates, follow these steps:
Required Information
- An active UPS shipping account connected to a UPS.com account (guide)
- Your UPS.com User ID and Password
💡 Need a UPS Account? Set one up quickly and get discounted rates. Open a new UPS account
Validating Your UPS Account
Once you have your account info:
- Enter your UPS Shipping Account Number.
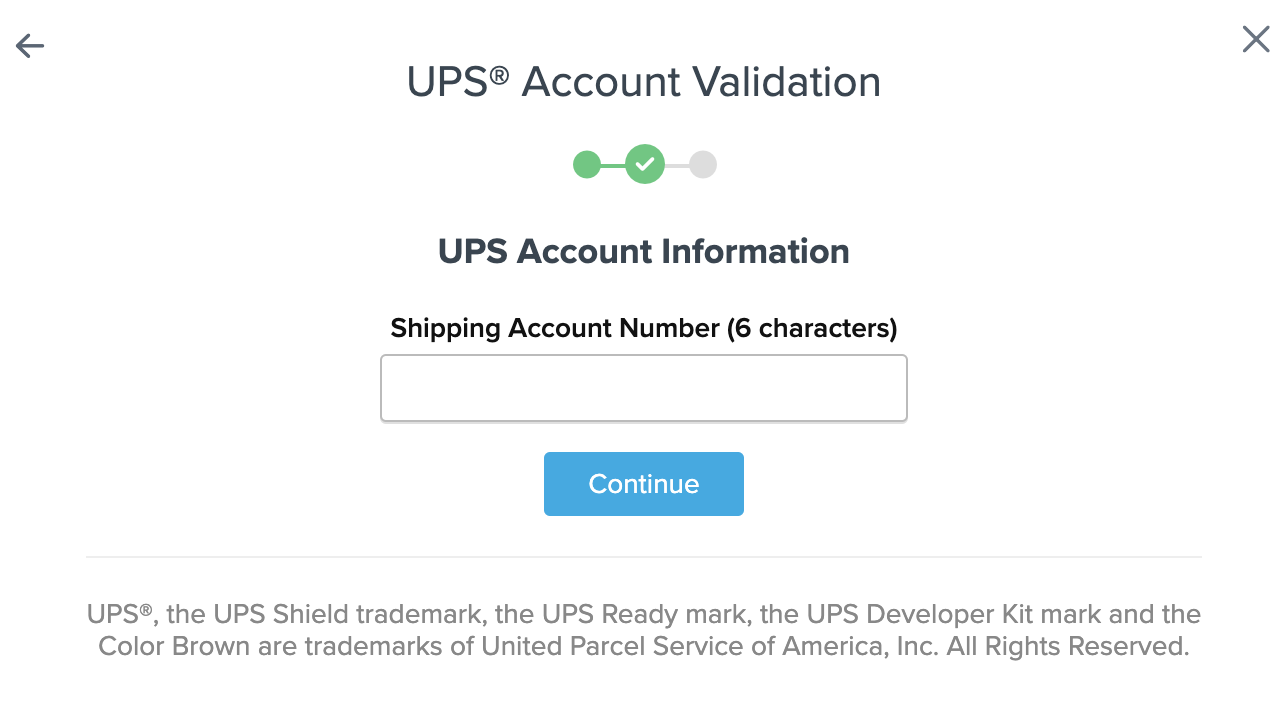
- Select Enter Credentials.

- Log in with your username or email address and accept terms.
- Enter your UPS account password.
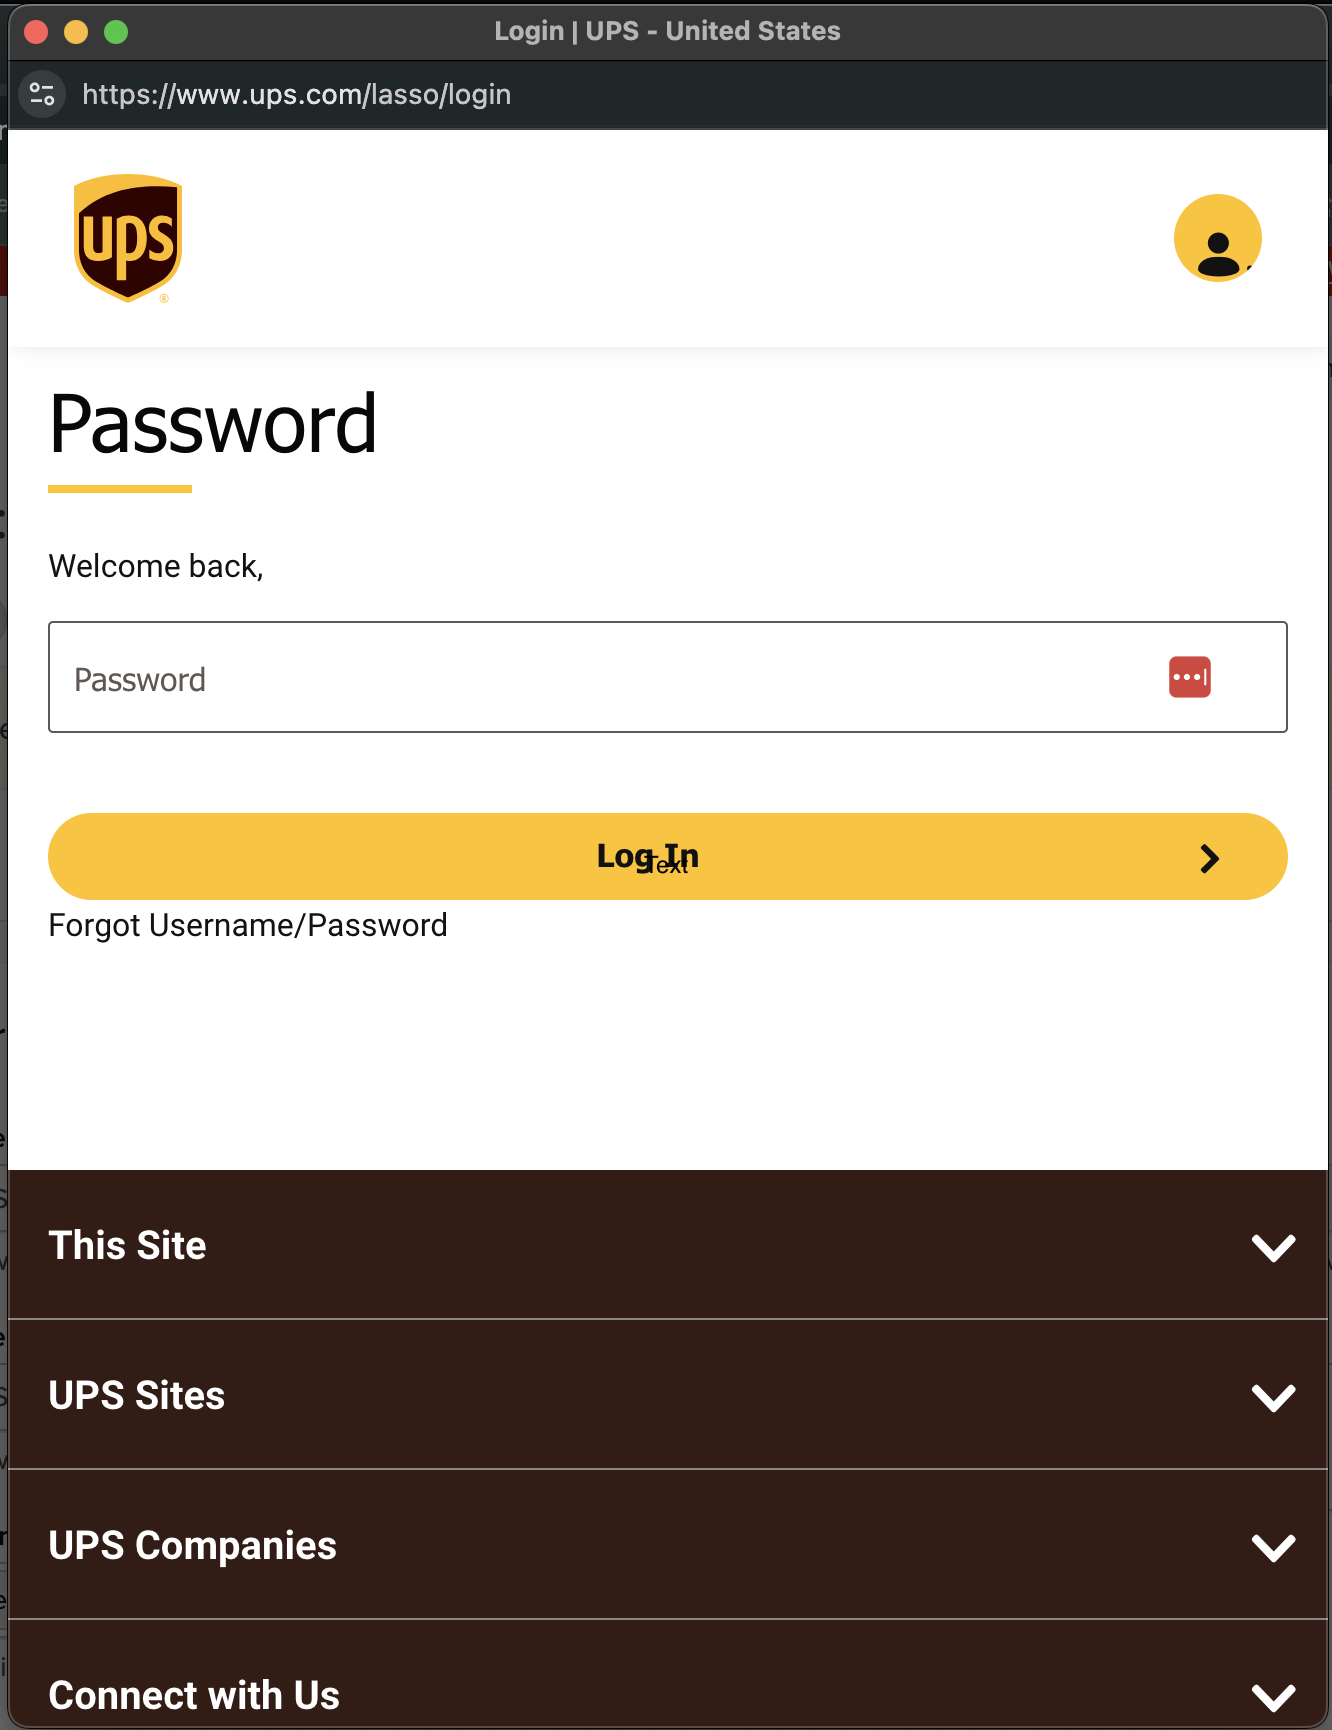
After validation, you can enable the carrier right away or configure it further and enable it later.
Configuring UPS
Configure your UPS carrier to match your needs.
Basic Settings
Access the Basic tab to configure core settings.
Carrier Overview
Manage how your carrier displays within ShipperHQ and to customers.
Carrier Titles
- Carrier Title in Checkout: Visible to customers (e.g., "UPS").
- Carrier Title Internal: Used within ShipperHQ (e.g., "New York UPS Account").
Assigned Origins
Assign this carrier to specific origins using the ShipperHQ Multi-Origin feature.
More about Multi-Origin Shipping
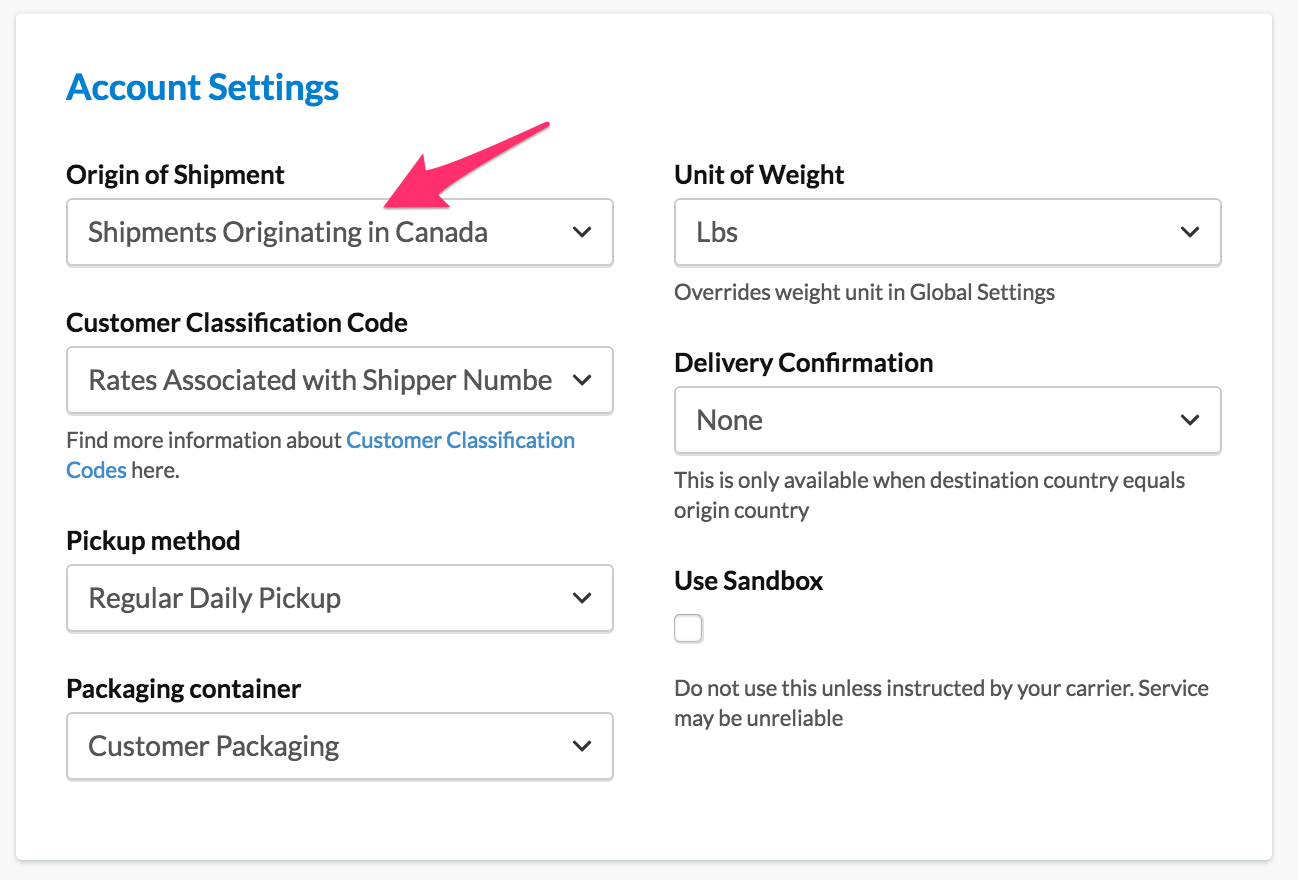
Account Settings
These relate to UPS communication and additional service features.
Rate Types
- Rates Associated with Shipper Number: Uses negotiated rates
- Retail Rates: For shippers at UPS retail locations
- Standard List Rates: For shippers with Standard List Rates or accounts post-January 2011
- Daily Rates: For pre-2011 accounts with Daily Rates
⚠️ Requires UPS account connection to ShipperHQ; otherwise, defaults to UPS Daily Rates.
Origin of Shipment
Specifies shipment origin. Check with your UPS rep if uncertain.
Pickup Method
Choose based on your shipping practices (e.g., Regular Daily Pickup or Customer Counter).
Packaging Container
Default to Customer Packaging, unless specific packaging is used.
Unit of Weight
Set based on your UPS and ShipperHQ accounts' weight unit preference.
Delivery Confirmation
Select delivery confirmation type, like Signature Required or Adult Signature Required.
Send Declared Value to Carrier
Enable this to send declared shipment value to UPS, potentially incurring extra charges.
⚠️ Additional charges may apply for certain Account Settings options (e.g., Delivery Confirmation).
Shipping Methods
Choose which Shipping Methods to offer. These options don't guarantee visibility for all orders, as some are scenario-dependent.
Use Shipping Rules to manage offered services based on specific criteria.
Carrier Service Area
Control the geographic service zones for the carrier. Use zones based on broad or specific location criteria.
For nuanced restrictions, use Shipping Rules.
Date & Time Settings
Available with the Date & Time Advanced Feature, show delivery info to customers.
Configuring Date & Time Settings
Package Settings
Accurate package weight and dimensions settings enhance rate accuracy. Highly effective with Dimensional Packing Advanced Feature.
Fees Settings
Manage fees or rate adjustments.
Handling Fees
Easily apply surcharges or discounts. Quick to set but less flexible than Shipping Rules.
Return Shipping Options
Offer paid return services at checkout (available on select plans).
More info on Return Shipping Options
Optional Settings
Optional settings are for specific scenarios and Advanced Features.
Restrictions
For LTL Freight, choose whether to show carriers even for freight shipments.
More info on Weight Thresholds
Prioritize Carrier
With Rate Shopping & Custom Method Names, prioritize one carrier over another.
More info on Carrier Prioritization
Error Handling
Set how ShipperHQ reacts when no rates are available, including default error messages.
Free Shipping Promotions
Choose free shipping settings when a promotion applies, or create a Free Shipping Custom Carrier.
Additional Settings
Address type-related settings appear based on your Advanced Features.
Without Address Type Advanced Feature
Set the Default Destination Address Type for all shipments.
With Address Validation
Automatically determine address type. Use Validated Address Type if enabled.
More on Address Type Validation
With Address Type Selector
Let customers select address type at checkout.
Specific Configuration Scenarios
Setting up UPS Canada
To receive accurate rates and methods for UPS Canada accounts, ensure:
- UPS Account Origin: Set to Canada.
- Weight Unit: Matches your product weight units.
- Shipping Methods: Select compatible Canadian methods (e.g., Express, Express Saver).
- Currency Conversion (Magento, Zoey, Adobe Commerce): Allow Canadian currency and setup conversion rates.
Setting up UPS Hundredweight Service
With an active UPS Hundredweight Service contract, ShipperHQ can display eligible discounted rates.
For more UPS Hundredweight Service requirements, visit UPS.com.
Troubleshooting
Common causes of registration failures or missing negotiated rates:
- Incorrect UPS® User ID or Password. Check Obtaining UPS Credentials.
- UPS® account not linked to UPS® user ID and password for Rates API. Follow this guide.
- Carrier settings changed before registration. Delete the carrier and create a new one.
- Missing default origin on your website. Set a default origin as explained on Website Configuration.
ShipperHQ defaults to Standard List Rates if validation/registration is unsuccessful.
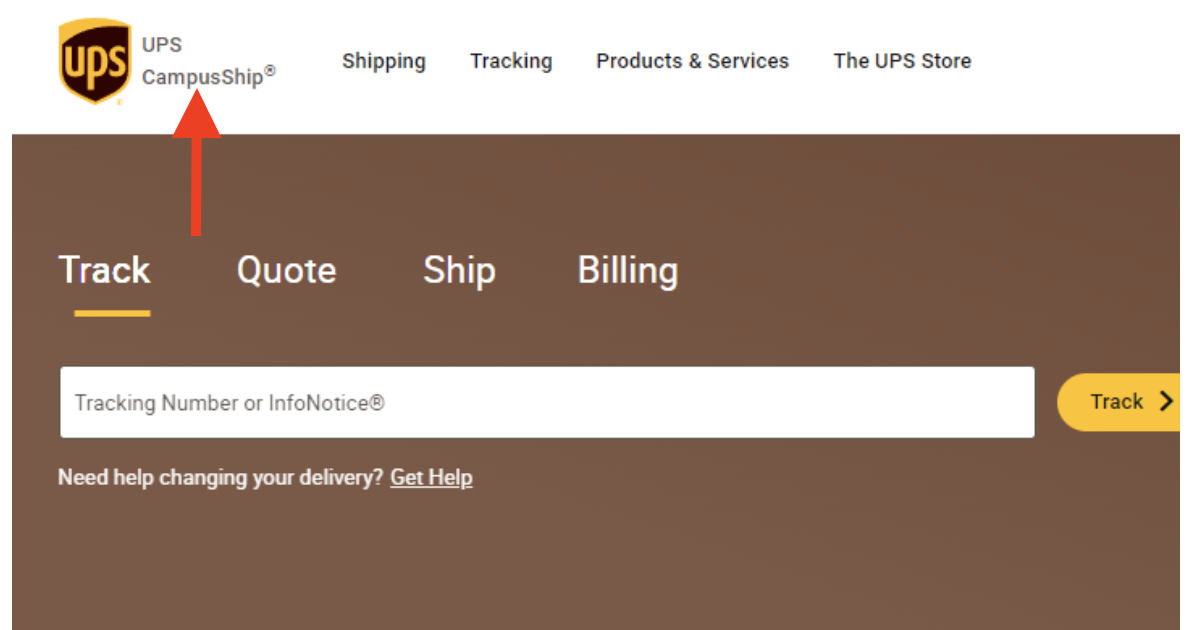
CampusShip UPS.com Accounts
⚠️ CampusShip UPS.com Accounts do not currently support OAuth for ShipperHQ
These accounts can't be authorized via OAuth with ShipperHQ at present.
To determine if your account is CampusShip, check for the UPS CampusShip logo in your account dashboard.
If you attempt to link a CampusShip account:
- For existing carriers, current authentication remains, but you'll need an OAuth update.
- For new carriers, only Daily Rates can be displayed without authorization for negotiated rates.
💡 What to do:
- Set up or use a non-CampusShip UPS.com account.
- Make sure it's linked to your UPS Account.
- Connect to ShipperHQ.