Table of Contents
- Overview
- Cheapest Date without Calendar
- Cheapest Date with Calendar
- Default to Cheapest Delivery Date
- Cheapest Date with Delivery Date or Time in Transit
- Example
- Additional Resources
Overview
Learn how to set up ShipperHQ to show the cheapest delivery date options at checkout. This feature helps reduce clutter and enhances customer experience by offering clarity and simplicity in shipping choices.
Cheapest Date without Calendar
Showing the cheapest shipping rates by date without using a calendar cuts down on overwhelming options at checkout. Here's how to activate this feature:
- Go to the Advanced Features section in your account and enable the Delivery Date & Time feature.
- Log in to your ShipperHQ account and select Carriers from the left menu.

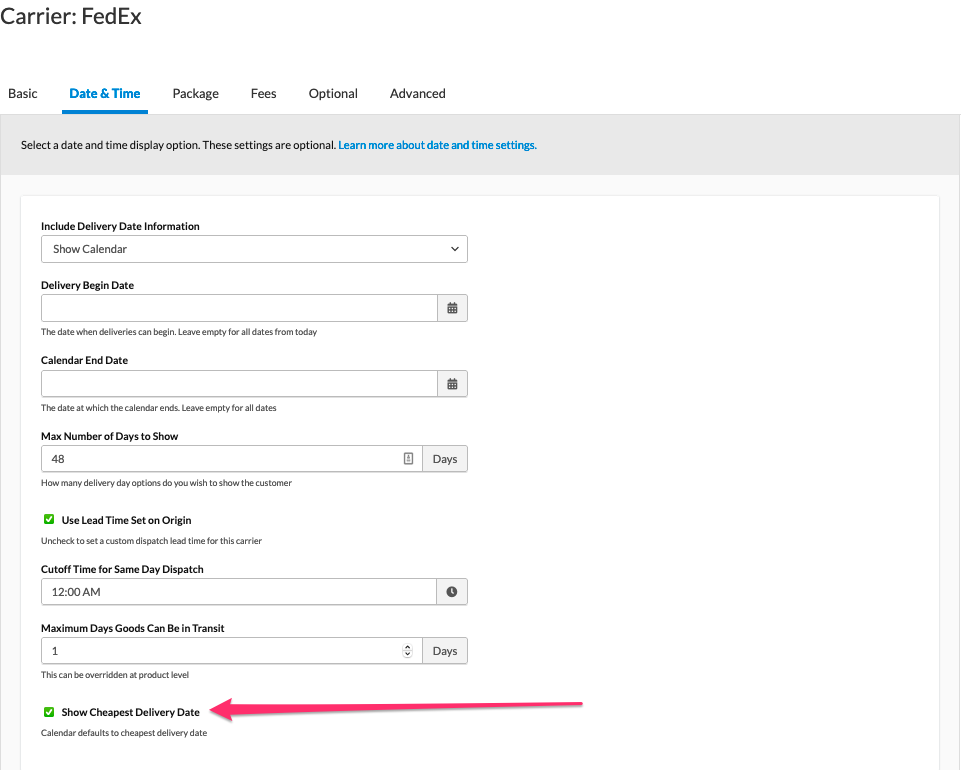
- Choose the carrier(s) for which you want to apply this feature (e.g., UPS). Navigate to the Delivery Date & Time tab and select Show Cheapest Date while keeping Show Delivery Date active.
Once saved, ShipperHQ will display only the lowest cost shipping options at checkout.
Cheapest Date with Calendar
For those using the Calendar Display Option for delivery dates, there are two ways to highlight the cheapest date.
Default to Cheapest Delivery Date
- Log in to ShipperHQ and click Carriers from the menu.
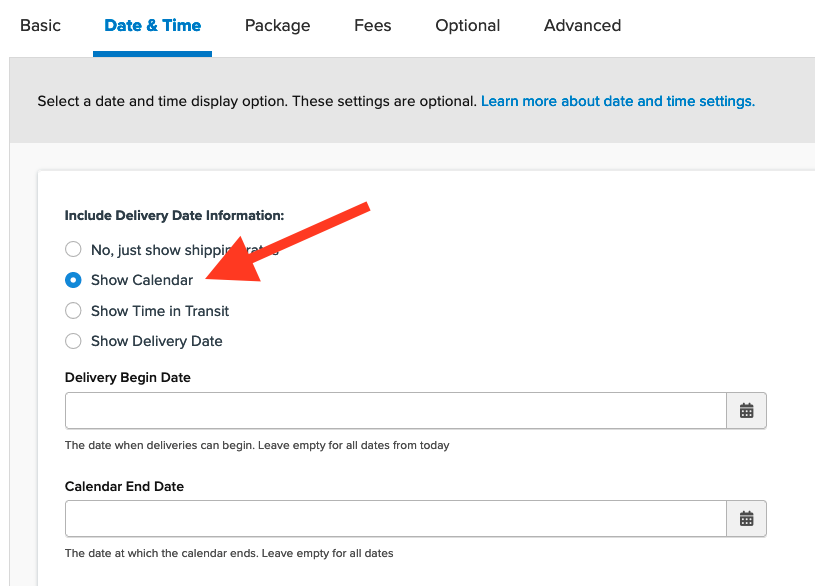
- Pick the desired carrier, navigate to Delivery Date & Time, and toggle Include Delivery Date Information to Show in Calendar.
- Scroll to and enable Default to Cheapest Delivery Date.
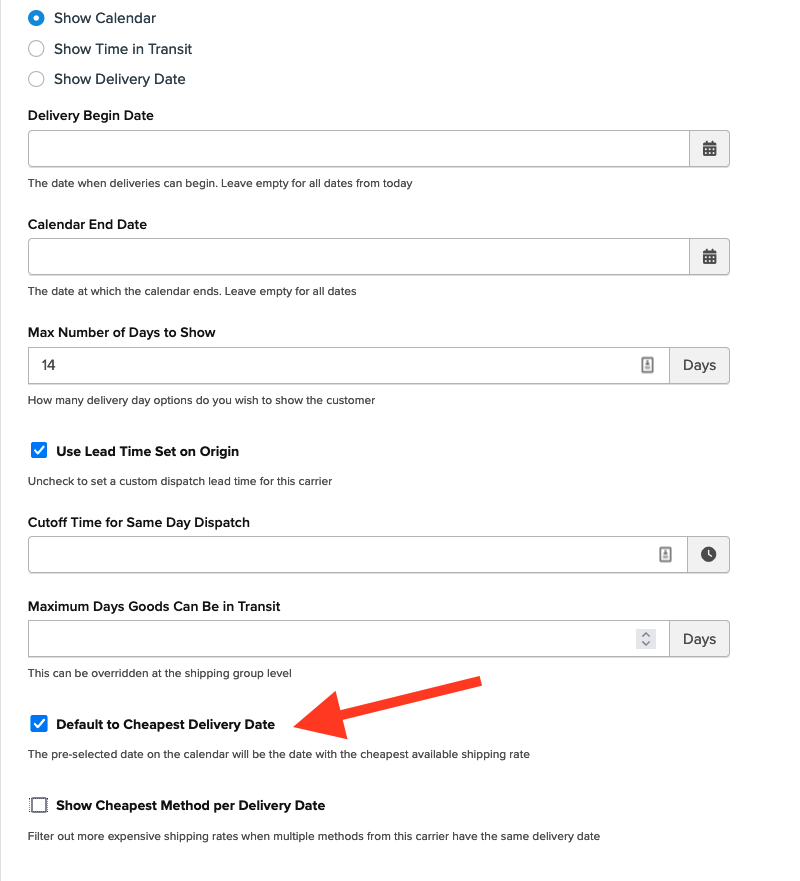
This setting auto-selects the date with the least expensive shipping rate, considering transit times and blackout dates.
Cheapest Date with Delivery Date or Time in Transit
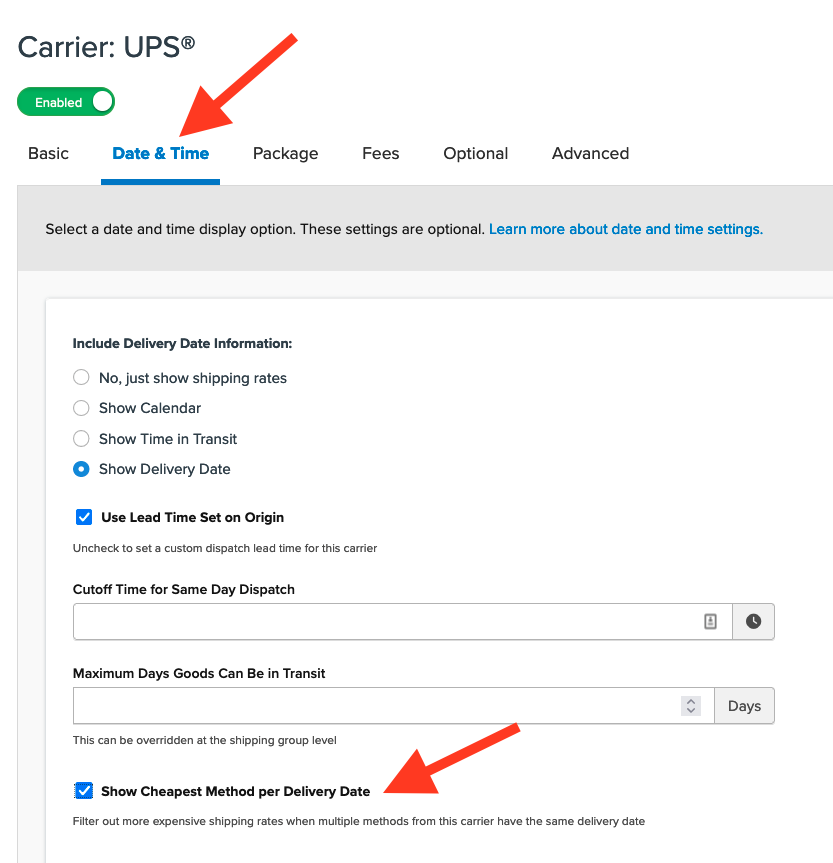
Another method is checking Show Cheapest Option per Delivery Date, which only shows the lowest-cost method per day based on the customer's selection.
Example