
Table of Contents
- Overview
- Key Features
- Configuration
- Where Should I Log To?
- What level of logging do I need?
- Reviewing Product Data
- Locating Transaction IDs
- Finding the Transaction ID from within the Order Details
- Finding the Transaction ID within the ShipperHQ View logs
- ShipperHQ Methods into Magento
Overview
The ShipperHQ Magento 2 extension comes with a comprehensive ShipperHQ Logger. This tool allows you to review the extension's processes and, if needed, provide logs when reaching out to support. This guide will help you enable the ShipperHQ Logger and find Transaction IDs to streamline troubleshooting. 😊
Key Features
The logger offers the following capabilities:
- Dedicated log panel within admin
- Configurable logging level to show more or fewer logs
- Option to log to the admin panel, file system, or via email
Additional functionality includes:
- Asynchronous operation to minimize performance impact
- Ability to switch off in production to avoid affecting performance
- Periodic Cron job for clearing out WebShopApps extension-related logs from the database
Configuration
Configure the Logger under Stores -> Configuration -> Advanced -> ShipperHQ Logger. Enable it by setting Enabled to 'Yes'.
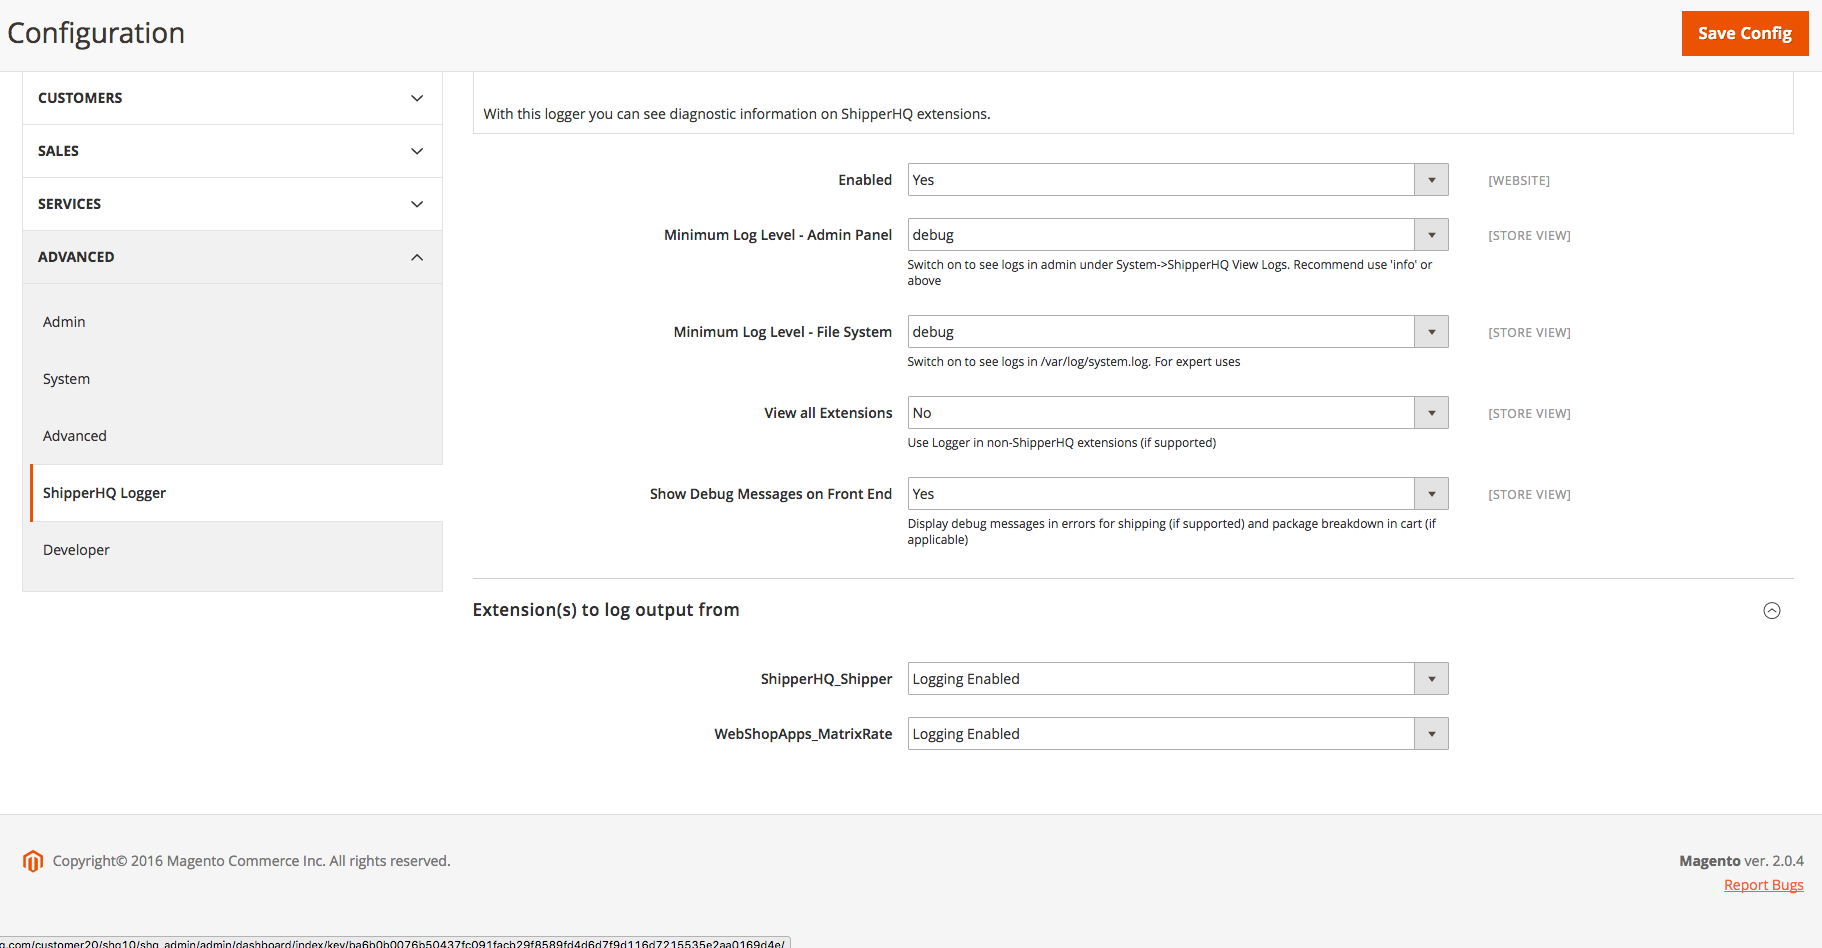
Before configuring logging, consider your needs:
- Do you want to log to the admin panel, system log, or email?
- What level of logging is needed?
Ensure you exercise the ShipperHQ extension code on the frontend to generate logs, such as getting a shipping quote in the cart or checkout.
Where Should I Log To?
In the configuration, choose where to output logs:
A. via Admin Panel
Logging to the admin panel typically suffices for most users. View logs under System -> ShipperHQ View Log. Ensure you're configured correctly if logs are not visible. 💡 Refresh the page and confirm Debug is set to Yes in the shipping method configuration.
B. via File System
Output directly to the file system under /var/log/system.log. Ensure developer logging is enabled. Recommended for advanced users.
What level of logging do I need?
Choose from four logging levels:
- Critical: For testing, displays critical issues (e.g., unable to process data)
- Warning: Highlights issues during testing (e.g., a rate cannot be found for a zipcode)
- Info: Provides high-level informational messages
- Debug: In-depth technical information (primarily for expert users and WebShopApps)
For production, switch off all logging to enhance performance.
Reviewing Product Data
When enabled, each rating request generates a log detailing the cart sent to ShipperHQ.
- Request a shipping rate for the cart under investigation.
- Navigate to System > ShipperHQ View Logs.
- Open the entry titled "Rate Request and Result."
Key details within the "Message" show the full cart details, including product attributes. Refer to the Attributes Not Included in Request article if attributes are missing.
Locating Transaction IDs
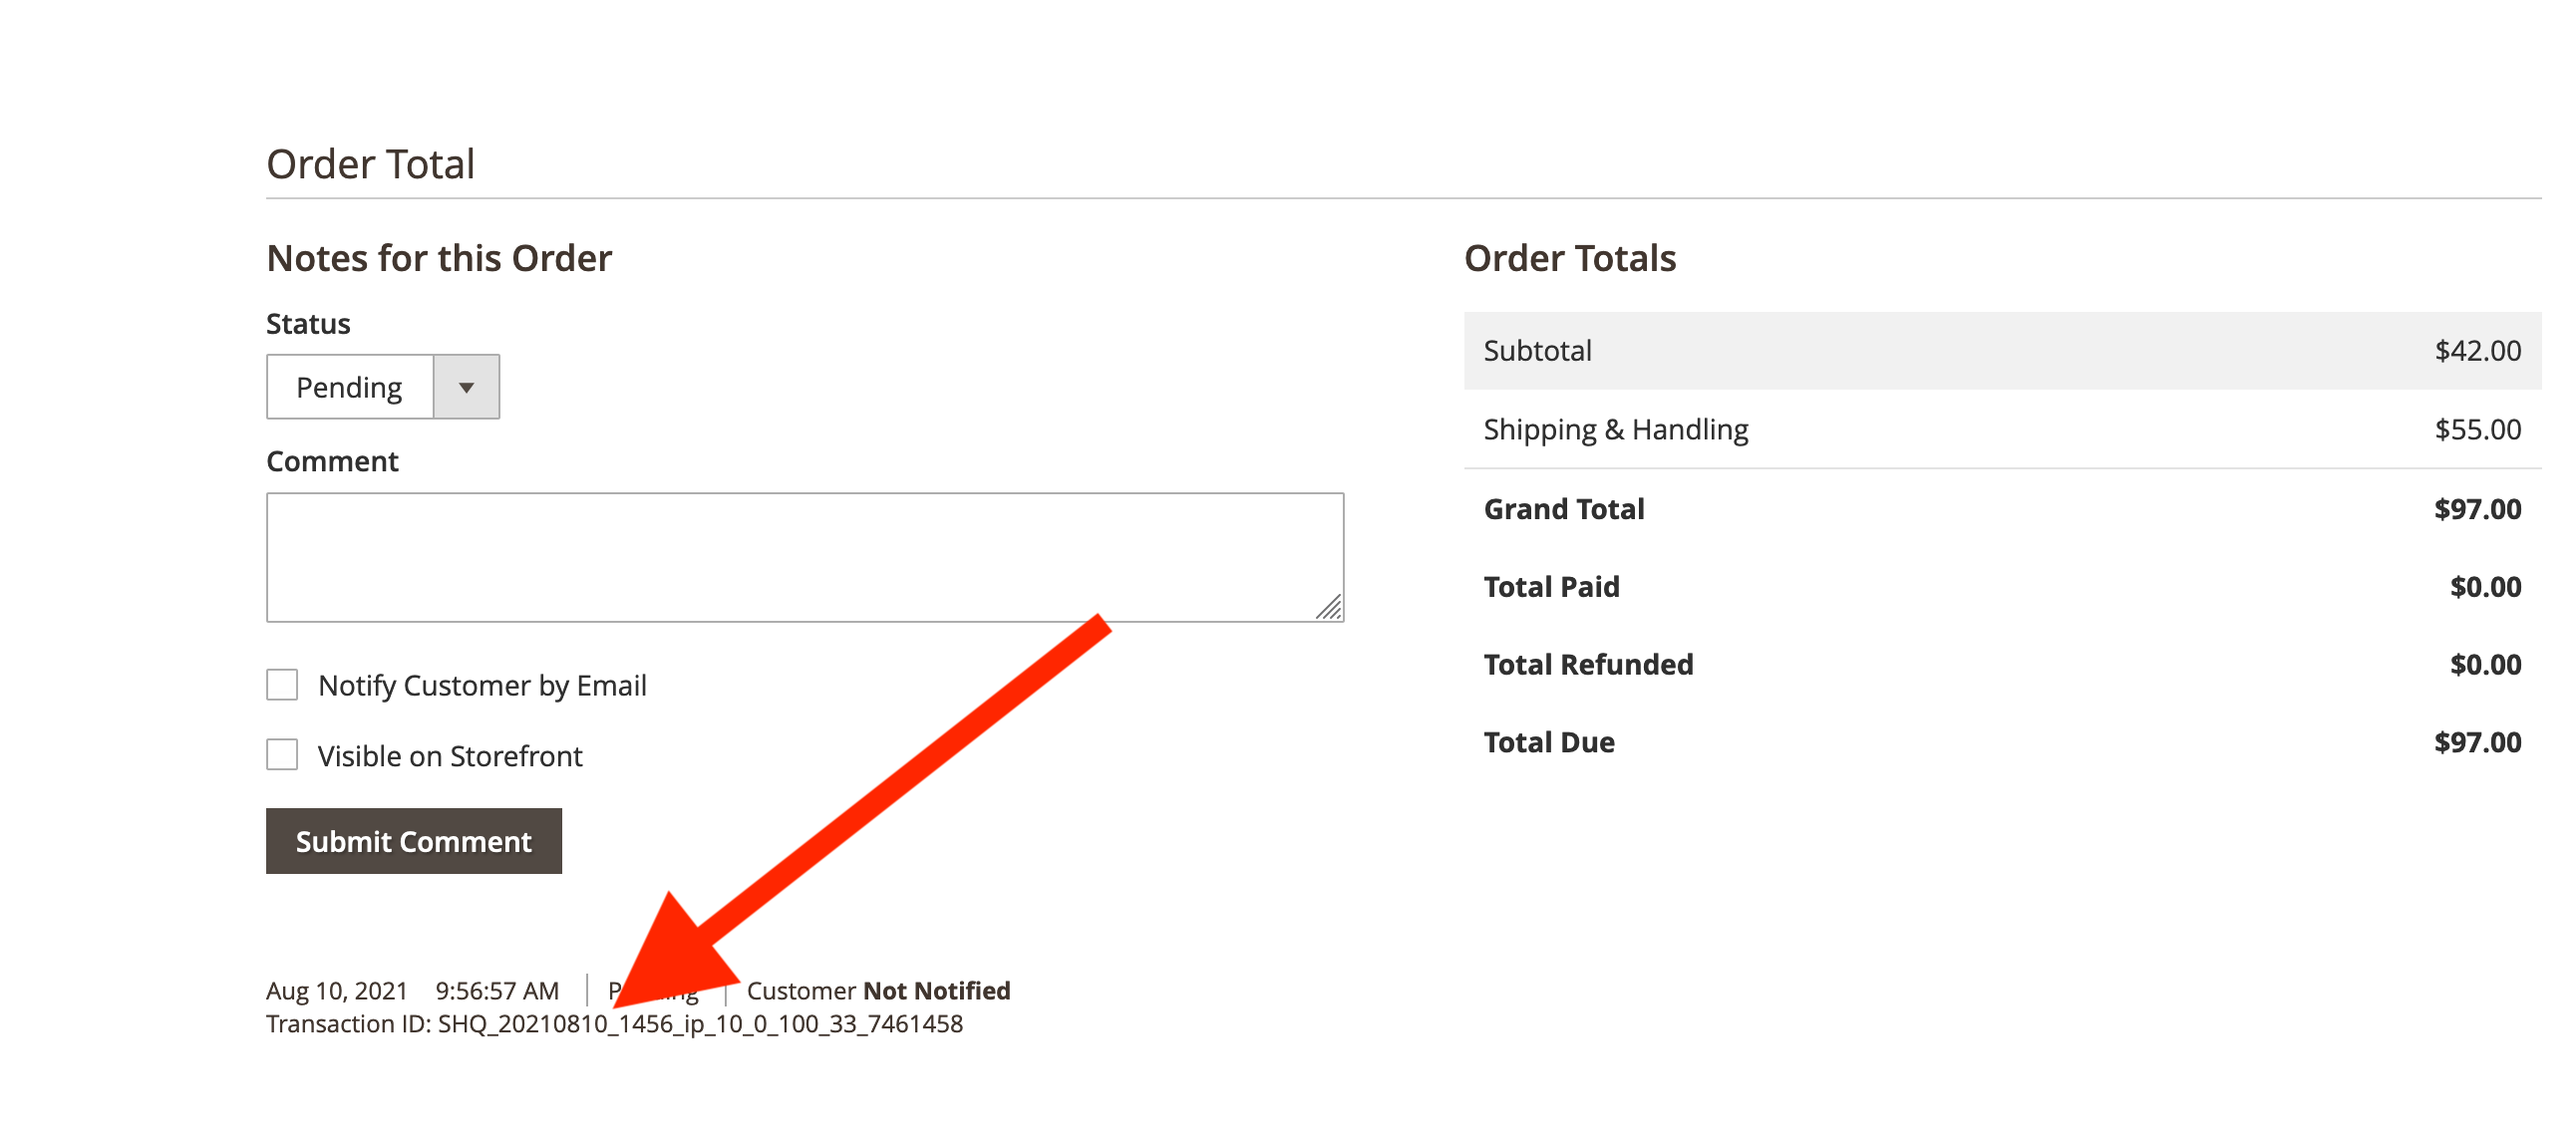
Providing the Transaction ID helps support address issues faster. In Magento 2, find the Transaction ID within the order details or via the ShipperHQ Logger.
Finding the Transaction ID from within the Order Details
- Go to Sales > Orders in your Magento Dashboard.
- Select the order.
- Locate the Transaction ID under the order comments (prefixed with "SHQ_").
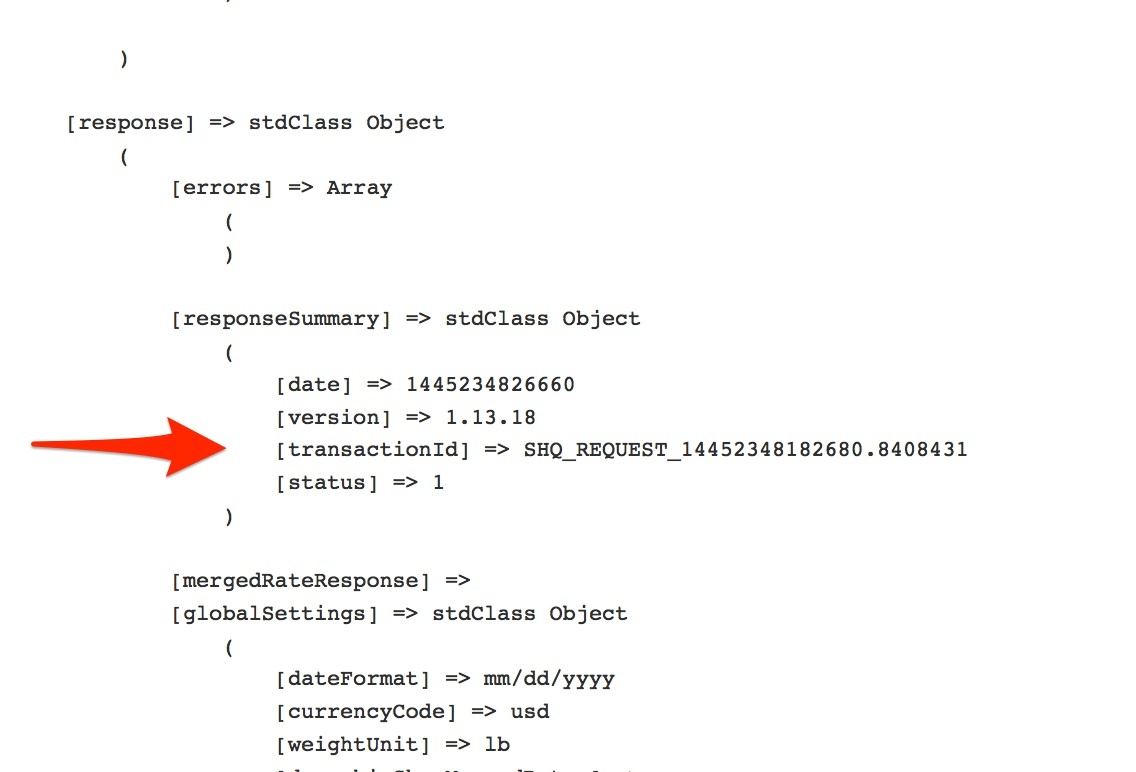
Finding the Transaction ID within the ShipperHQ View logs
- Perform the request or test.
- Go to System > ShipperHQ View Logs.
- Open the "Rate Request and Result" entry.
- Use
cmd-forctrl-fto find the Transaction ID.
Copy this ID with a problem description to support for diagnosis. Remember to disable the logger when not in use.
ShipperHQ Methods into Magento
You can view carrier codes and associated methods in the logger via System > ShipperHQ View Logger > "Allowed Methods." These details require storage synchronization.

Please remember to turn off the logger. Running it continuously may slow down shipping rates.